Tag Archive for: cake

Image Brides Alchemy Editorial Shoot

Having always been a fan of the chic Irish fashion and lifestyle magazine, Image, it is no surprise that it’s sister magazine, Image Brides, has become my go-to read for following trends and finding inspiration in the wedding industry. It was hence a delight to have been invited to design a cake for an editorial in their current Winter/Spring edition.

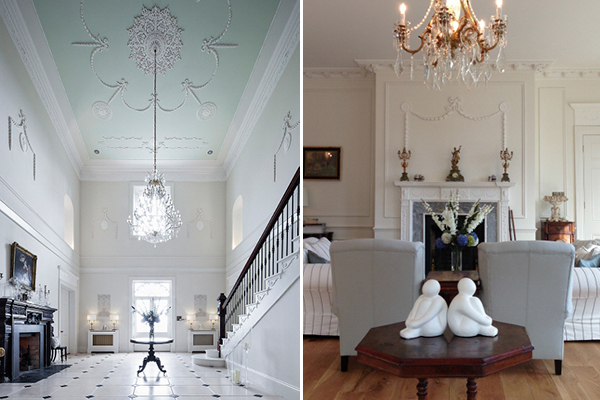
The shoot took place at one of Ireland’s most exclusive wedding venues, Clonwilliam House, a gorgeous country house set amongst wooded hills in the Vale of Avoca in Co. Wicklow. Meticulously renovated and decorated, Clonwilliam exudes contemporary glamour in stunning period surroundings…I had serious house envy! (Image courtesy of One Fab Day).

clonwilliam-house-chandeliers

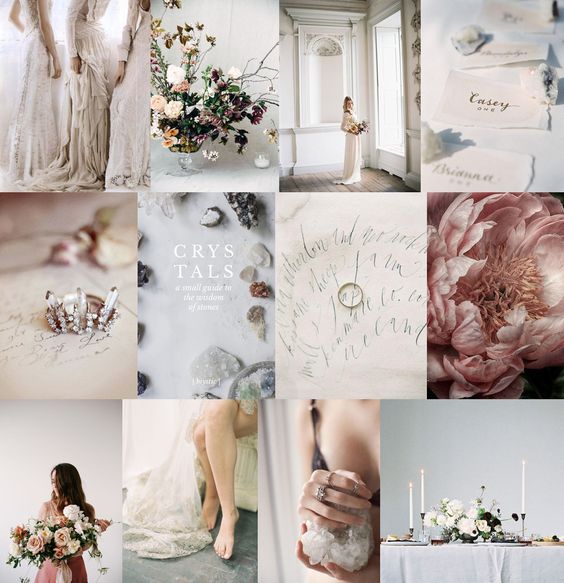
The theme of the shoot was ‘Alchemy’, with styling by Ciara O’Halloran of Style Serendipity, who specialises in beautiful wedding, interior and food styling.  Her brief and mood board were tantalising.  With inspiration taken from the earthy magic of crystal and mineral stones, the look was about capturing the simplicity and beauty of natural elements, with delicate jewellery , large blooming flowers and bohemian gowns in shades of ‘rose quartz, rich cream, shimmering gold and crystal grey’ creating an ‘effortlessly luxe’, romantic, mysterious and enchanting mood.

0ac22906258e1da26b6b78e2f53834d0

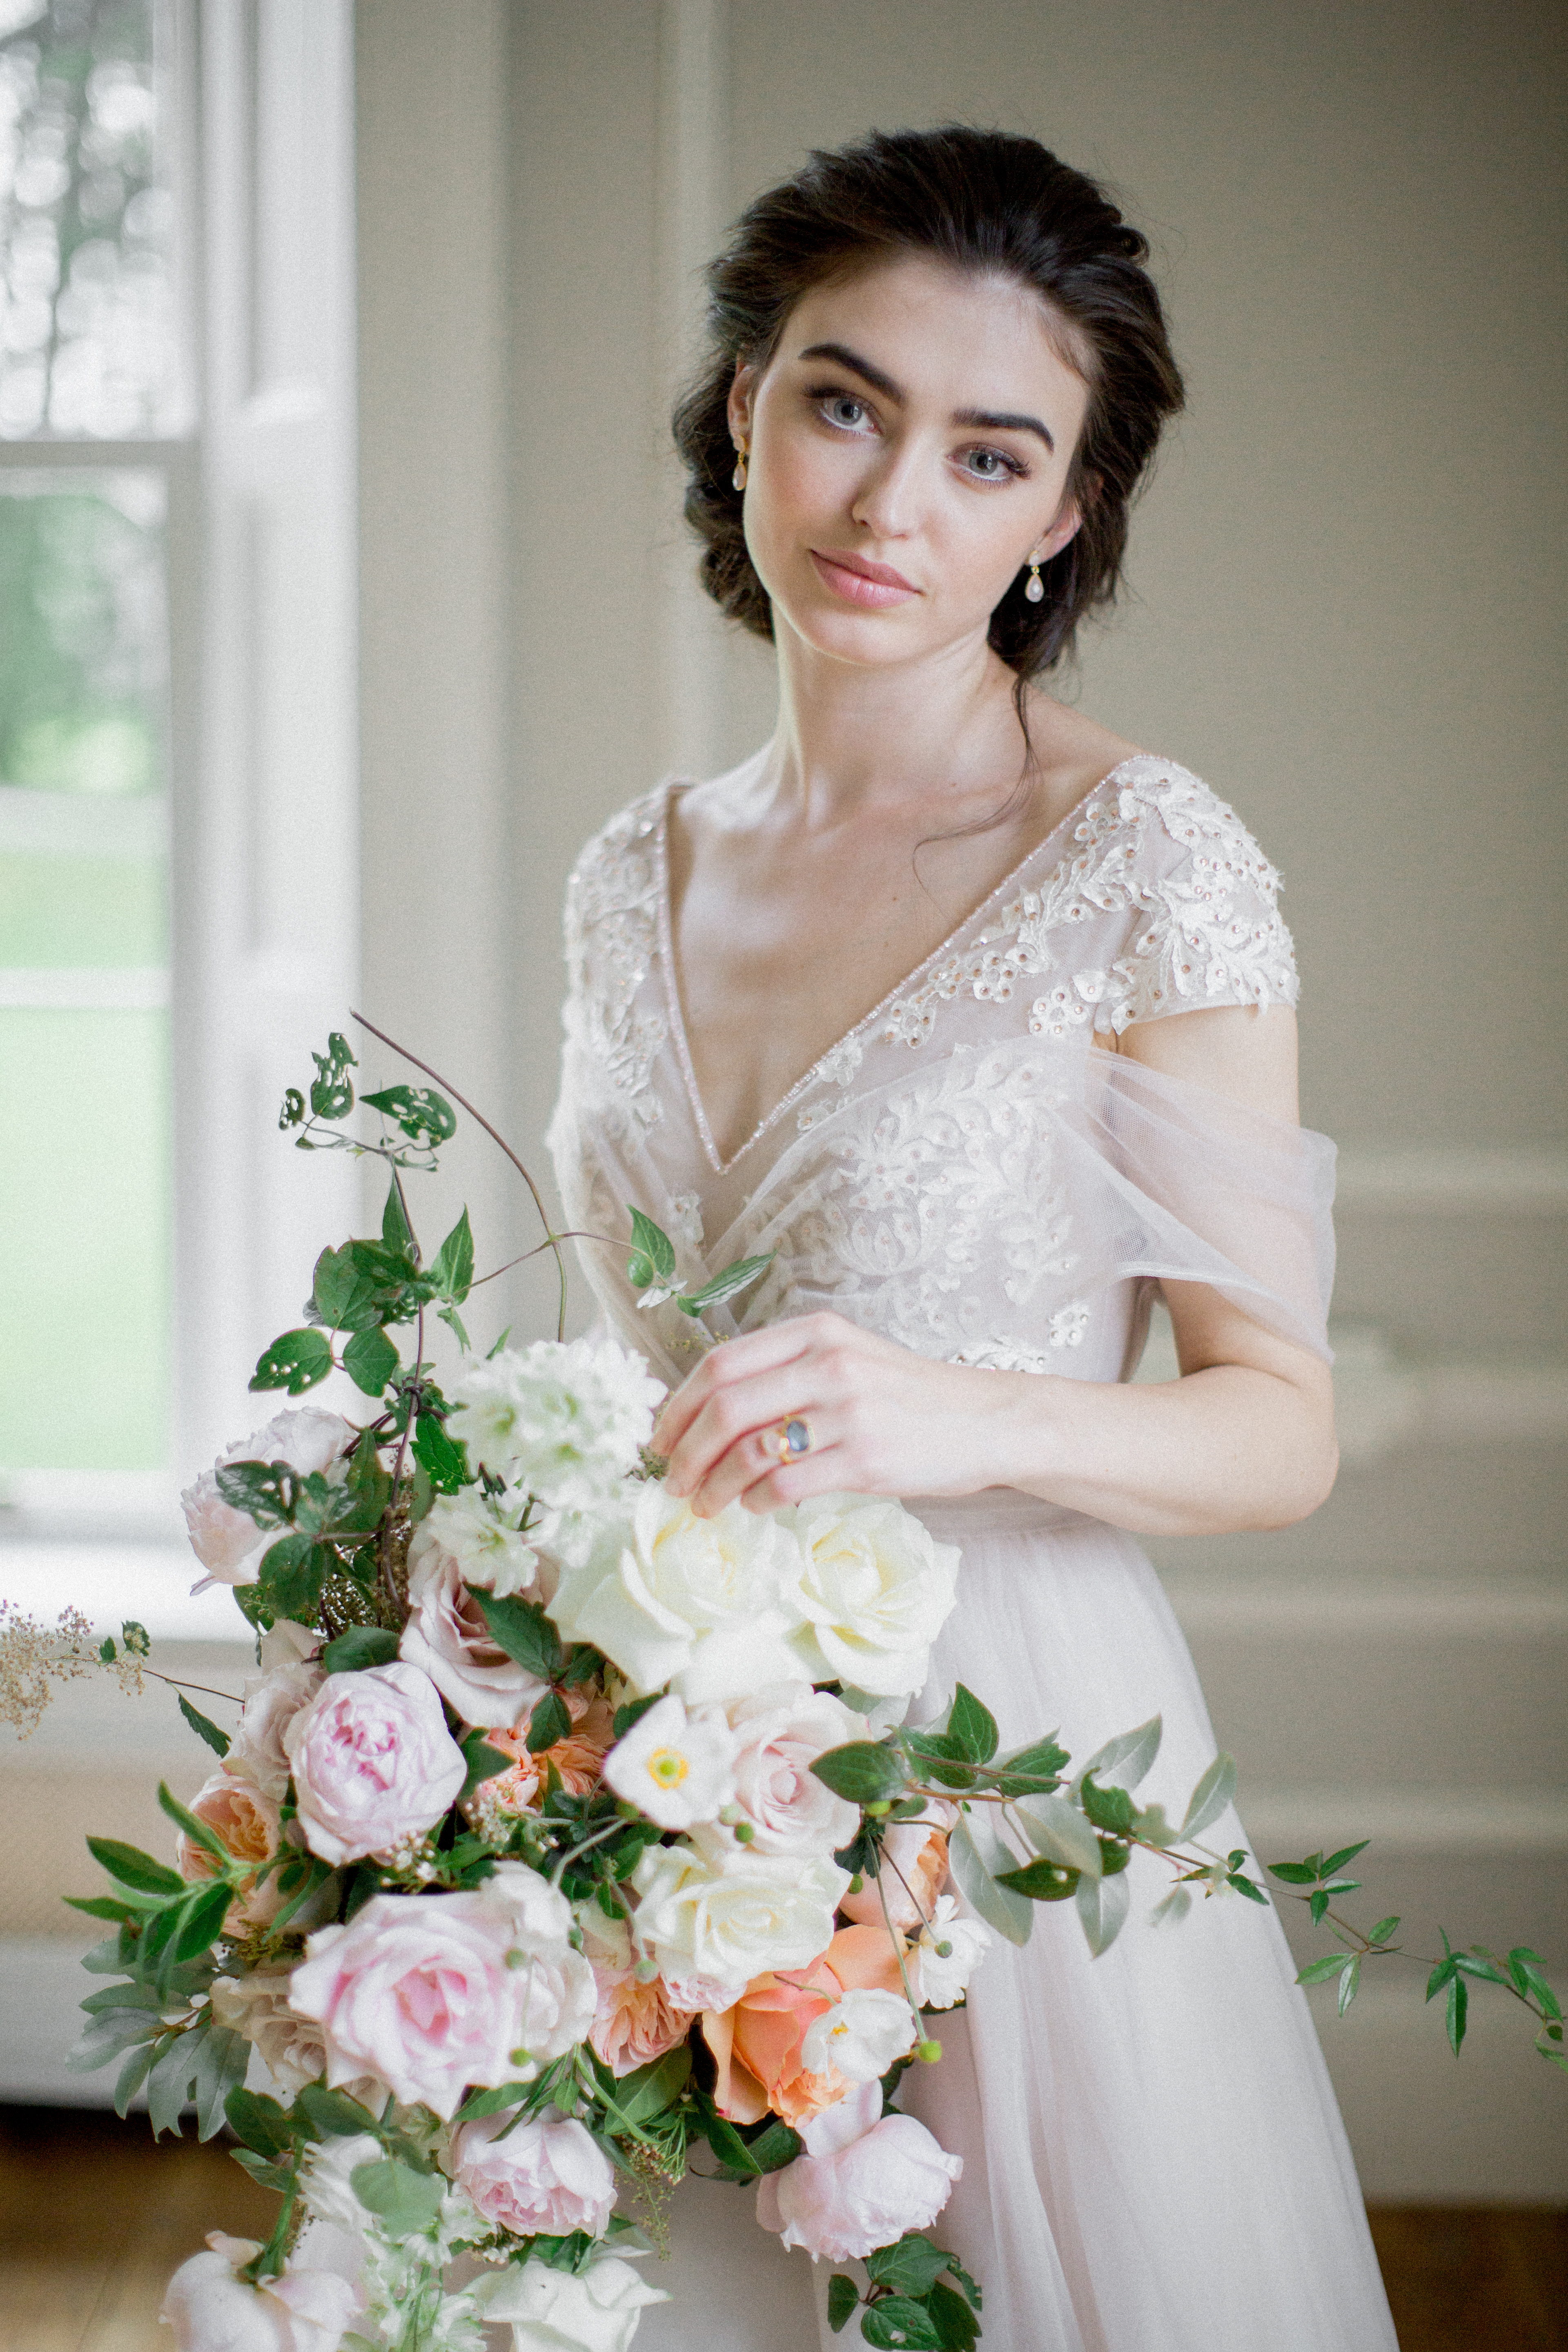
The photographer for the shoot was the talented Christina of Brosnan Photographic. Having admired her light, relaxed photography for some time I was thrilled to finally get the opportunity to work with her. It was a delight to watch Ciara and Christina at work throughout the morning and the final photos from the shoot were undoubtedly stunning!….

082

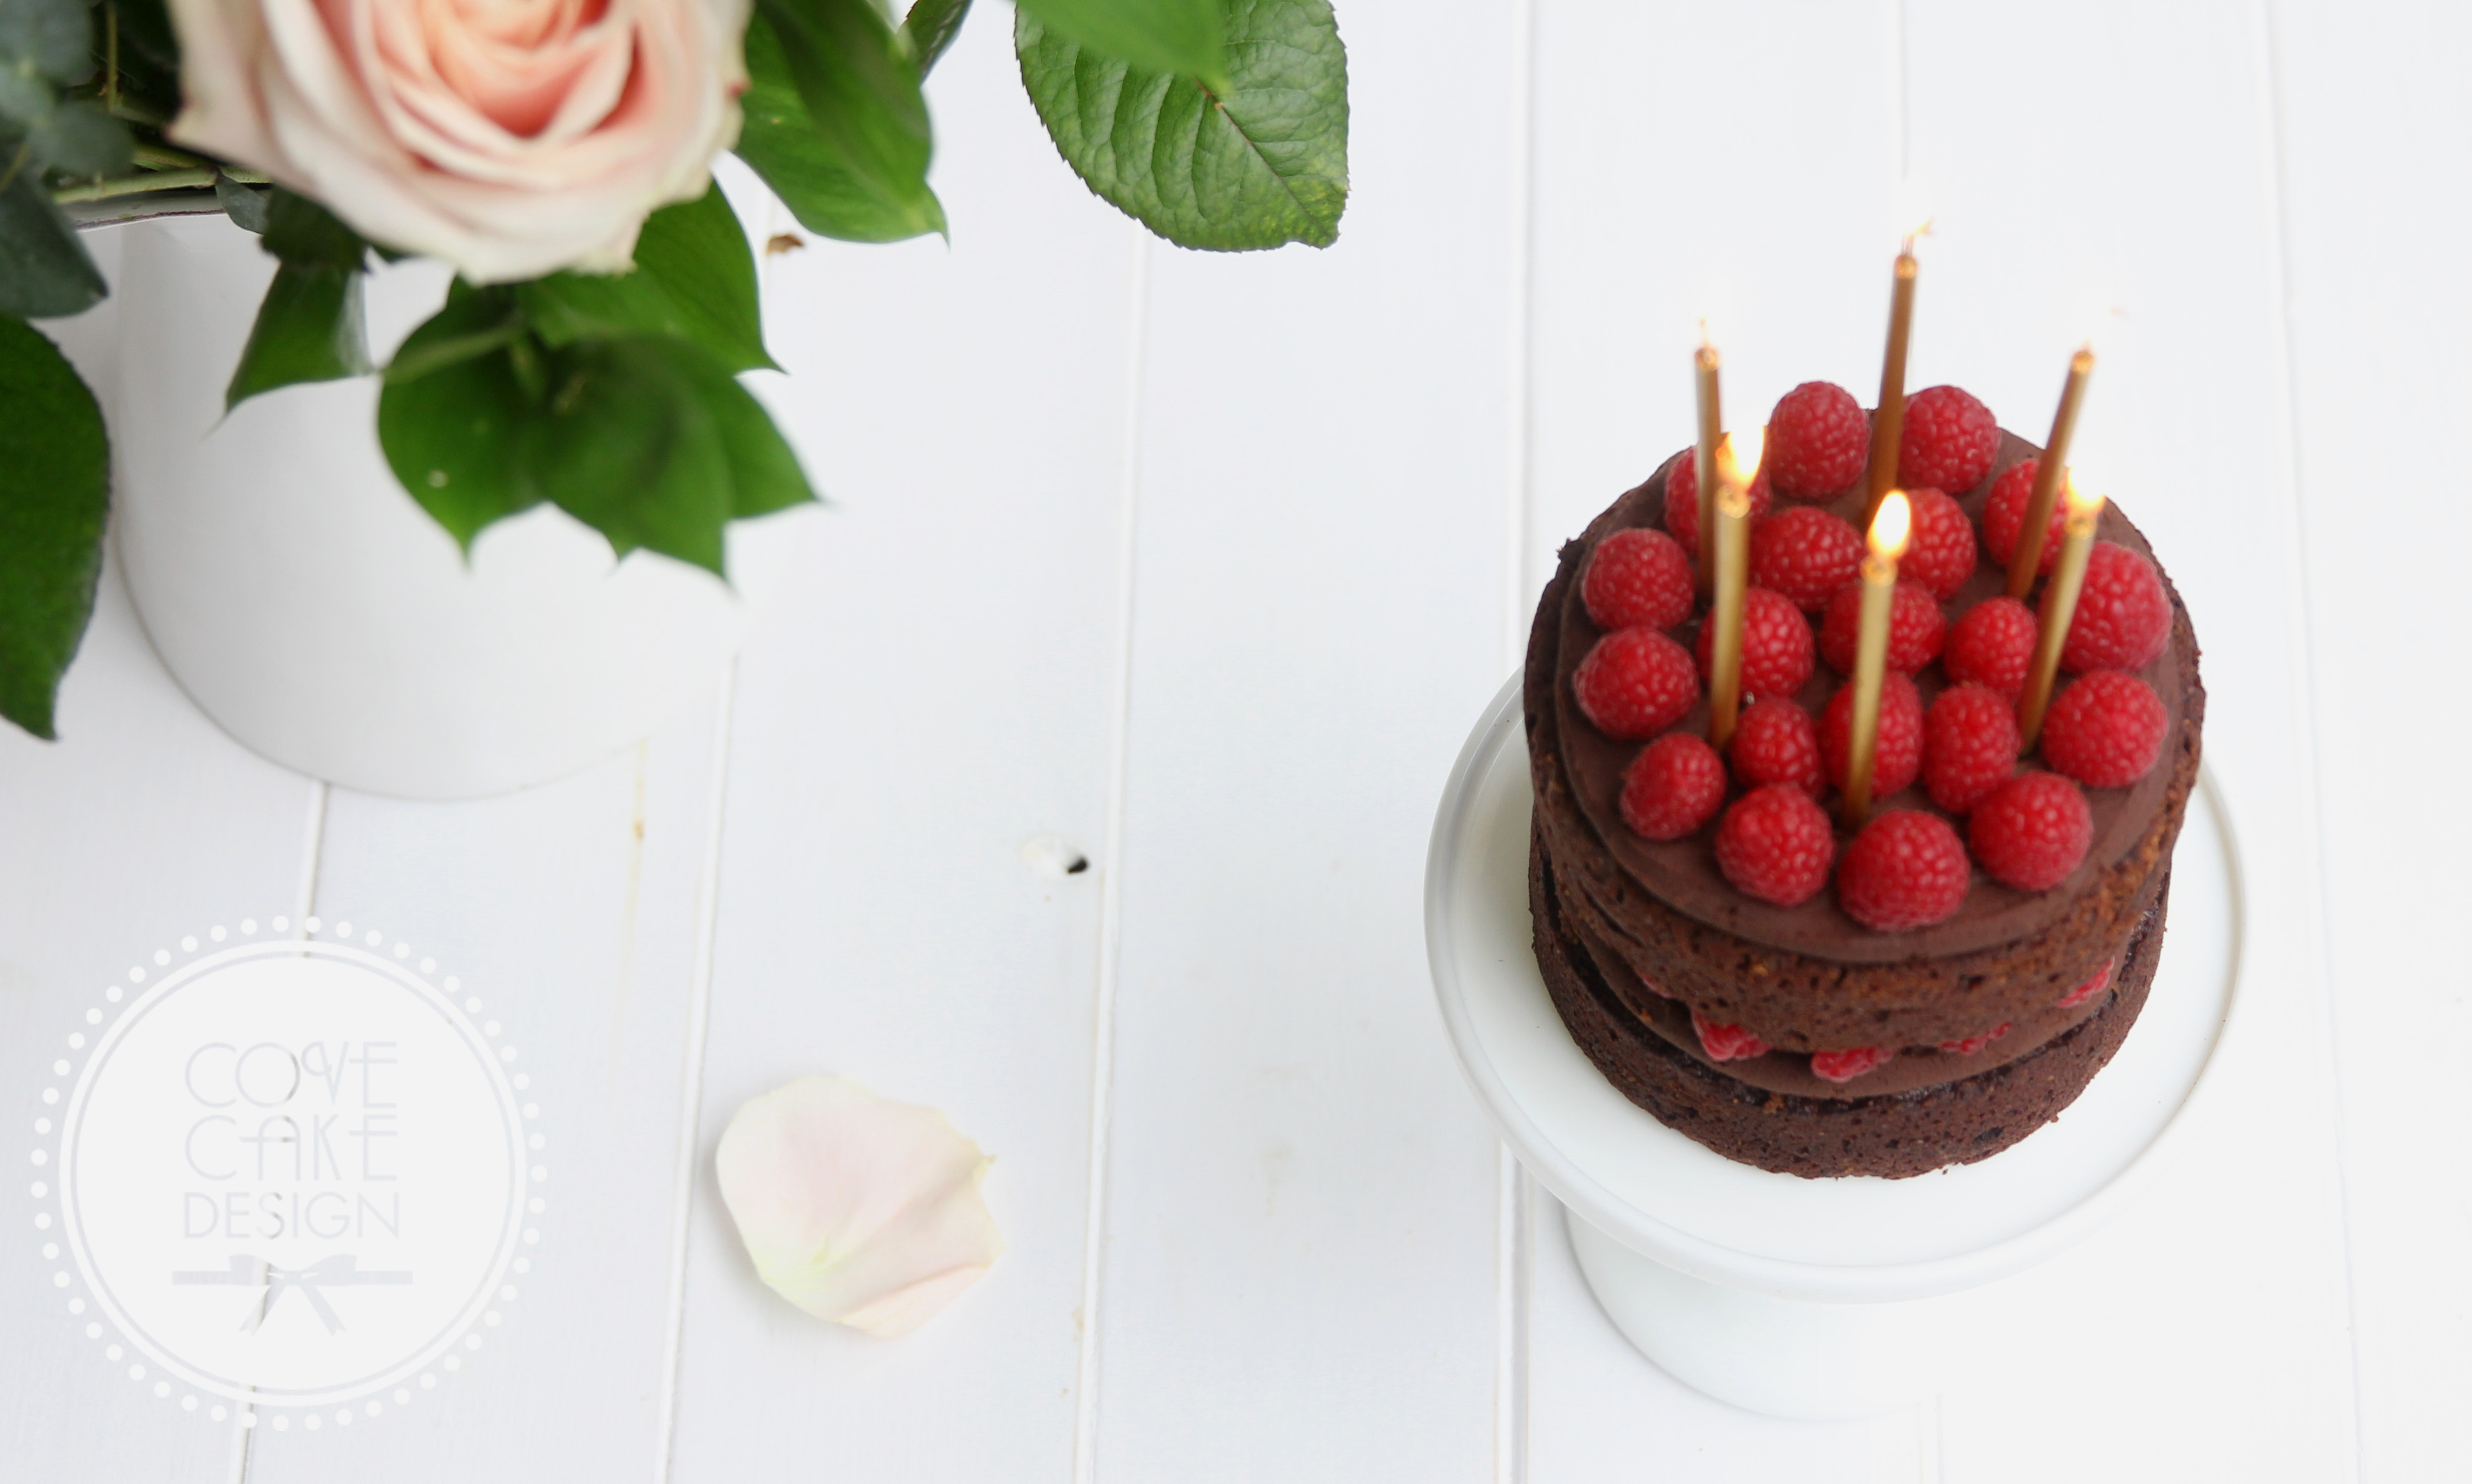
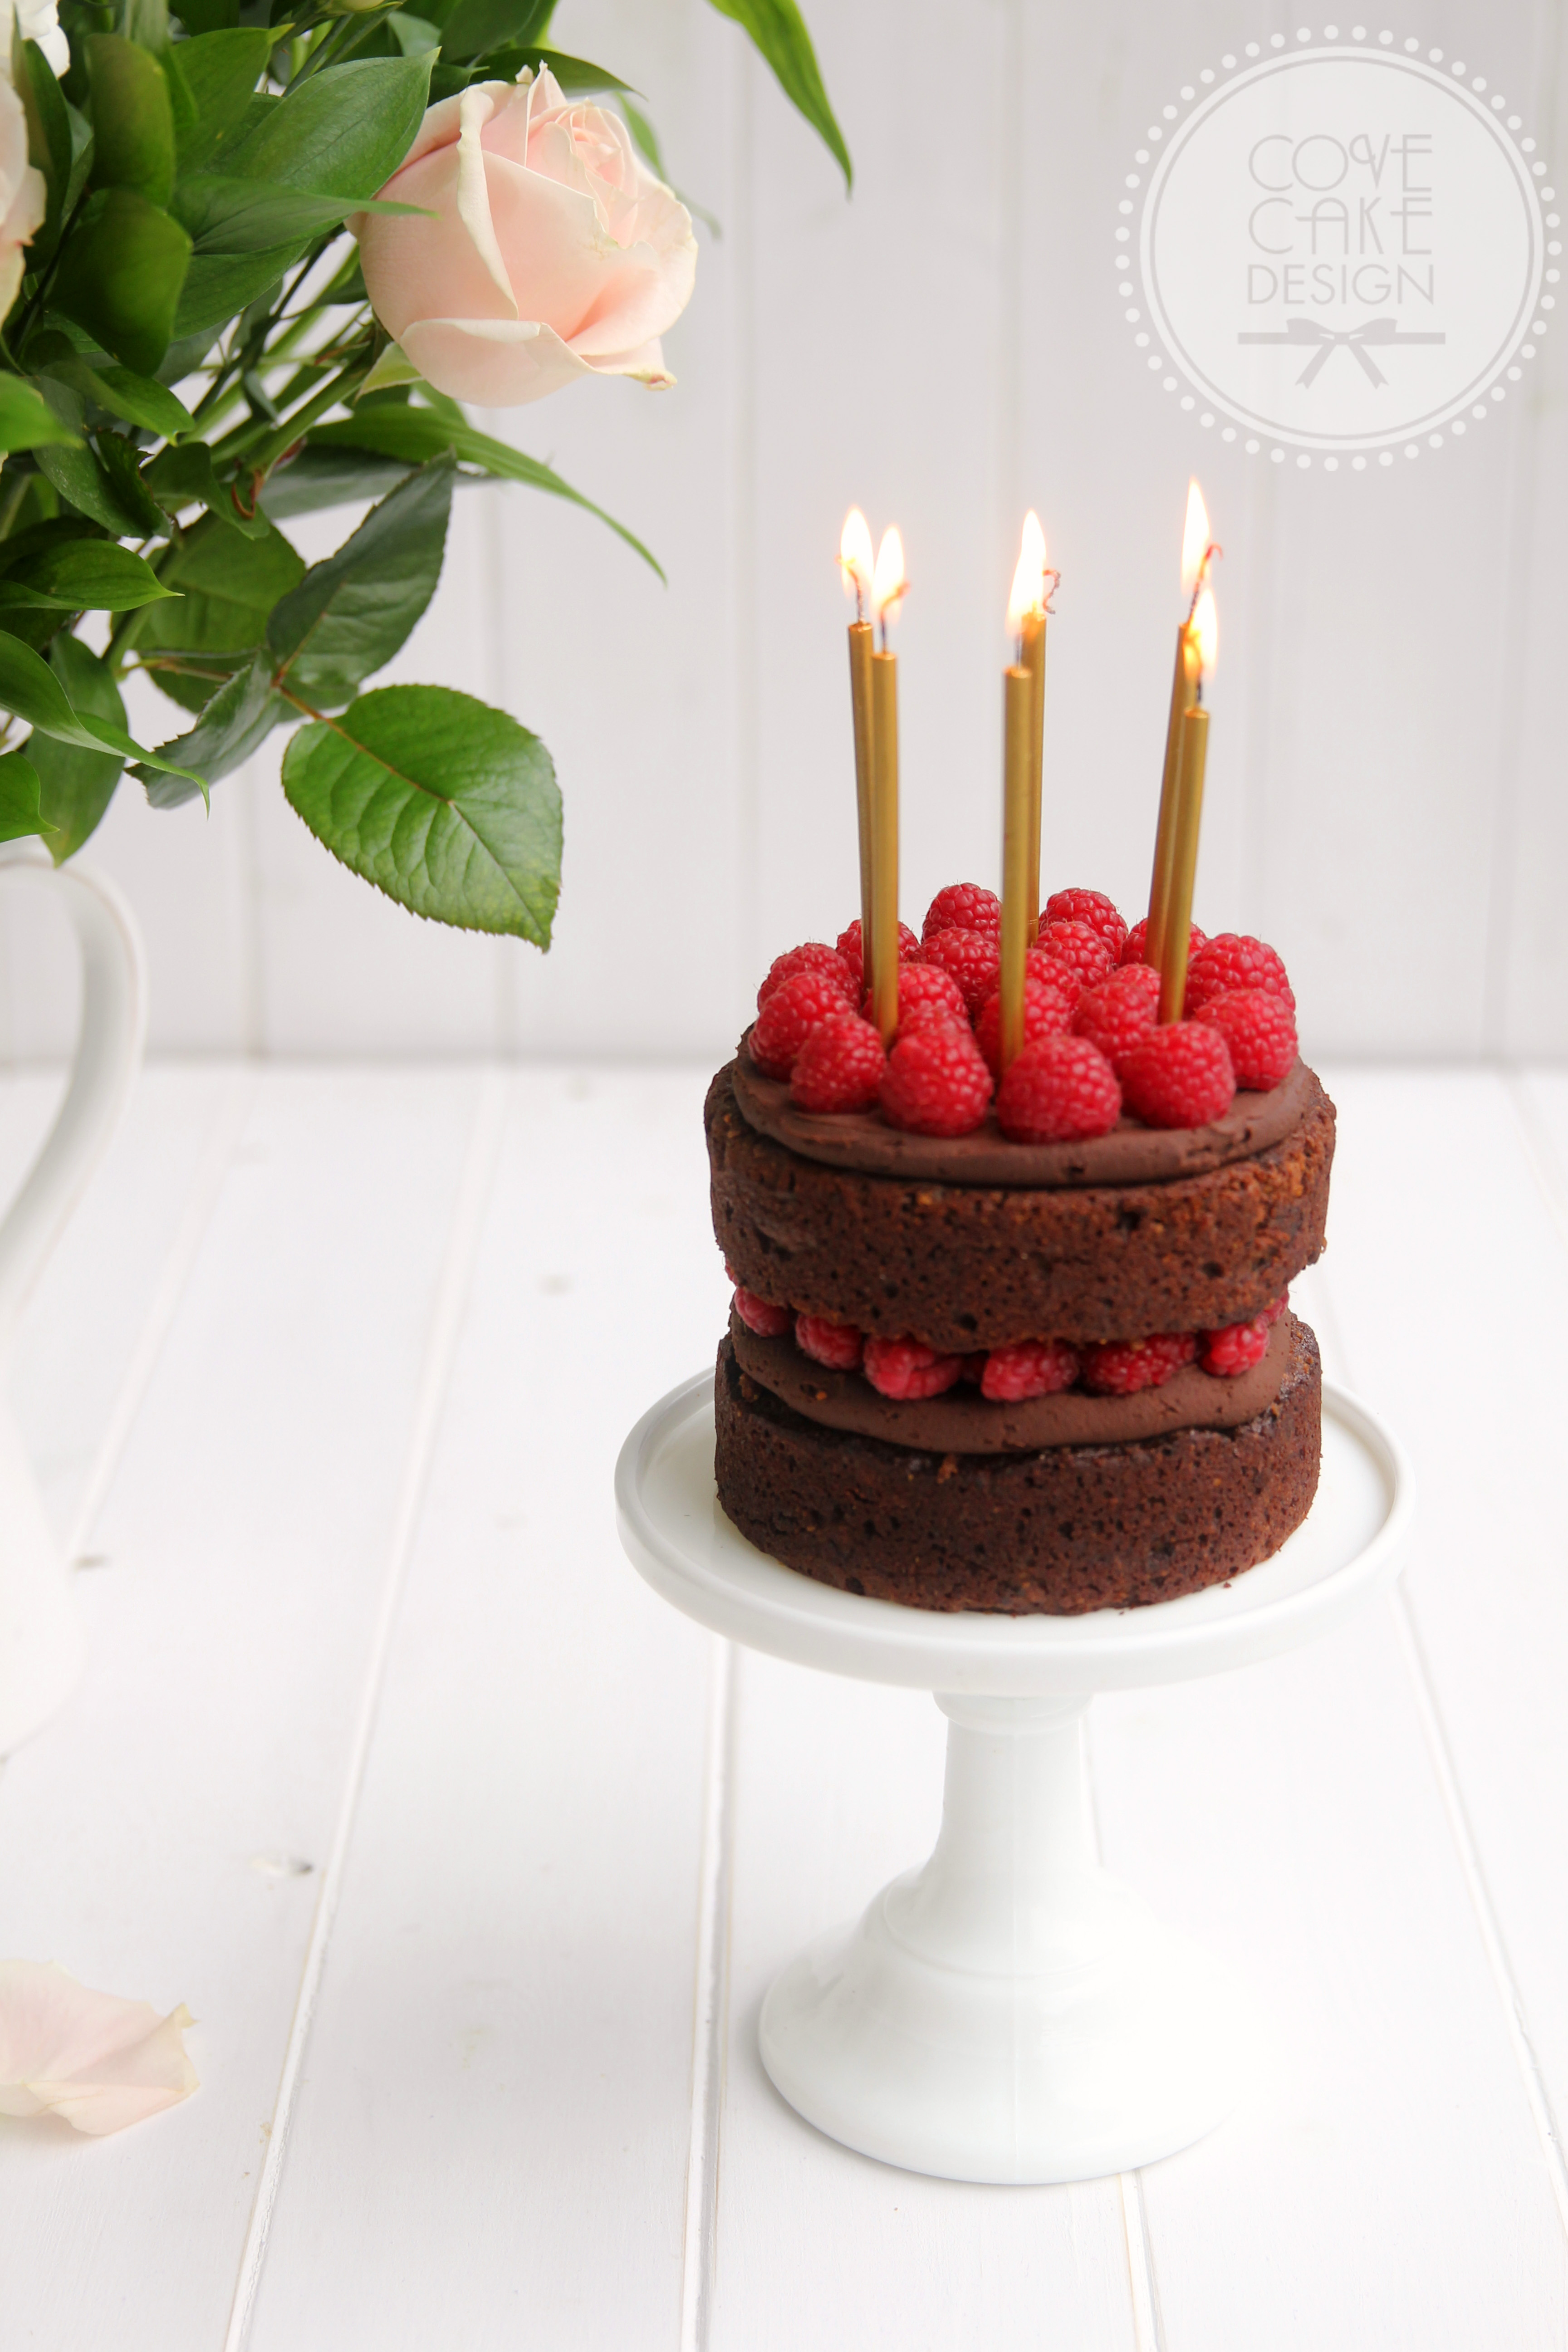
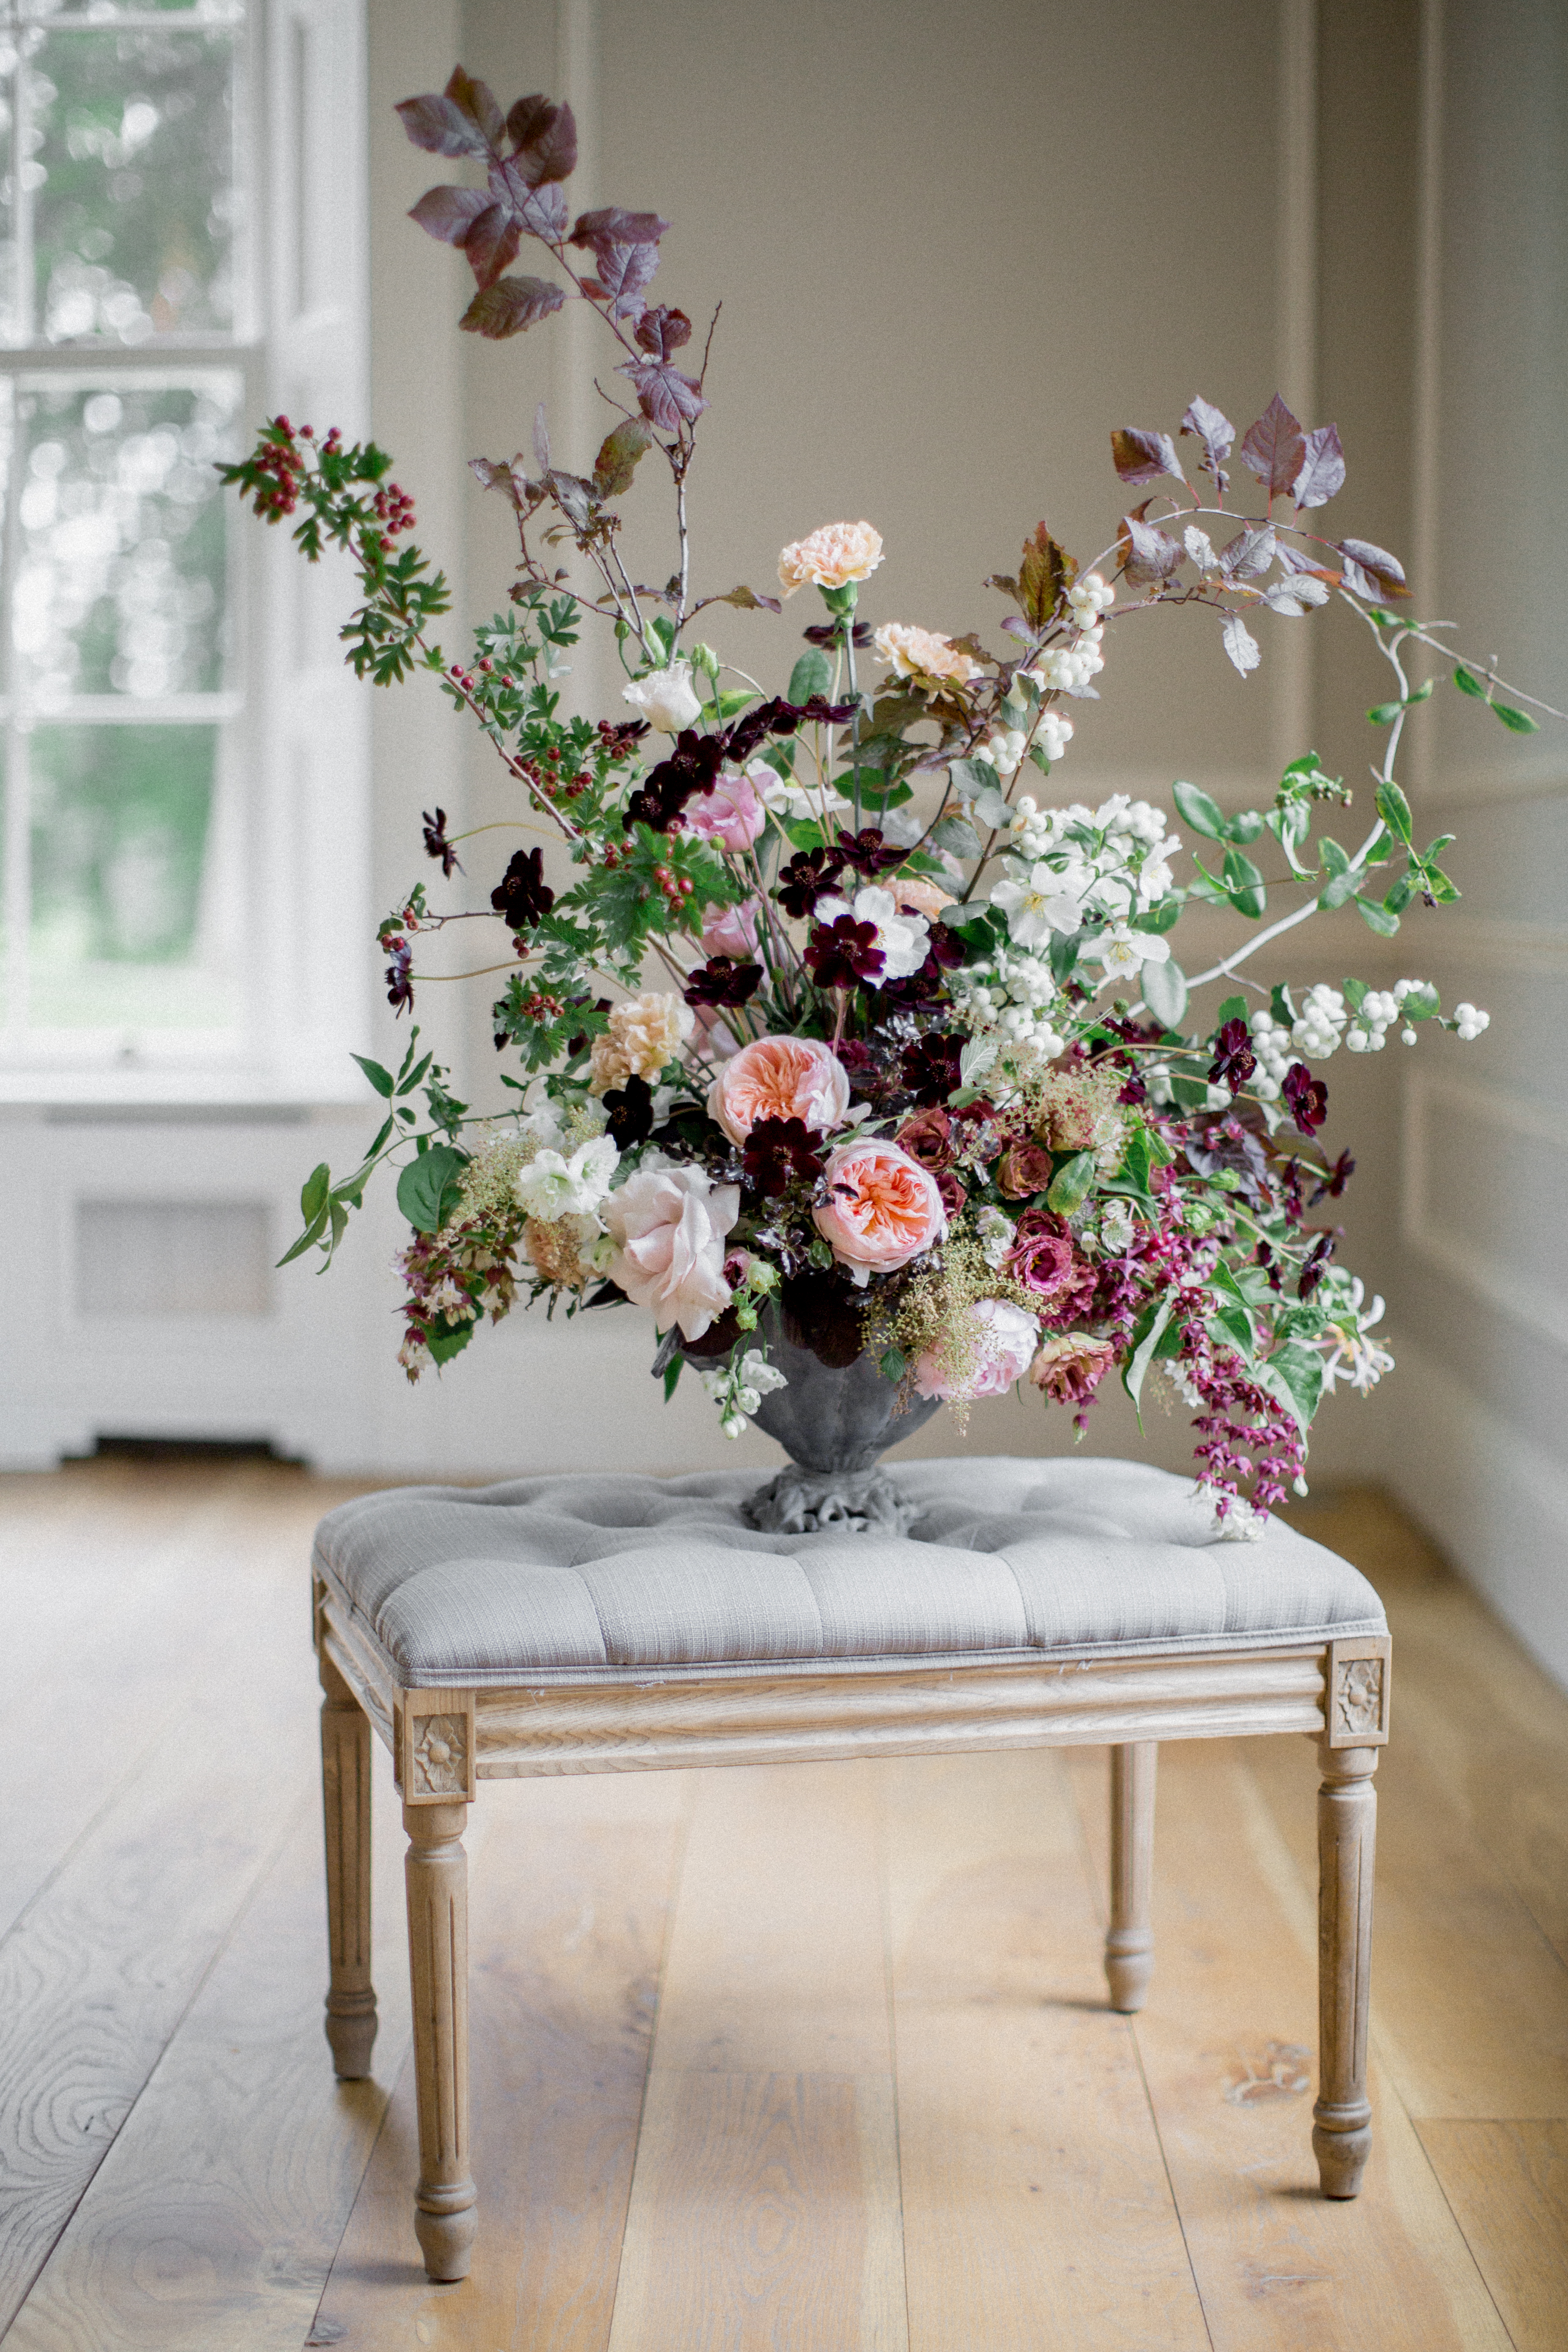
Love the colours and relaxed style of this flower arrangement by The French Touch!

037

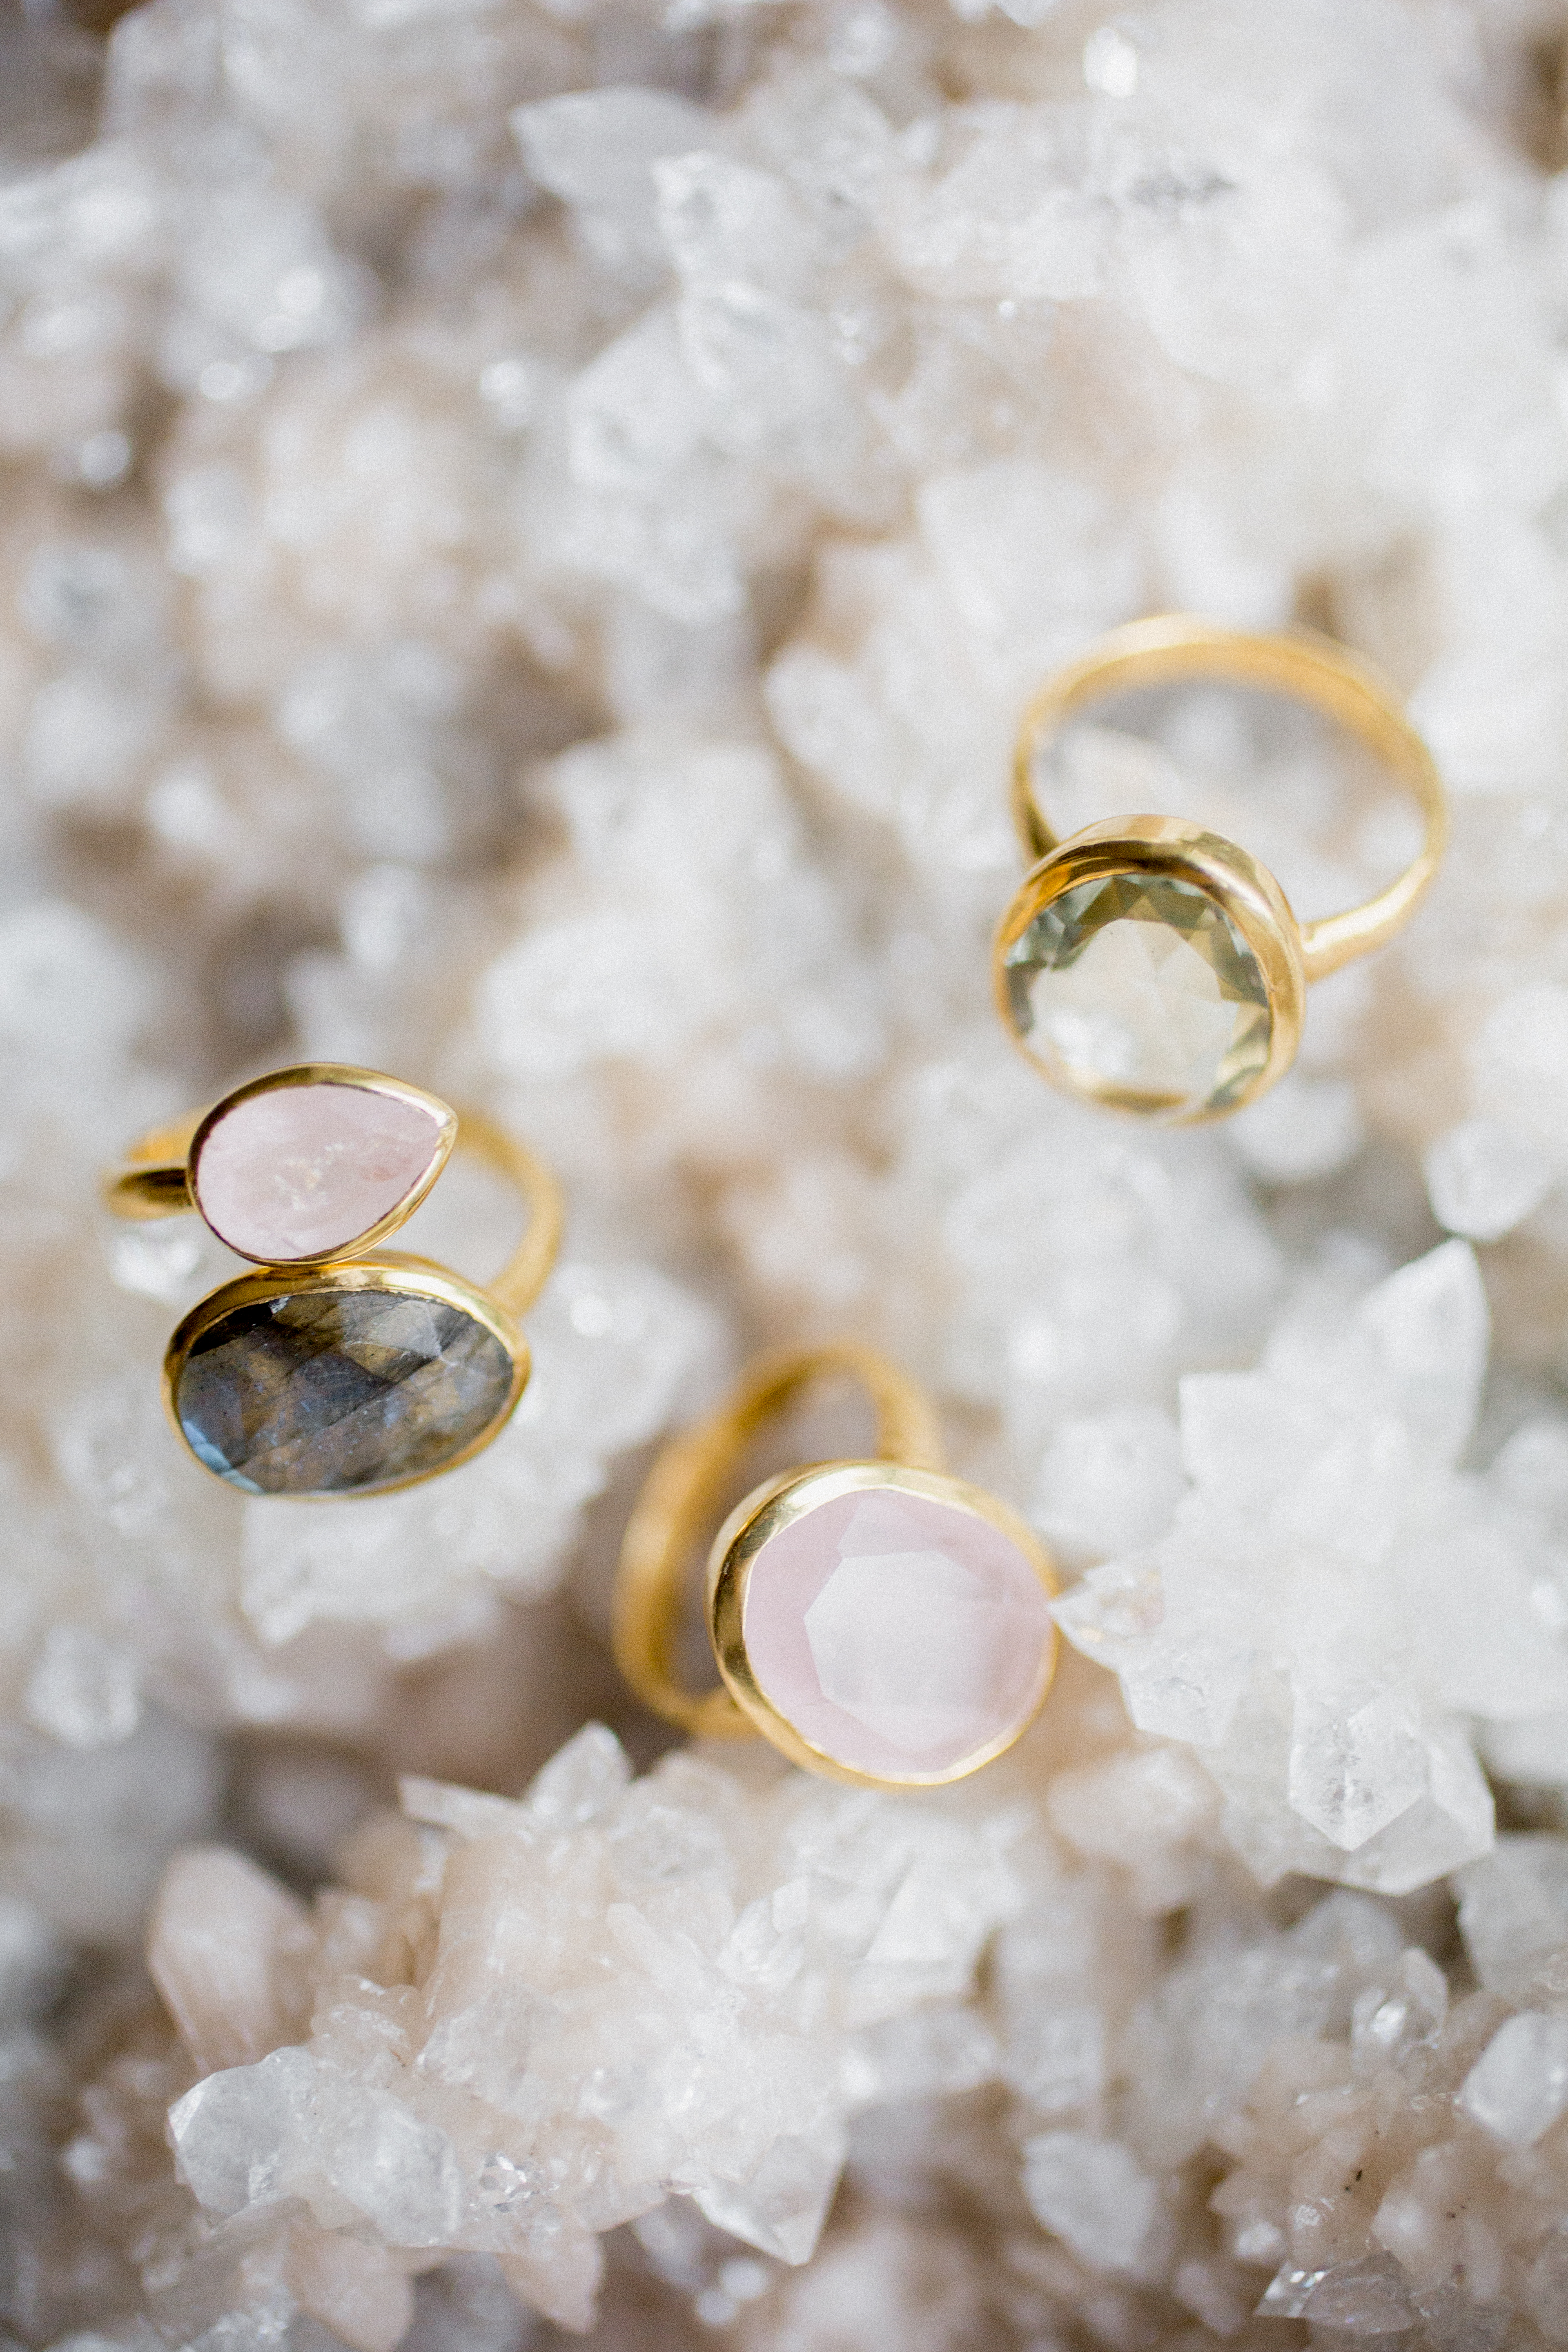
Beautiful amethyst rings by Juvi Designs

rings

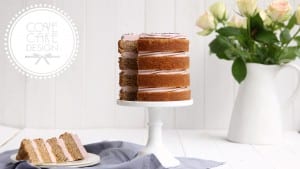
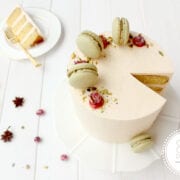
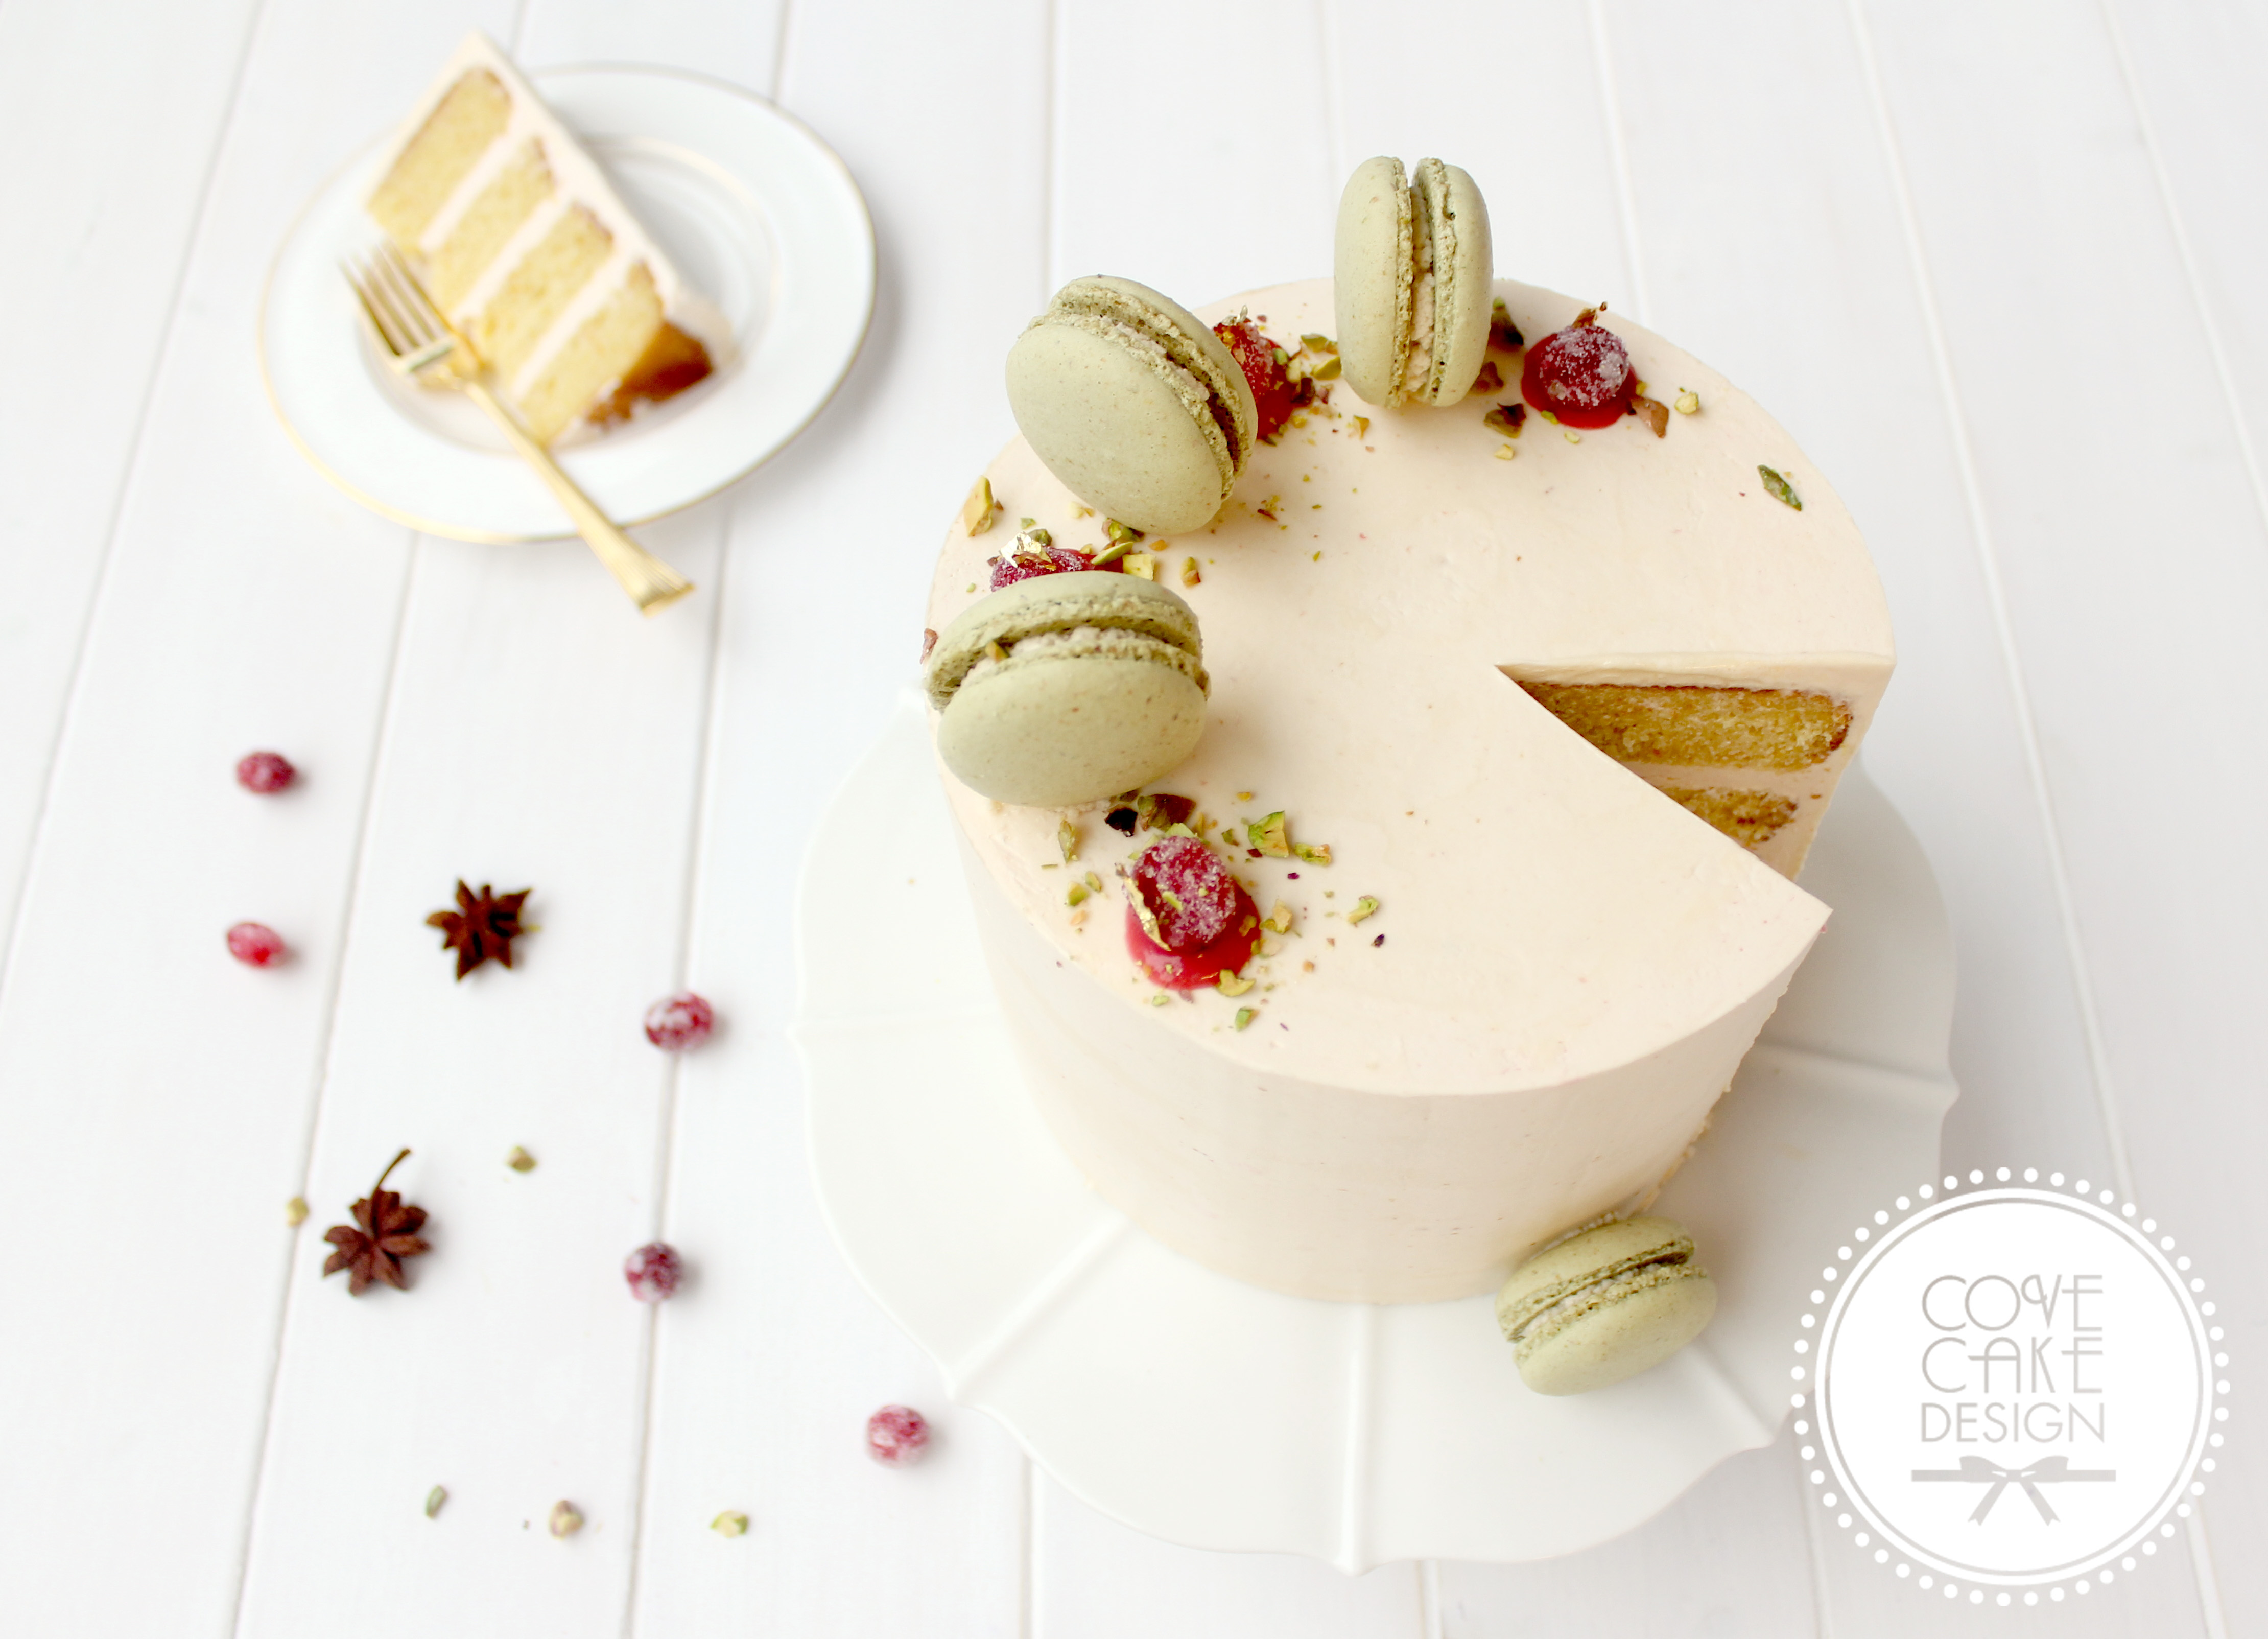
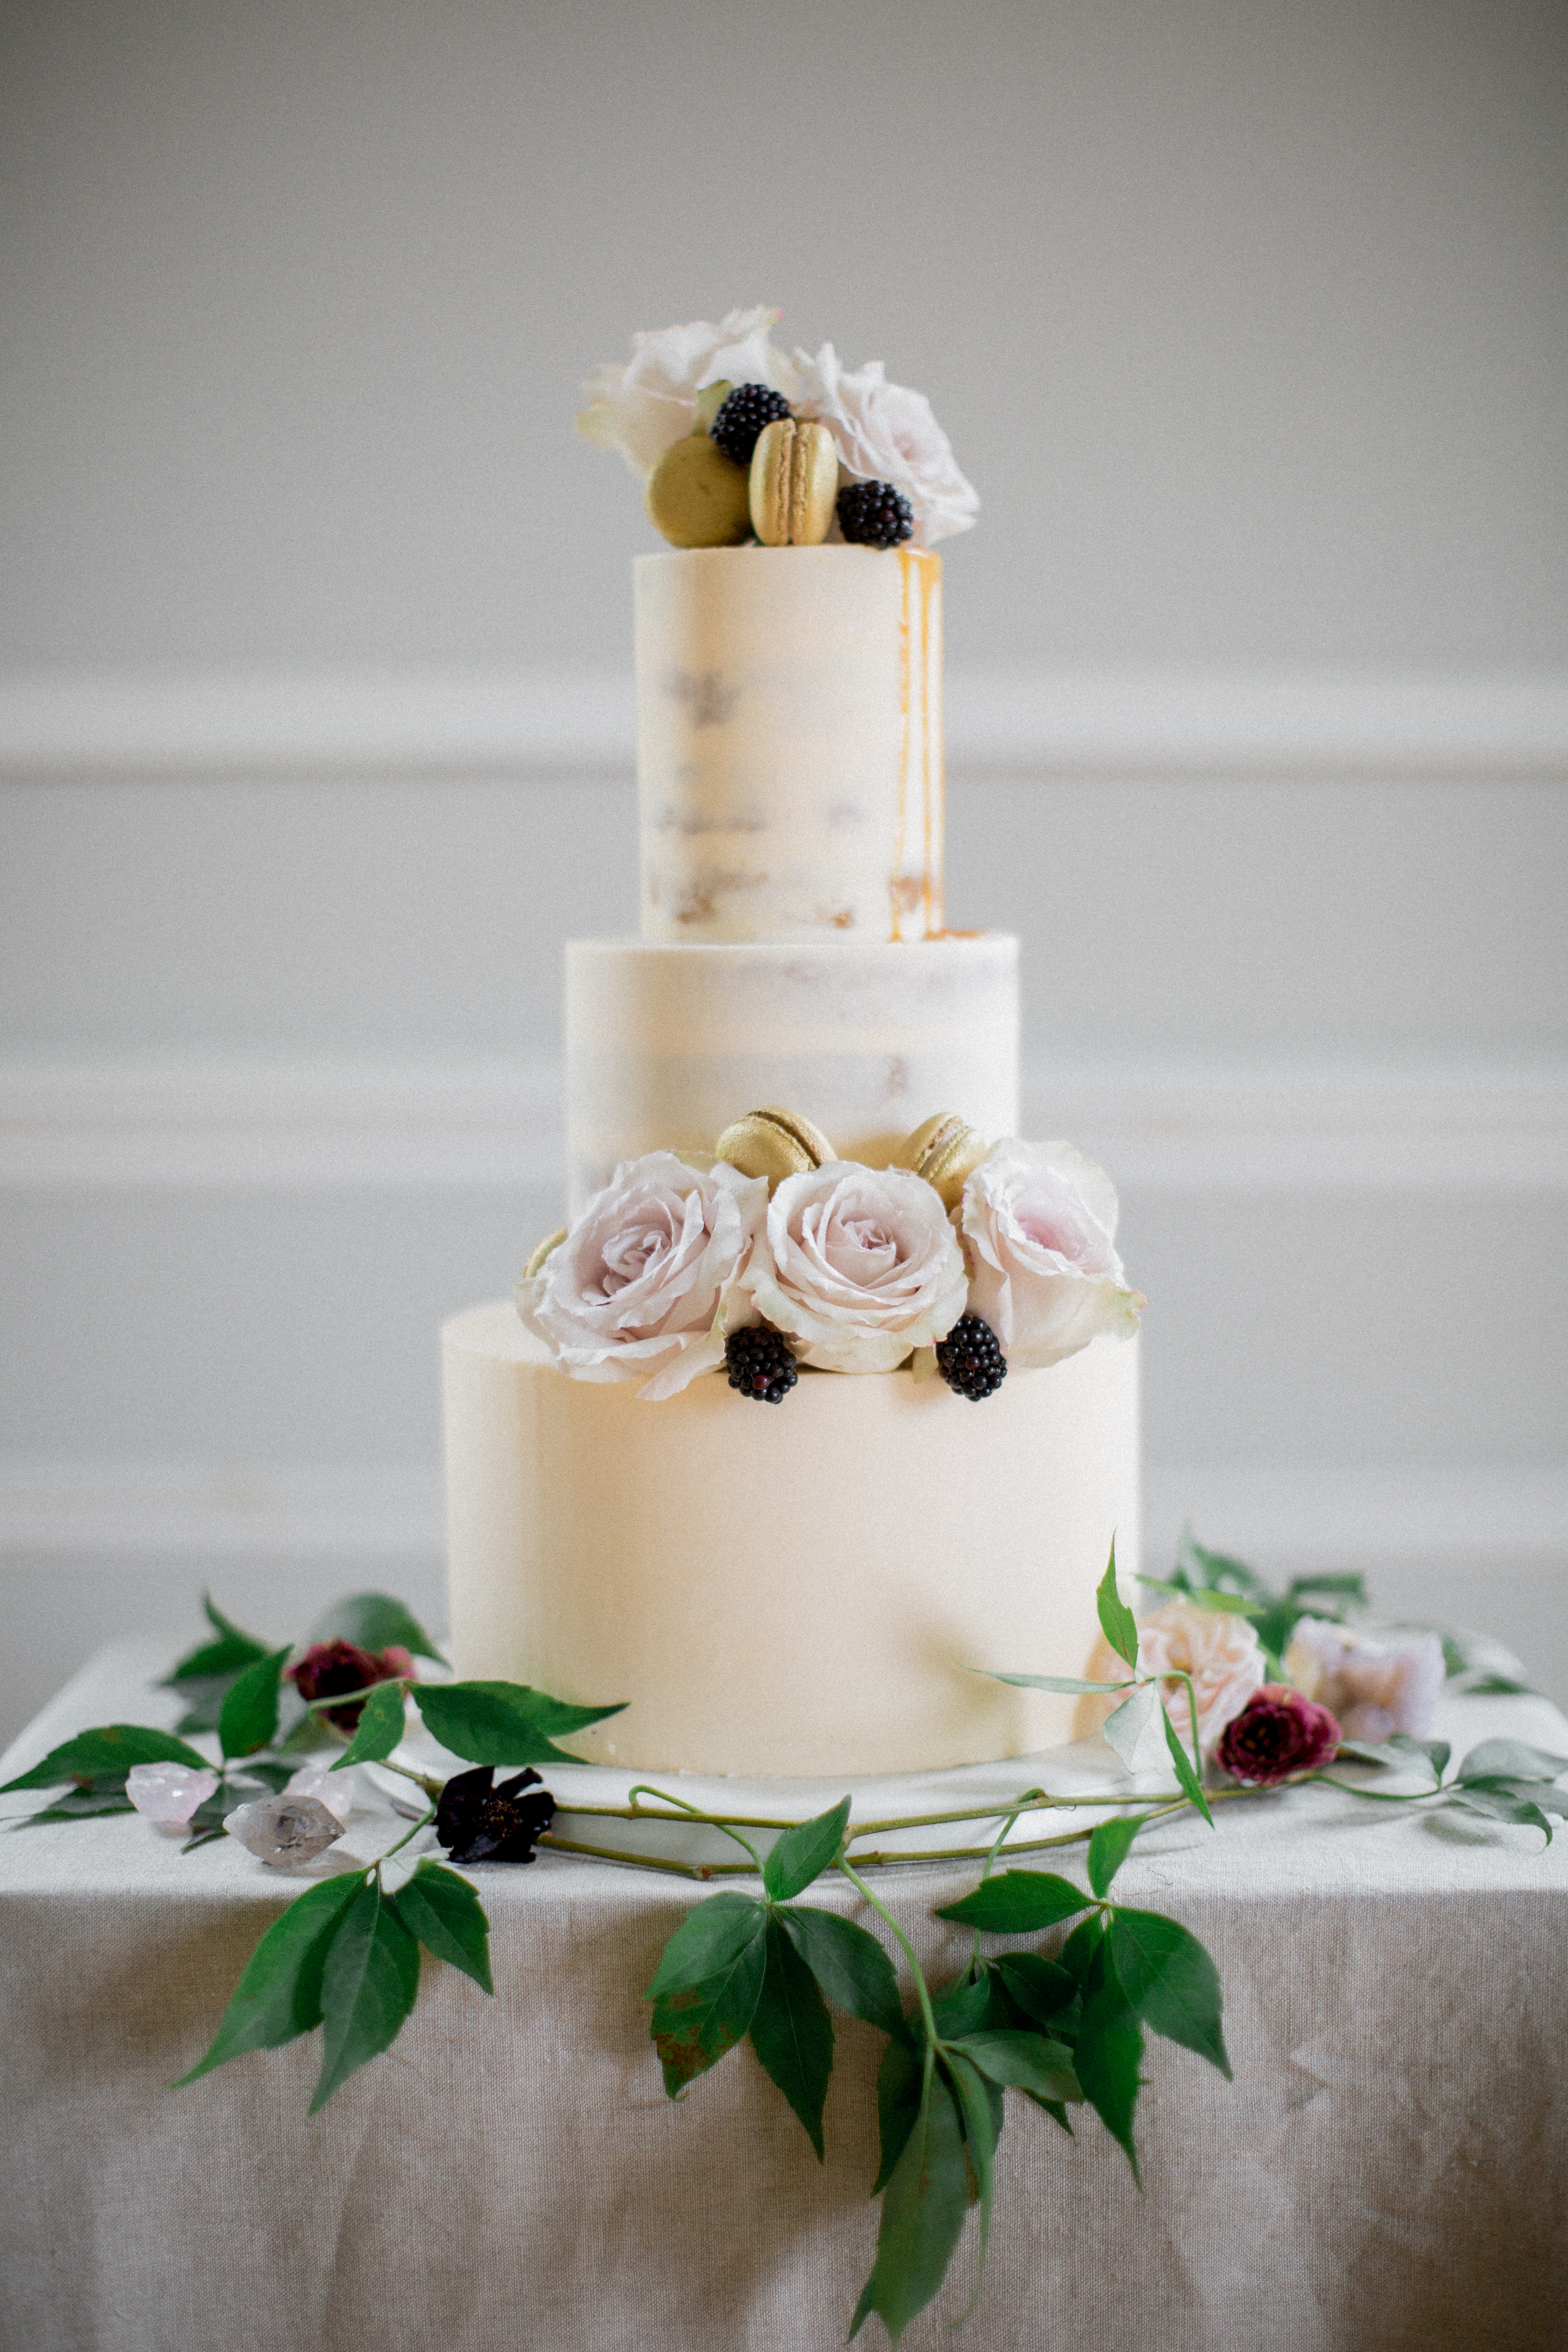
And for the cake….Ciara briefed on a ‘luxe bohemian’ style, suggesting dripping caramel, fruits and blooms with additional elements such as gold leaf and macarons for added decadence. We opted for a natural blush buttercream finish, contrasting a smooth base tier with semi-naked upper tiers. A luscious caramel drip was complimented with simple yet elegant styling: gorgeous roses by The French Touch Flowers offset by contrasting blackberries..and of course those gold macarons for some luxury!

cake-1

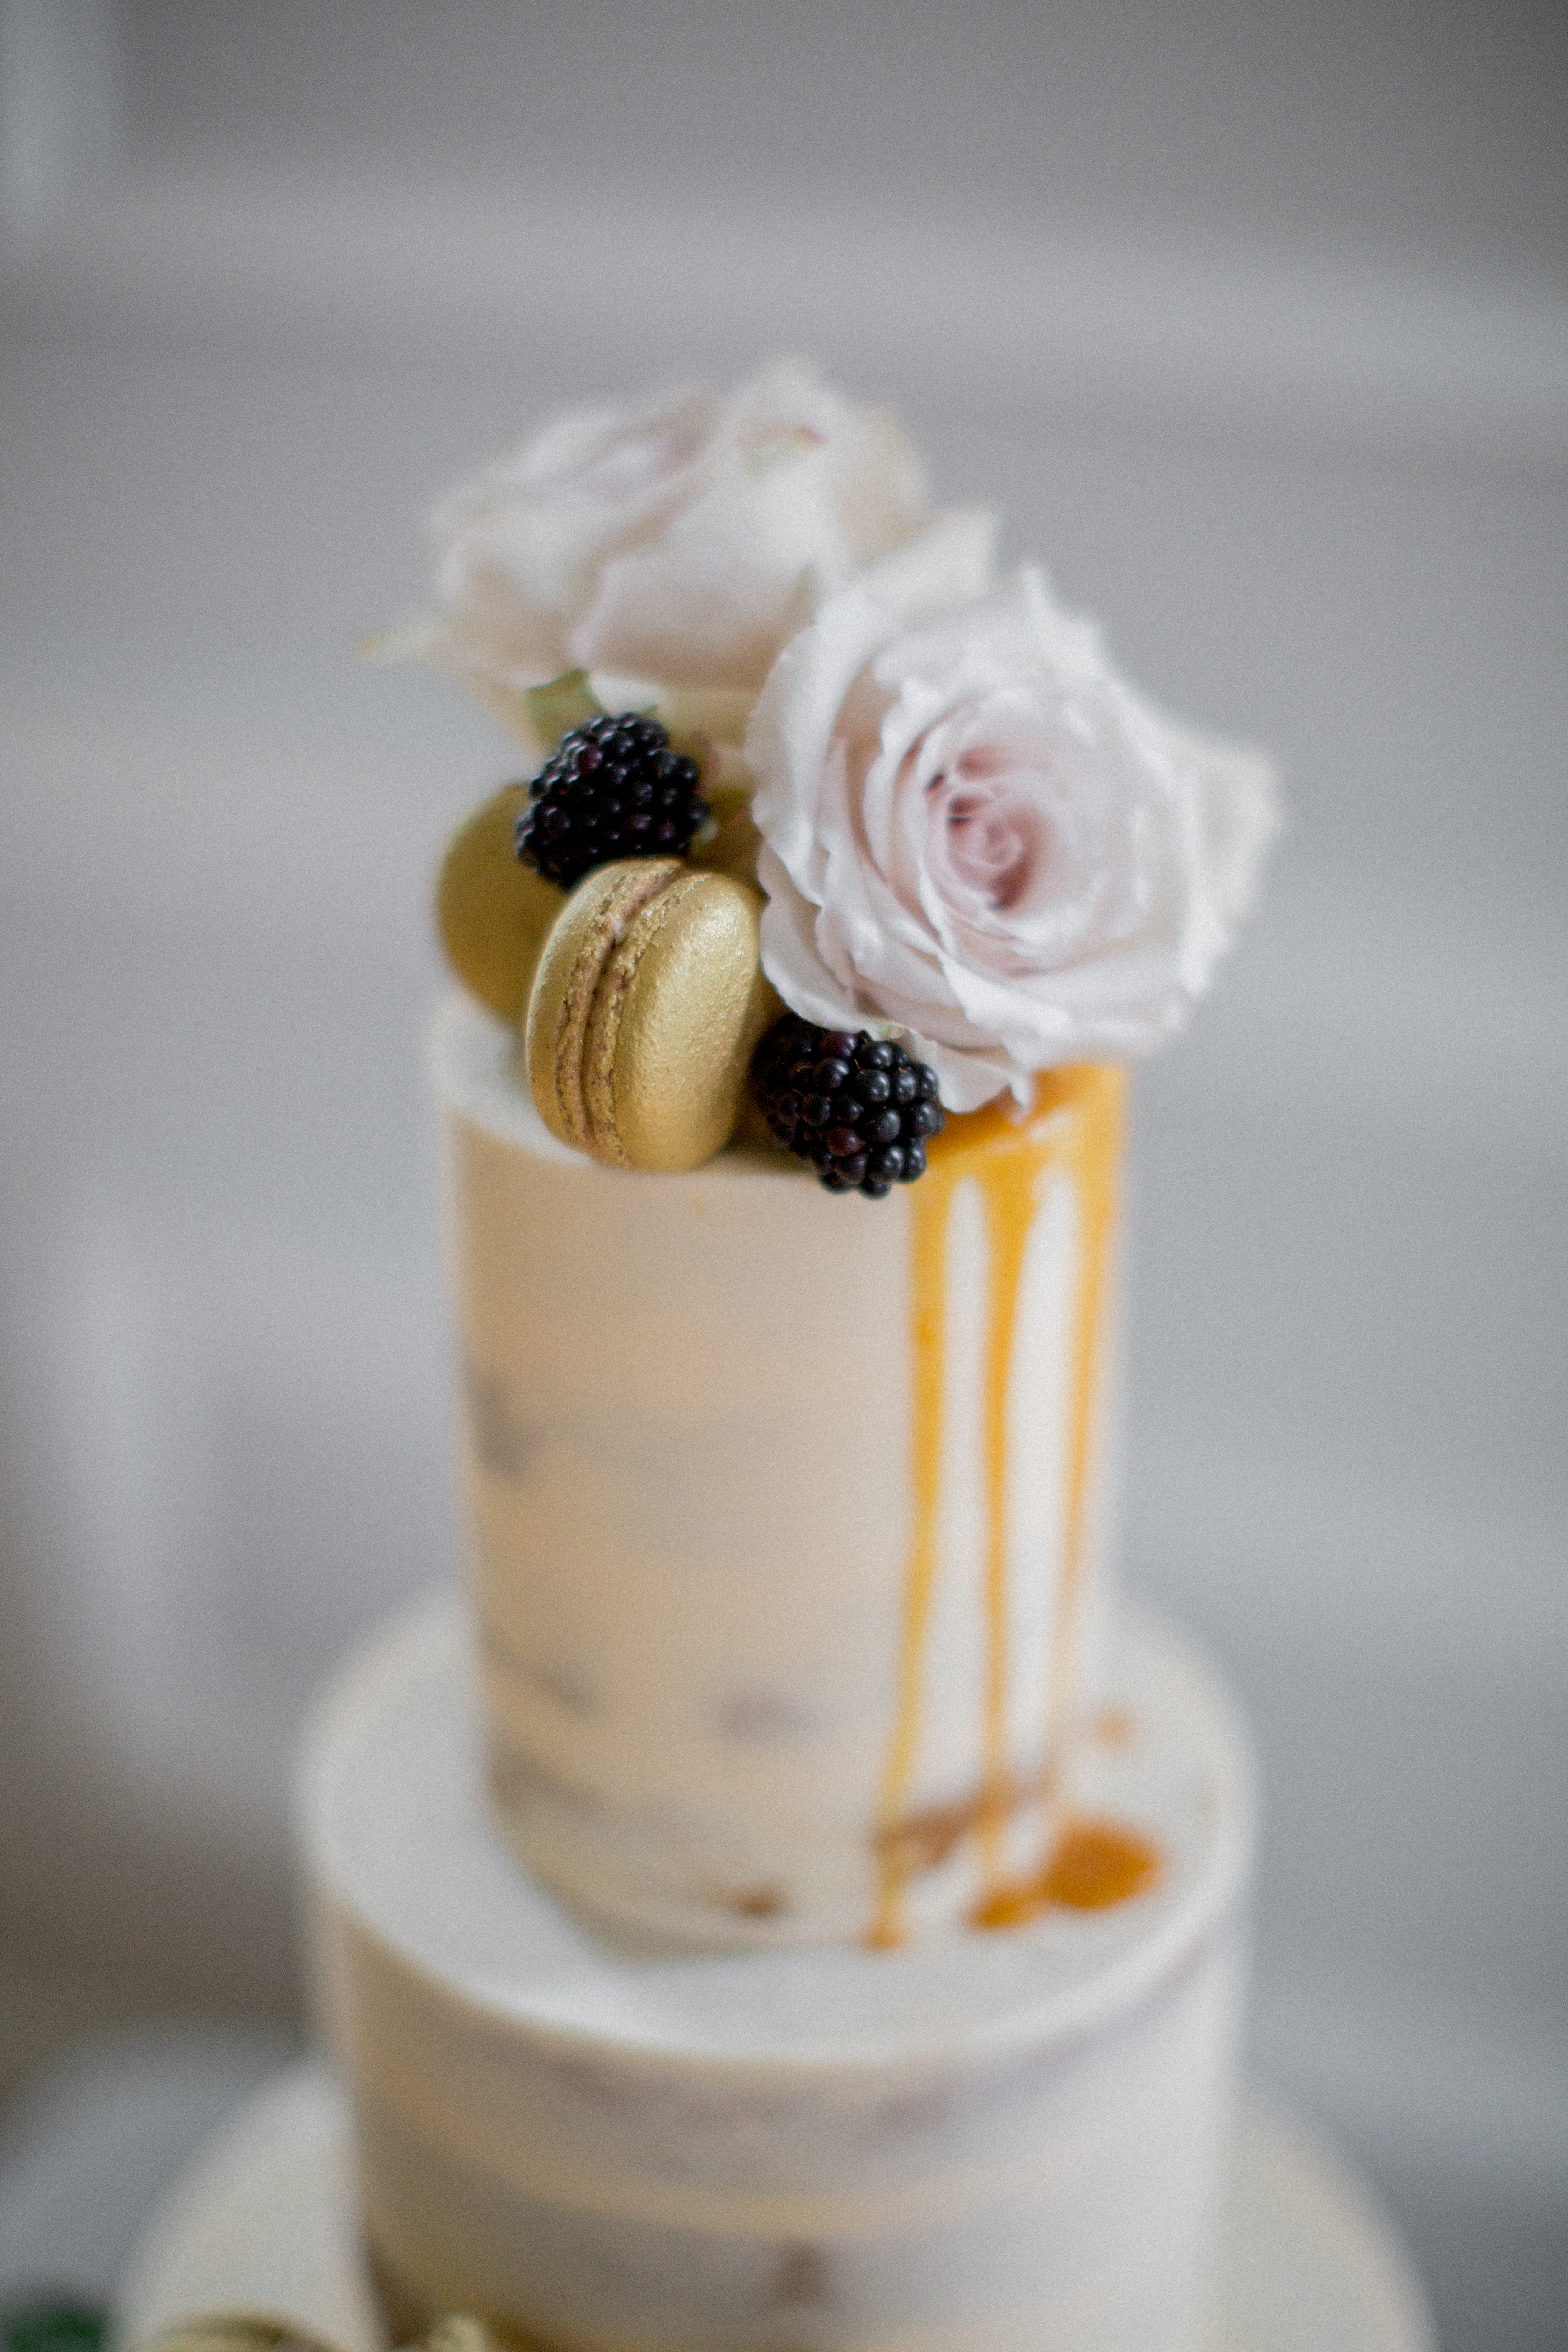
Top cake view! Some detail of those roses, that drip and our macarons…

cake-2

It is always nice to see the different elements of the shoot come together and I think all credit to a great team who created this contemporary, romantic luxe beauty!

picmonkey-image

Stylist: Ciara O’Halloran

Photographer: Christina Brosnan

Model: Sarah Tansey at Andrea Roche Model Agency

Hair: Inch Hair Design

Make-up: Elysian Brows

Jewellry: Juvi Designs

Flowers: The French Touch

Stationary: Kerry Harvey Designs

Cake: ME!

See more of this shoot and indeed lots more inspiration, supplier guides and real weddings in the gorgeous Winter/Spring edition of Image Brides, on shelves now!


Vegan Chocolate Pistachio Cake with Raspberries

My children love a family birthday and never let one pass without having candles on a cake! With my birthday falling just a few days after Easter this year I decided to bake a cake which was a bit more wholesome after the chocolate-laden weekend my children had experienced the week before. This cake is gluten, dairy and refined-sugar free. The natural sweetness of the banana and syrup satisfied the desire for a treat while the dense nutty texture made a small slice sufficiently filling. Although this recipe is for a tiny 5″ cake it easily serves 8-10 deliciously rich slices. This was deemed a winner by my children, so much so that it was gone before I got to take a photo of a cut slice! (problems of a food blogger!).

IMG_2673_edited-1

Vegan Chocolate Pistachio Cake with Chocolate Ganache and Raspberries

Ingredients for the cake:

  • 100g ground almonds
  • 100g shelled pistachios
  • 25g unsweetened cocoa powder
  • 1tsp gluten-free baking powder
  • Sea salt
  • 2 flax eggs: 2tbsp ground flaxseed and  6tbsp of water (or two large eggs if not vegan)
  • 2 ripe bananas
  • 80ml melted coconut oil or rapeseed oil
  • 120ml maple or other syrup
  • 1tsp vanilla extract

Ingredients for the chocolate ganache:

  • 125ml full fat coconut milk (you can use more or less milk depending on whether you prefer a softer or stiffer ganache)
  • 275g dark chocolate (dairy-free if vegan)

Step 1: To make the cake, preheat the oven to 150°C/315F.  Grease and line two 5” cake tins

Step 2: Make the flax eggs by combining ground flaxseed and water in a small bowl. Set aside for 5mins to thicken.

Step 3: Put the pistachios in a food processor and blend to a fine powder.

Step 4: Put the ground almonds, ground pistachios, cocoa powder, baking powder and a pinch of sea salt in a mixing bowl and stir to combine.

Step 5: In a separate bowl mix together the flax eggs, mashed banana, maple syrup and vanilla extract.

Step 6: Add the wet ingredients to the dry ingredients and stir to combine. Pour the batter into the prepared tins and bake for 20-30mins until a skewer inserted into the centre comes out clean. Remove from the tins and leave to cool on a wire rack.

Step 6: To make the chocolate ganache, heat the coconut milk and chocolate in a bowl over a pan of gently simmering water, stirring until the chocolate has melted and the mixture is smooth. Place mixture in the fridge for 30mins-1hour until chilled and firm. Scoop into mixing bowl and beat on high speed for several minutes until light and fluffy.

Step 8: To assemble the cake, level the cakes. Place the first cake layer on a plate or cake stand. Spread some of the whipped ganache over the cake and cover with fresh raspberries. Place the second cake layer on top and repeat. Simple but oh so delicious!

Earl Grey, Lemon and Lavender Cake


Earl Grey Tea is a black tea blend flavoured with bergamot orange. Its citrusy aroma naturally lends itself to flavouring cakes and confectionary and it pairs well with floral accents such as lavender. I have always been wary of using lavender as a cake flavour, too much and it can be reminiscent of soap which is never pleasant to eat! However this recipe is the perfect combination. The earl grey-infused milk adds fragrant moistness to the cake and pairs beautifully with subtle lavender icing and a contrasting tangy lemon curd.  This cake was a winner when taste tested by my family, so much so that I plan to add it to our wedding and celebration cake menu, perfect for something a little different!

IMG_2514_edited-1

Earl Grey, Lemon and Lavender Cake

Ingredients for the cake:

  • 250ml whole milk
  • 4 Earl Grey tea bags
  • 225g unsalted butter
  • 400g caster sugar
  • 1tsp vanilla bean paste
  • 360g plain flour
  • 2.5 tsp baking powder
  • 1tsp ground Earl Grey tea leaves
  • Pinch of salt
  • 5 medium eggs

Ingredients for the lemon curd:

  • 75g butter
  • 150g caster sugar
  • Juice and zest of 3 lemons
  • 2 eggs
  • 1 egg yolk

Ingredients for the lavender buttercream:

  • 60ml milk
  • 1 tsp culinary lavender flowers
  • 300g icing sugar
  • 450g unsalted butter, room temperature
  • Purple food colour (optional)
  • Lavender flowers to decorate (optional)

Step 1: To make the cake, preheat the oven to 150°C/315F.  Grease and line two 6” cake tins (or for a shallower 2-layer cake use two 8” cake tins).

Step 2: Place the milk in a small saucepan over a medium heat and bring to a simmer. Remove from the heat and add the tea bags. Cover the pan and leave to infuse for around 30mins. Remove the teabags, squeezing out any excess liquid. Measure the remaining milk and ensure that there is 250ml. If it has reduced slightly add more milk to bring it up to 250ml.

Step 3: Cream together the butter, vanilla paste and sugar by hand or in a mixer.  Beat in the eggs one at a time, mixing well after each addition.  Sift together the flour, baking powder, ground tea leaves and salt.

Step 4: Pour the flour mixture into the butter mixture in 3 additions, alternating with a third of the milk each time and mixing gently after each addition.

Step 5: Pour the batter into the prepared tins and bake for approximately 40-45mins until springy to the touch and a skewer inserted into the centre comes out clean.  Leave to cool in the tins for 10-15mins before turning out onto a wire rack to cool completely.

Step 6: To make the lemon curd, melt the butter with the sugar, lemon zest and juice in a small pan over a low heat. Beat together the eggs and the egg yolk in a bowl and add to the lemon mixture. Stir gently over a low heat until the mixture has cooled enough to coat the back of a spoon. Remove from the heat and pour into a sterilised jam jar. Leave to cool and store in the refrigerator until needed. Any leftover curd will keep in the fridge for up to two weeks.

Step 7: To make the lavender icing, place the milk and lavender flowers in a small saucepan over a low heat. Bring to a simmer, remove from the heat and leave to infuse until cool. Beat together the butter and icing sugar in an electric mixer until pale and fluffy (approx. 10mins). Strain the lavender from the milk, add the milk to the buttercream and beat again. Add a few drops of purple food colour if desired.

Step 8: To assemble the cake, level the cakes and cut each cake in two to create 4 layers (if an 8” cake simply sandwich the two layers together as follows). Place the first cake layer on a plate or cake stand. Pipe a ring of buttercream around the edge of the layer and fill the centre with buttercream to a shallower depth than the ring. Place some lemon curd in the centre and spread around the layer keeping it inside the piped ring. Repeat with two more layers and top with the final cake layer. Spread the top with icing and sprinkle with lavender flowers if desired.

Clementine Cake with Star Anise and Cinnamon, Cranberry Curd Meringue Buttercream and Pistachio

IMG_0752_edited-1

With Christmas around the corner we are inundated with images and recipes for all sorts of delicious  baking so I thought I would add to the mix with this seasonal spiced Clementine Cake with Cranberry.  I think it looks so beautiful with the subtle orange and pink tones from the clementines and cranberries further contrasted with some green pistachio macarons! It has a lovely moist texture and paired with the silky meringue buttercream, would make a lovely light alternative to some traditionally heavier seasonal cakes.

The recipe has quite a few components and in its entirety is aimed at the experienced baker, but for the novice baker please don’t let this put you off! The cake itself is so easy to make and would look fabulous simply sandwiched together with the icing and decorated with a smattering of cranberries and pistachios, obviating the need to attempt to make notoriously difficult macarons! Furthermore, should you wish for a simpler buttercream recipe, simply add some of the cranberry curd to this buttercream.

Clementine Cake with Star Anise and Cinnamon, Cranberry Curd Meringue Buttercream and Pistachio Macarons

Ingredients for the cake:

  • 3 clementines
  • 2 star anise
  • 1 cinnamon stick
  • 275g self-raising flour
  • 3tsp baking powder
  • 275g caster sugar
  • 225g butter
  • 4 eggs
  • 1tsp ground cinnamon

Ingredients for the cranberry curd:

  • 225g cranberries
  • 1/2 cup water
  • 140g caster sugar
  • Zest of 1 orange and 1 lemon
  • 3 egg yolks (keep the whites for your macarons)
  • 1 egg
  • 60g unsalted butter

Ingredients for the cranberry swiss meringue buttercream:

  • 150g egg white (can be from a carton)
  • 250g caster sugar
  • 340g unsalted butter, cubed
  • 3-4 tbsp cranberry curd to taste
  • pinch salt

Ingredients for the Pistachio Macarons

  • 65g icing sugar
  • 45g ground almonds
  • 20g shelled pistachios
  • 45g caster sugar
  • 50g aged egg white (approx two egg whites)
  • Green paste food colour

Step 1: To make the cake, preheat the oven to 160°C/320F/gas mark 3. Grease and line two 6″ round cake tins.

Step 2: Place the whole clementines (including skin) in a saucepan with the star anise and cinnamon stick, cover with boiling water and simmer for approx 20 mins until skins are soft. Leave to cool slightly and infuse. Remove clementines from the water, cut in half, remove any pips and then process in a food processor until pulpy.

Step 3: Add the remaining cake ingredients to the clementines in the food processor and process until smooth and well mixed. Avoid overmixing.

Step 4: Pour the mixture into the prepared tins and bake for 30-40 mins until cake is springy to the touch and a skewer inserted into the centre comes out clean. Leave to cool in the tins before turning out onto a wire rack to cool completely.

Step 5: To make the pistachio macarons, process the icing sugar, ground almonds and pistachios in a processor until fine. Sieve into a clean bowl and discard any larger particles.

Step 6: Wipe the inside of a metal bowl and an electric handheld whisk with some lemon juice and paper towel to remove any traces of grease. Weigh the egg white into the bowl and whisk on low speed until foamy. Increase speed and whisk until you see trails in the egg white. Add the caster sugar in thirds, whisking well after each addition. Continue whisking until just before stiff peaks form. Add desired amount of green food colouring before continuing to whisk to stiff peaks.

Step 7: Add half the almond mixture to the egg white and fold in before adding the remaining half. Gently fold the mixture (it’s called macronage) to remove some of the air until it has a flow and consistency of lava.

Step 8: Pour into a piping bag fitted with a round nozzle. Fix some baking paper onto a tray with a dot of the mixture (or use a silicone baking mat) and pipe rounds. You should get approx 30 macaron shells. Bang tray firmly on the counter to remove any excess air bubbles. Leave to form a ‘skin’, this takes approx 30mins depending on humidity. To test for this simply lightly touch the top of one of the macarons and check that your finger comes away clean. Meanwhile preheat the oven to 160°C .

Step 9: Bake macarons for 14-16mins turning the tray around half-way through. The macarons are cooked when you can lightly a shell and the top doesn’t move from the feet. Leave to cool on the tray before removing.

Step 10: To make the cranberry curd, place cranberries and water in a saucepan, cover and heat until cranberries have burst and liquid bubbles. Pour through a sieve into a clean bowl and press through cranberry pulp. Return the pulp to the saucepan and stir in sugar to dissolve. Add the lemon and orange zest if  and allow to cool slightly.

Step 11: Whisk the egg yolks and whole egg together and pour into the cranberry mixture, whisking until combined. Stir over a medium heat using a wooden spoon until the mixture has thickened and easily coats the back of a spoon (approx. 8-10mins). Pour into sterilised jars and place in the fridge once cool to set. This will keep for up to 2 weeks in the fridge to use any leftovers as you see fit!

Step 12: To make the cranberry swiss meringue buttercream, wipe the bowl of an electric mixer with paper towel and lemon juice. Add egg whites and sugar and place over a pan of simmering water whisking constantly until it reaches 160°F. If you do not have a sugar thermometer heat until sugar has completely dissolved and mixture is hot.

Step 13: Place the bowl on an electric stand mixer and whisk until the meringue is thick and glossy and the bottom of the bowl feels neutral to the touch, approx 10mins. Change to a paddle attachment. Slowly add the butter in cubes one at a time until incorporated. Continue to beat until it has reached a smooth silky texture. Add cranberry curd and mix to combine. If buttercream is too runny place in the fridge to firm up slightly before remixing.

Step14: To assemble the cake, level each cake using a cake leveller or sharp knife. Cut each cake in two so you have four cake layers. Place the base of the first cake on a cake card (or a cake stand or plate) and using a piping bag cover with the buttercream icing. Smooth the icing with a palette knife. Add the second layer and repeat, finishing with the inverted base of the second cake.  Before coating the outside of the cake, place in fridge to firm up slightly first. Crumb coat the cake by spreading a small amount of buttercream over the cake and scraping off any excess before refrigerating again until firm. Now feel free to ice in your favourite texture, rough, smooth, patterned! I have finished with a smooth buttercream. For this I placed the worked on the sides of the cake first, adding buttercream so that it was up over the top of the cake, scraping with a metal scraper, refrigerating until firm before repeating the process until perfectly smooth. For the top, use a palette knife to level the buttercream at the edge before filling in the centre.

Step 15: Fill the pistachio macarons with some of the buttercream (or your preferred buttercream) and fix on the cake with a dot of buttercream. I decorated with some pistachios and sugared cranberries but feel free to get creative!