Tag Archive for: edible gift

Almond Sheet Cake with Plum and Sweet Geranium Cove Cake Design

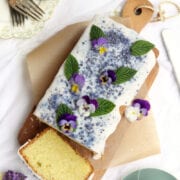
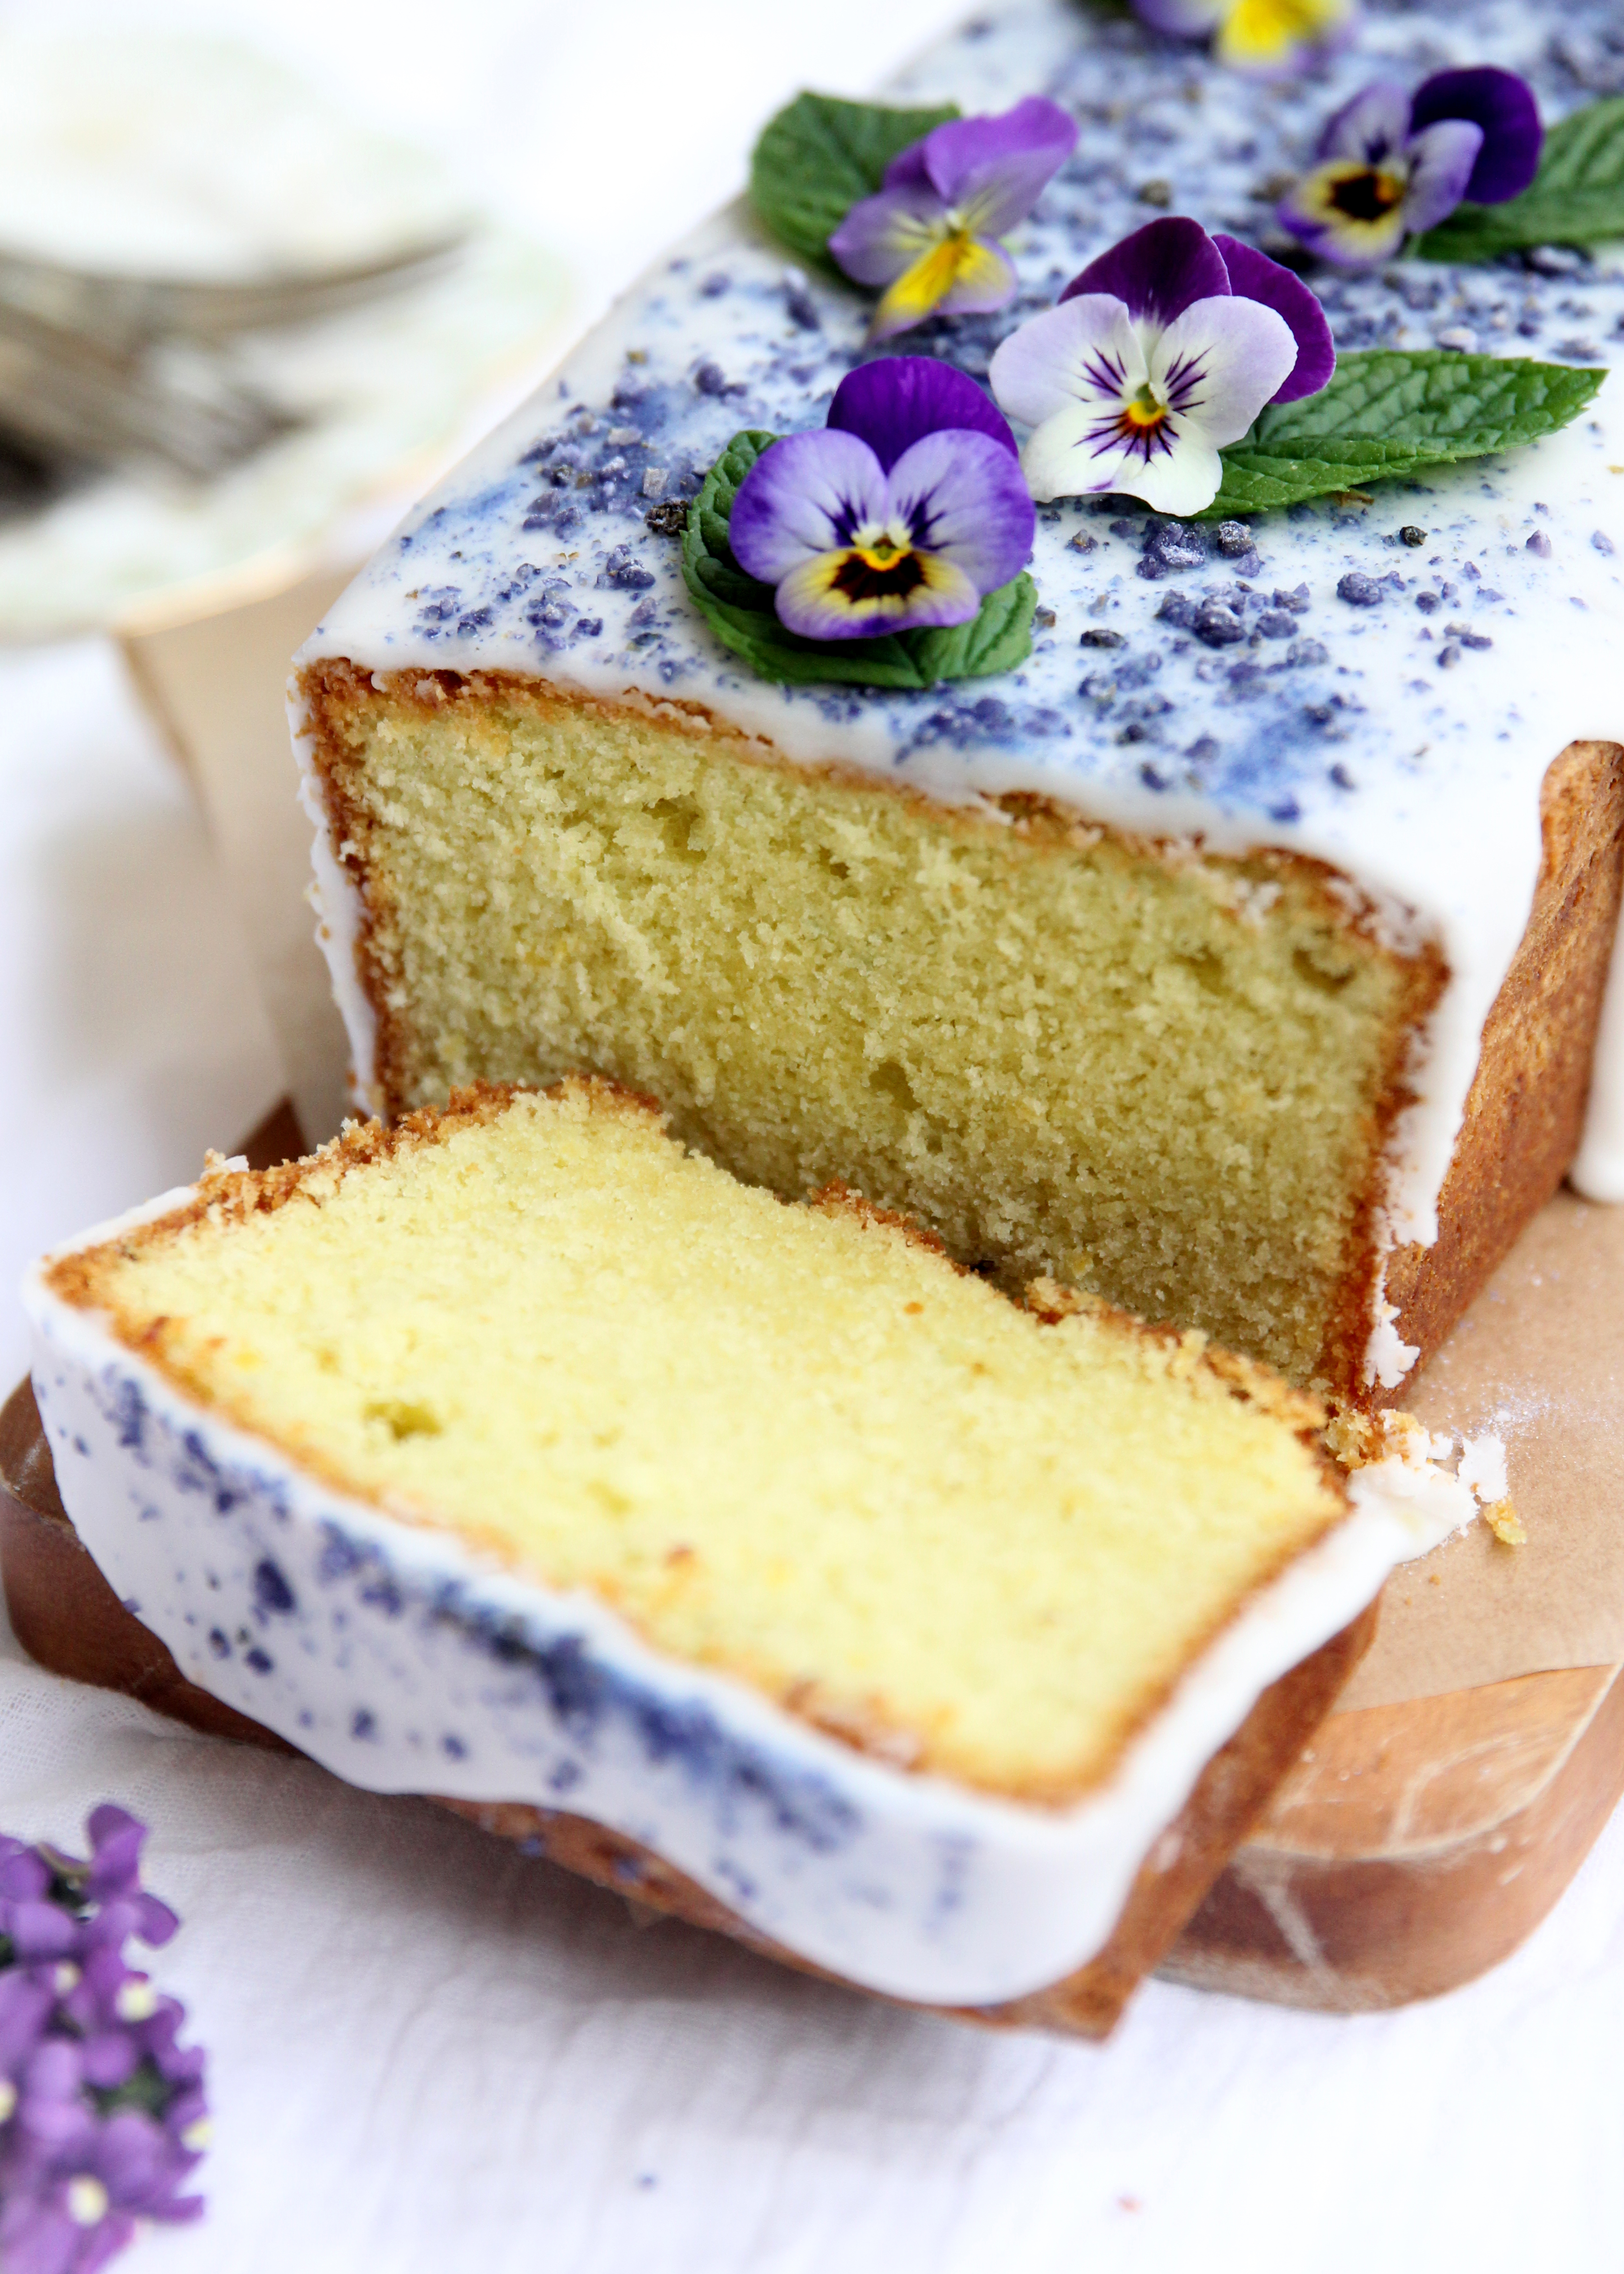
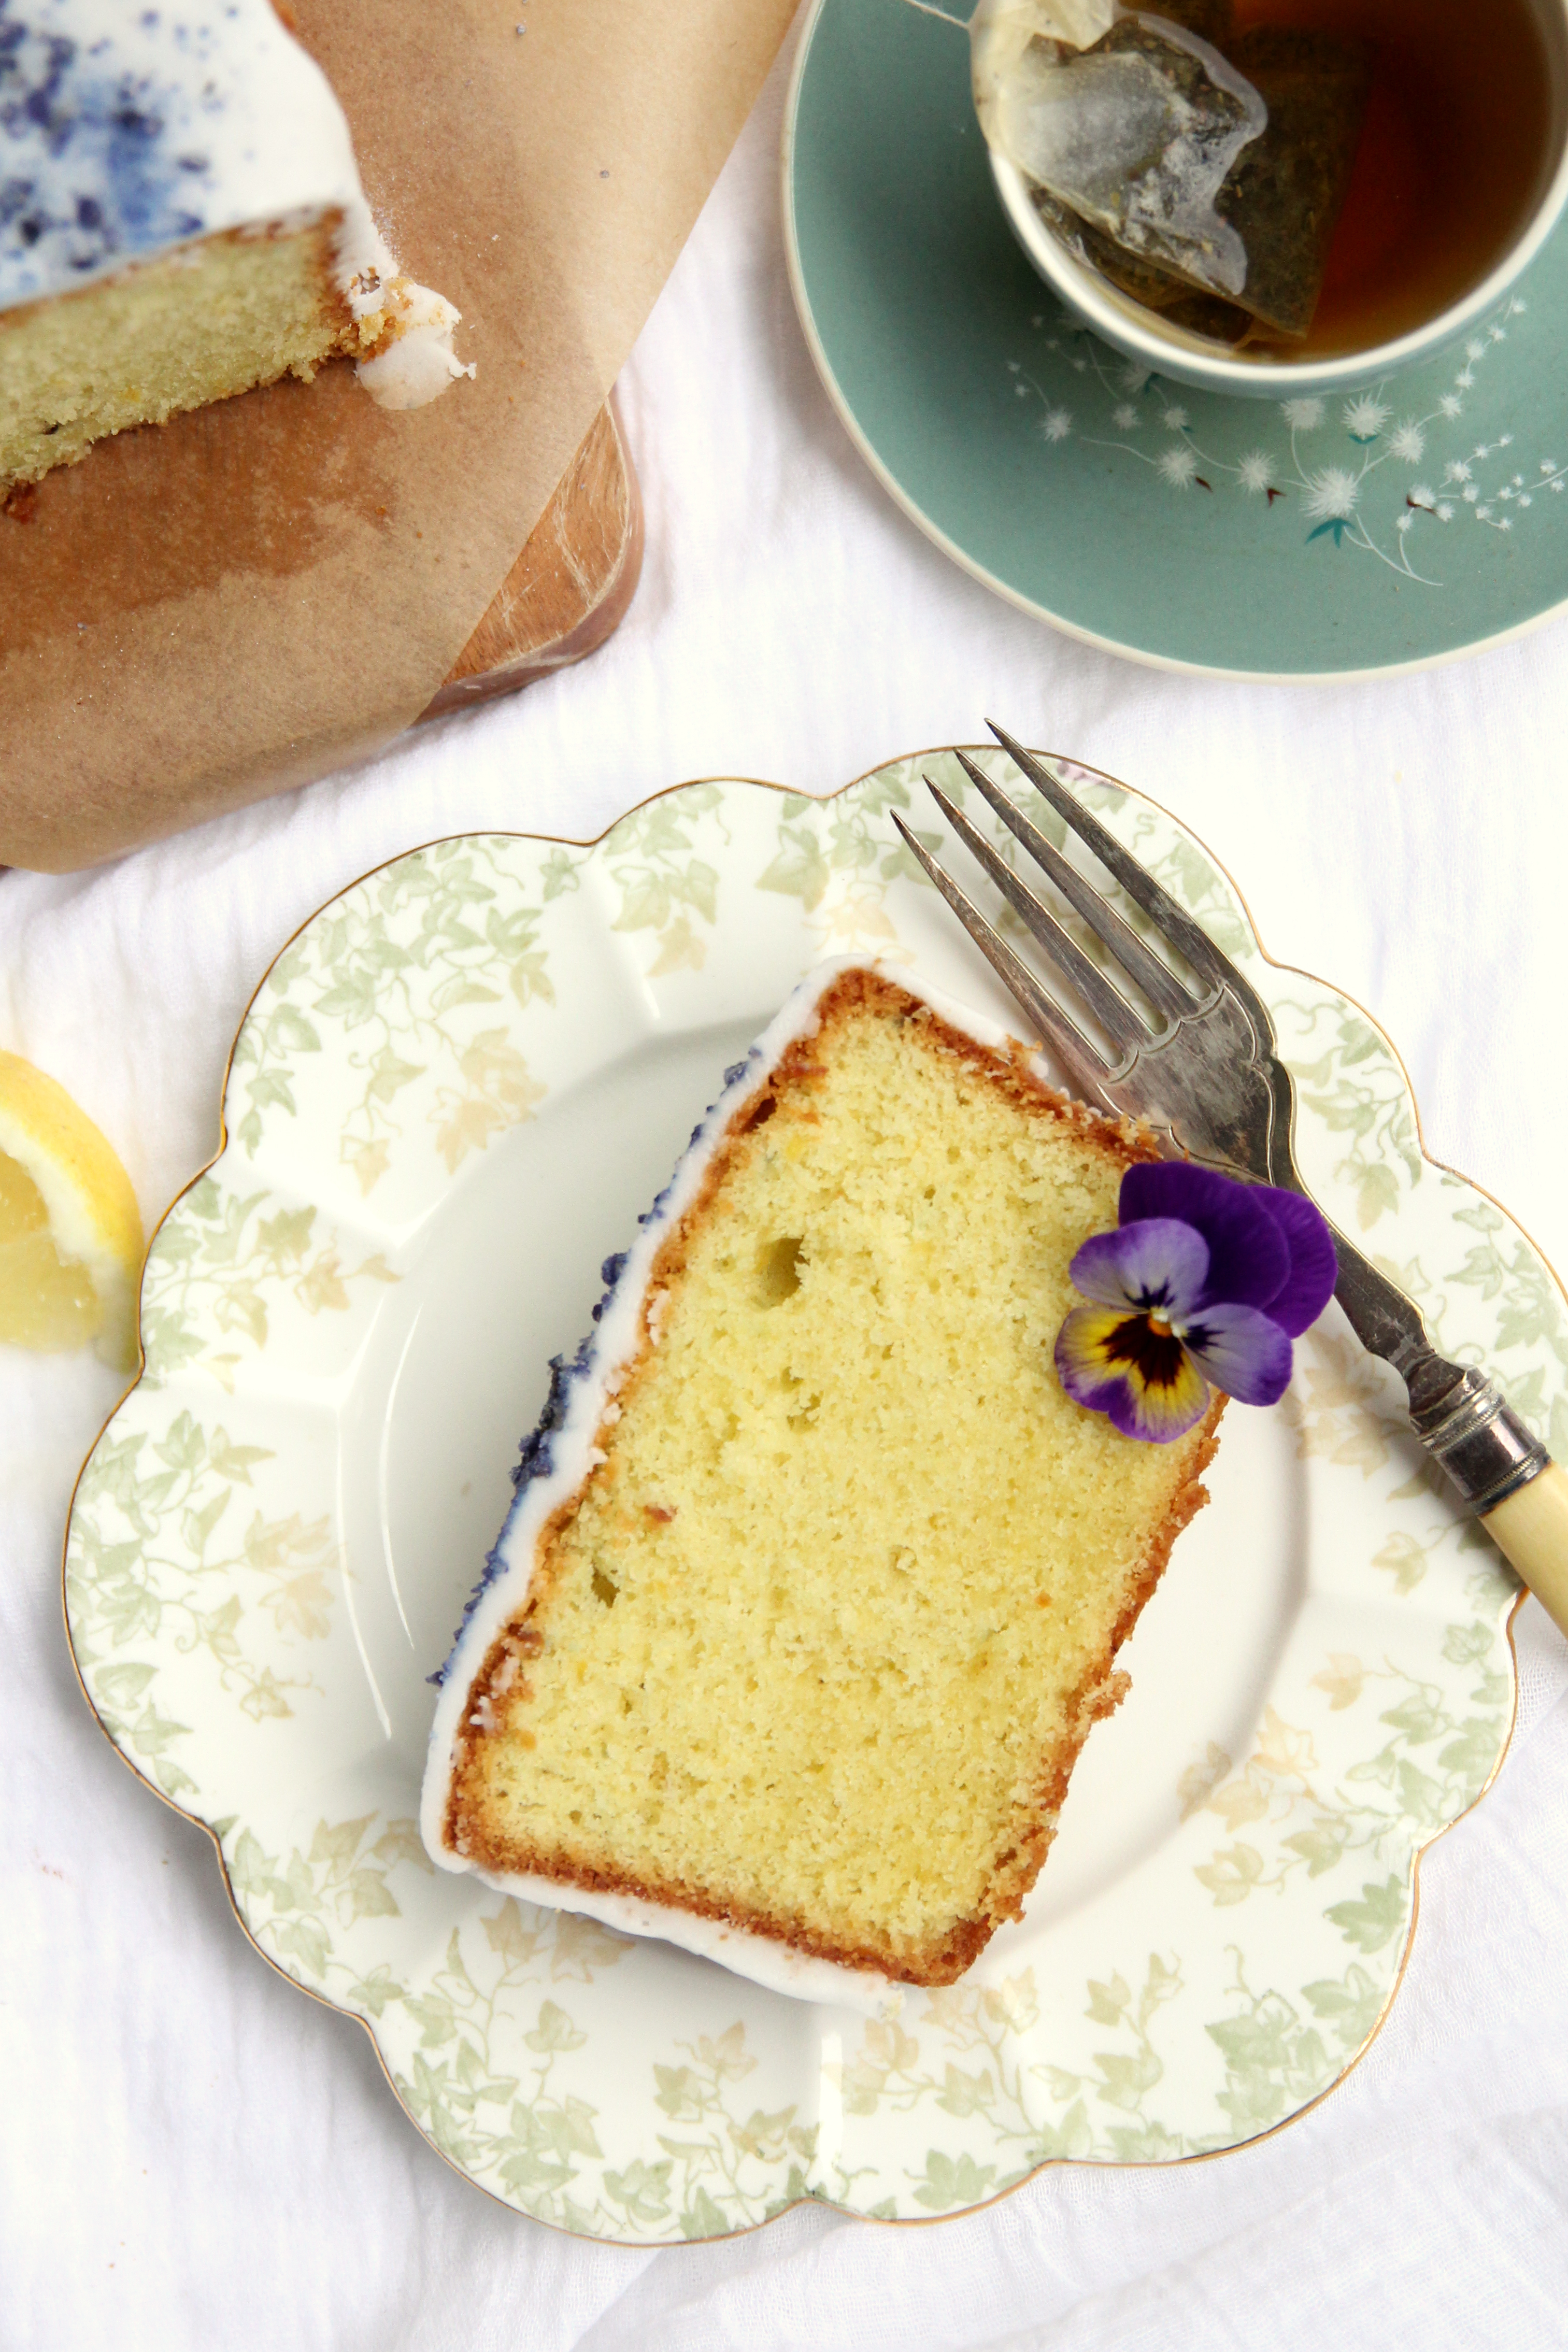
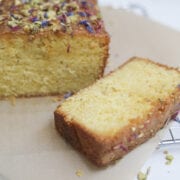
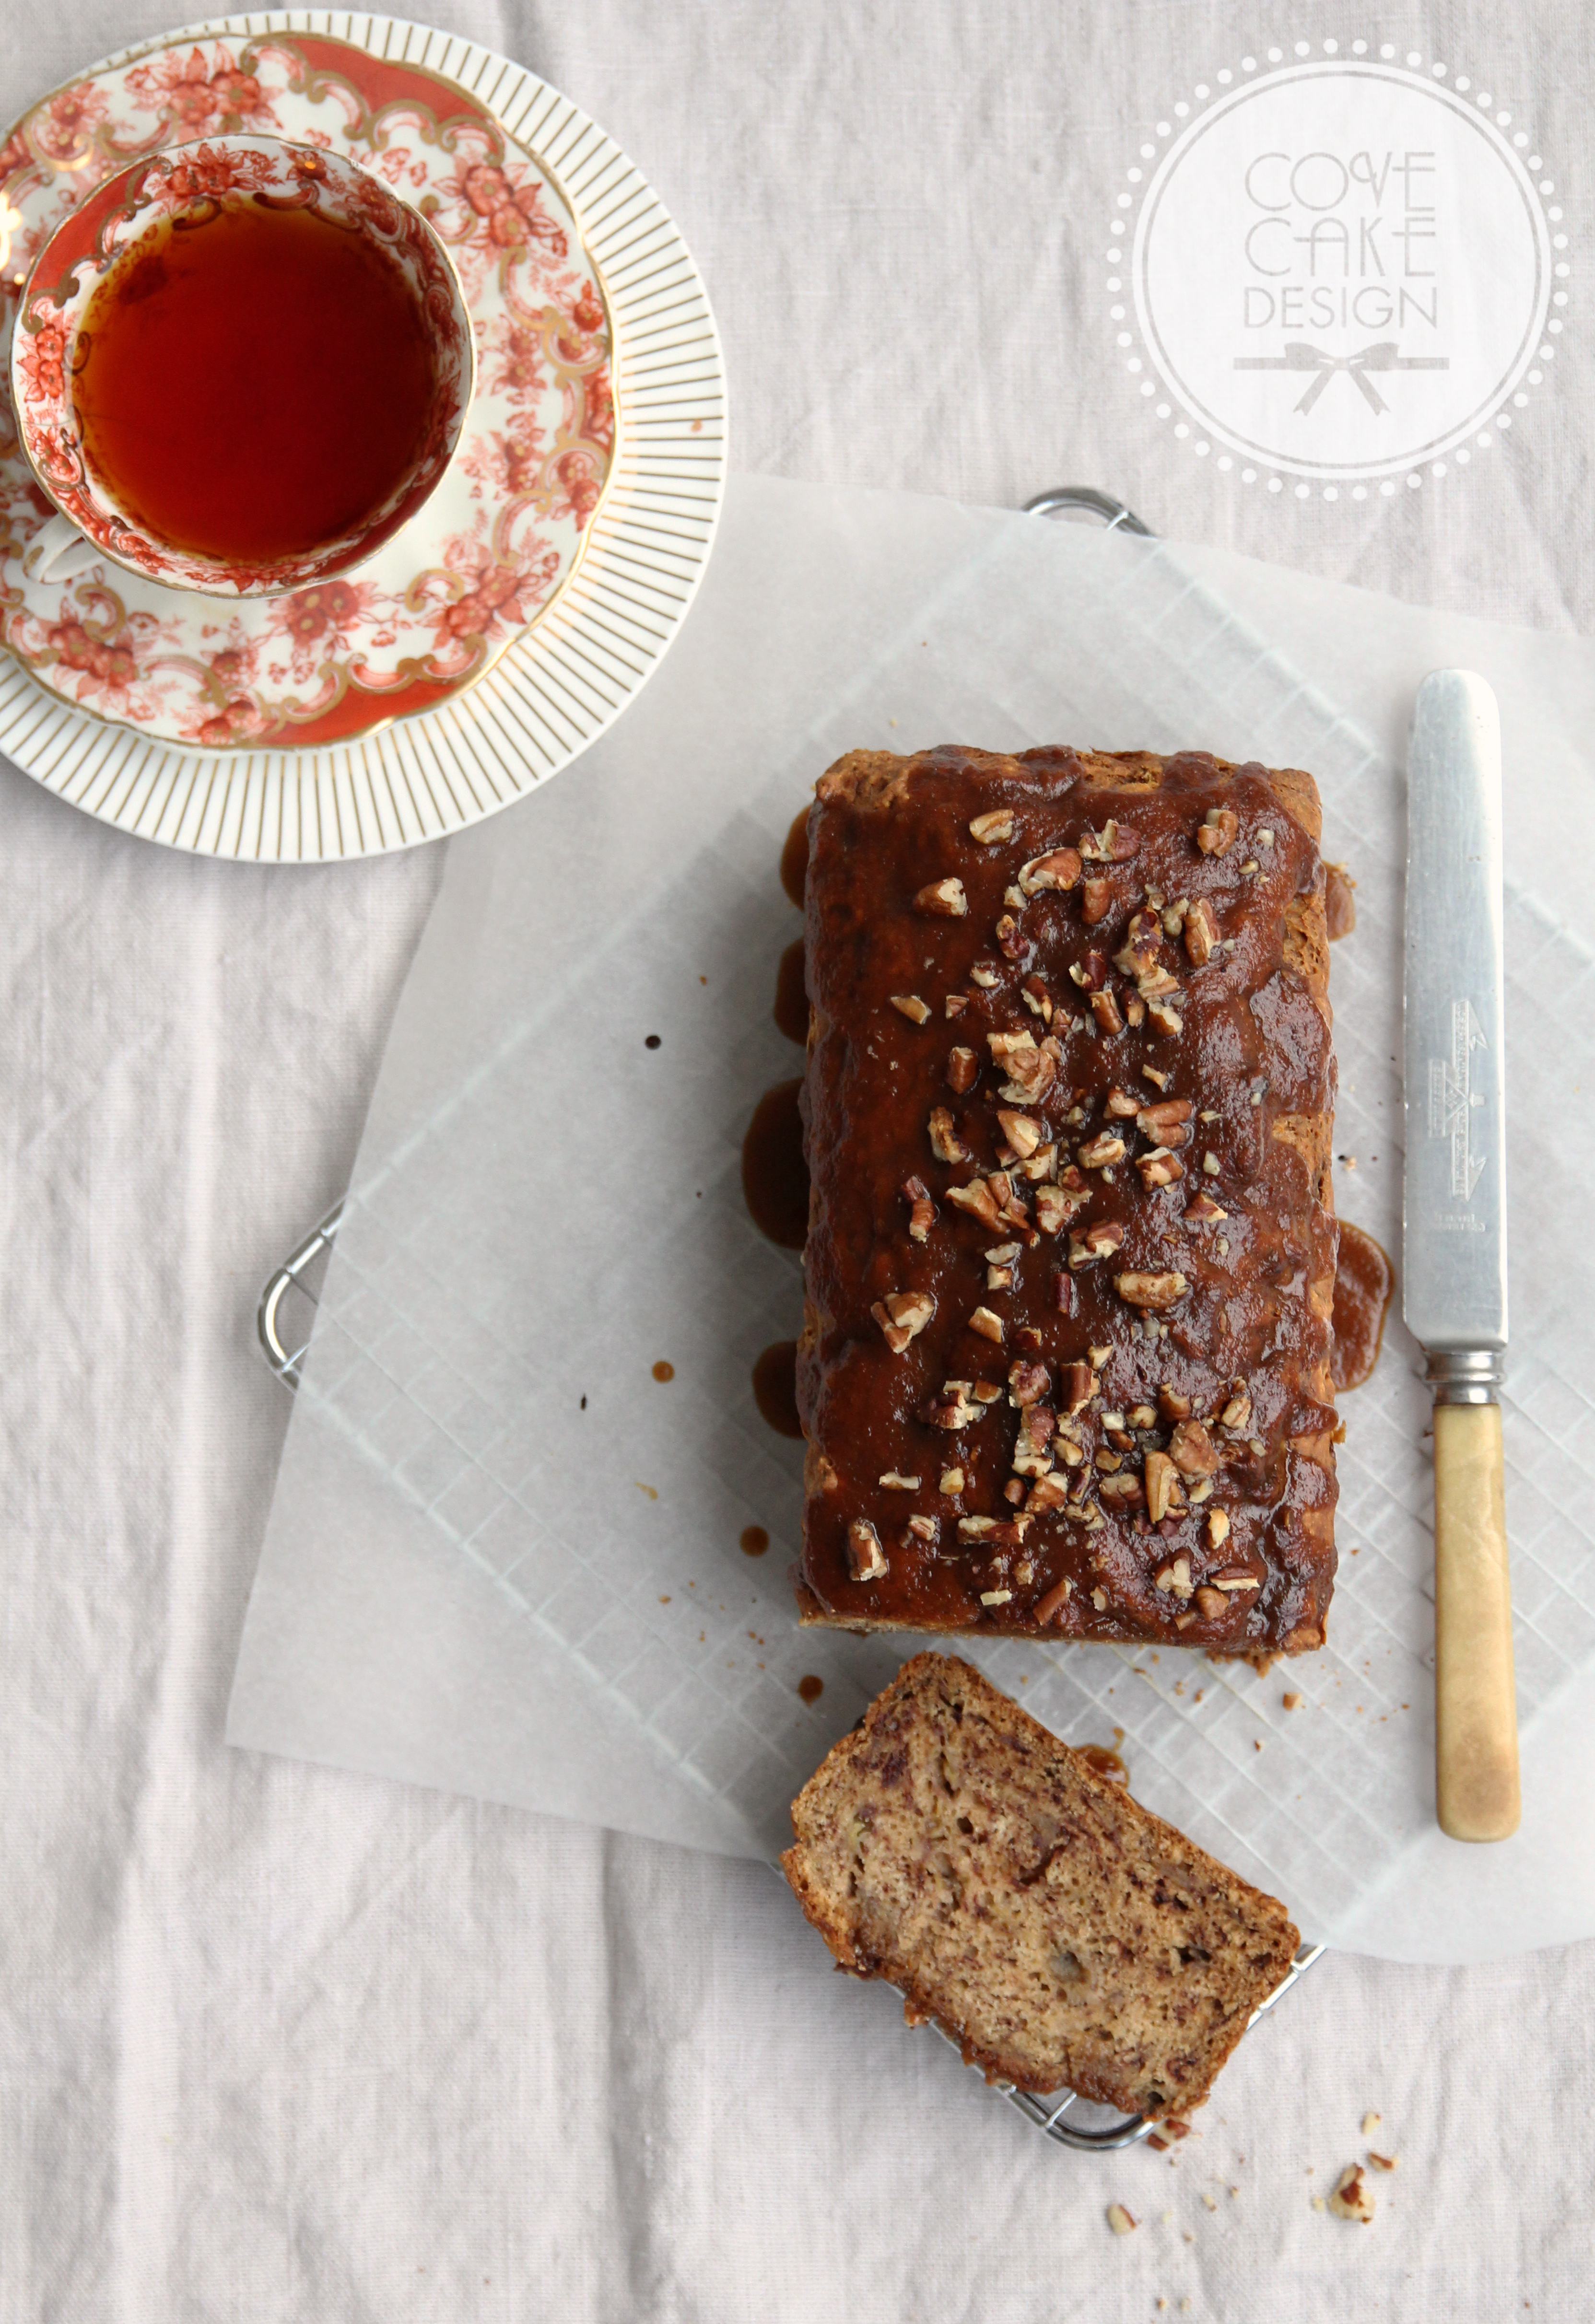
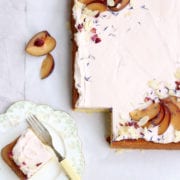
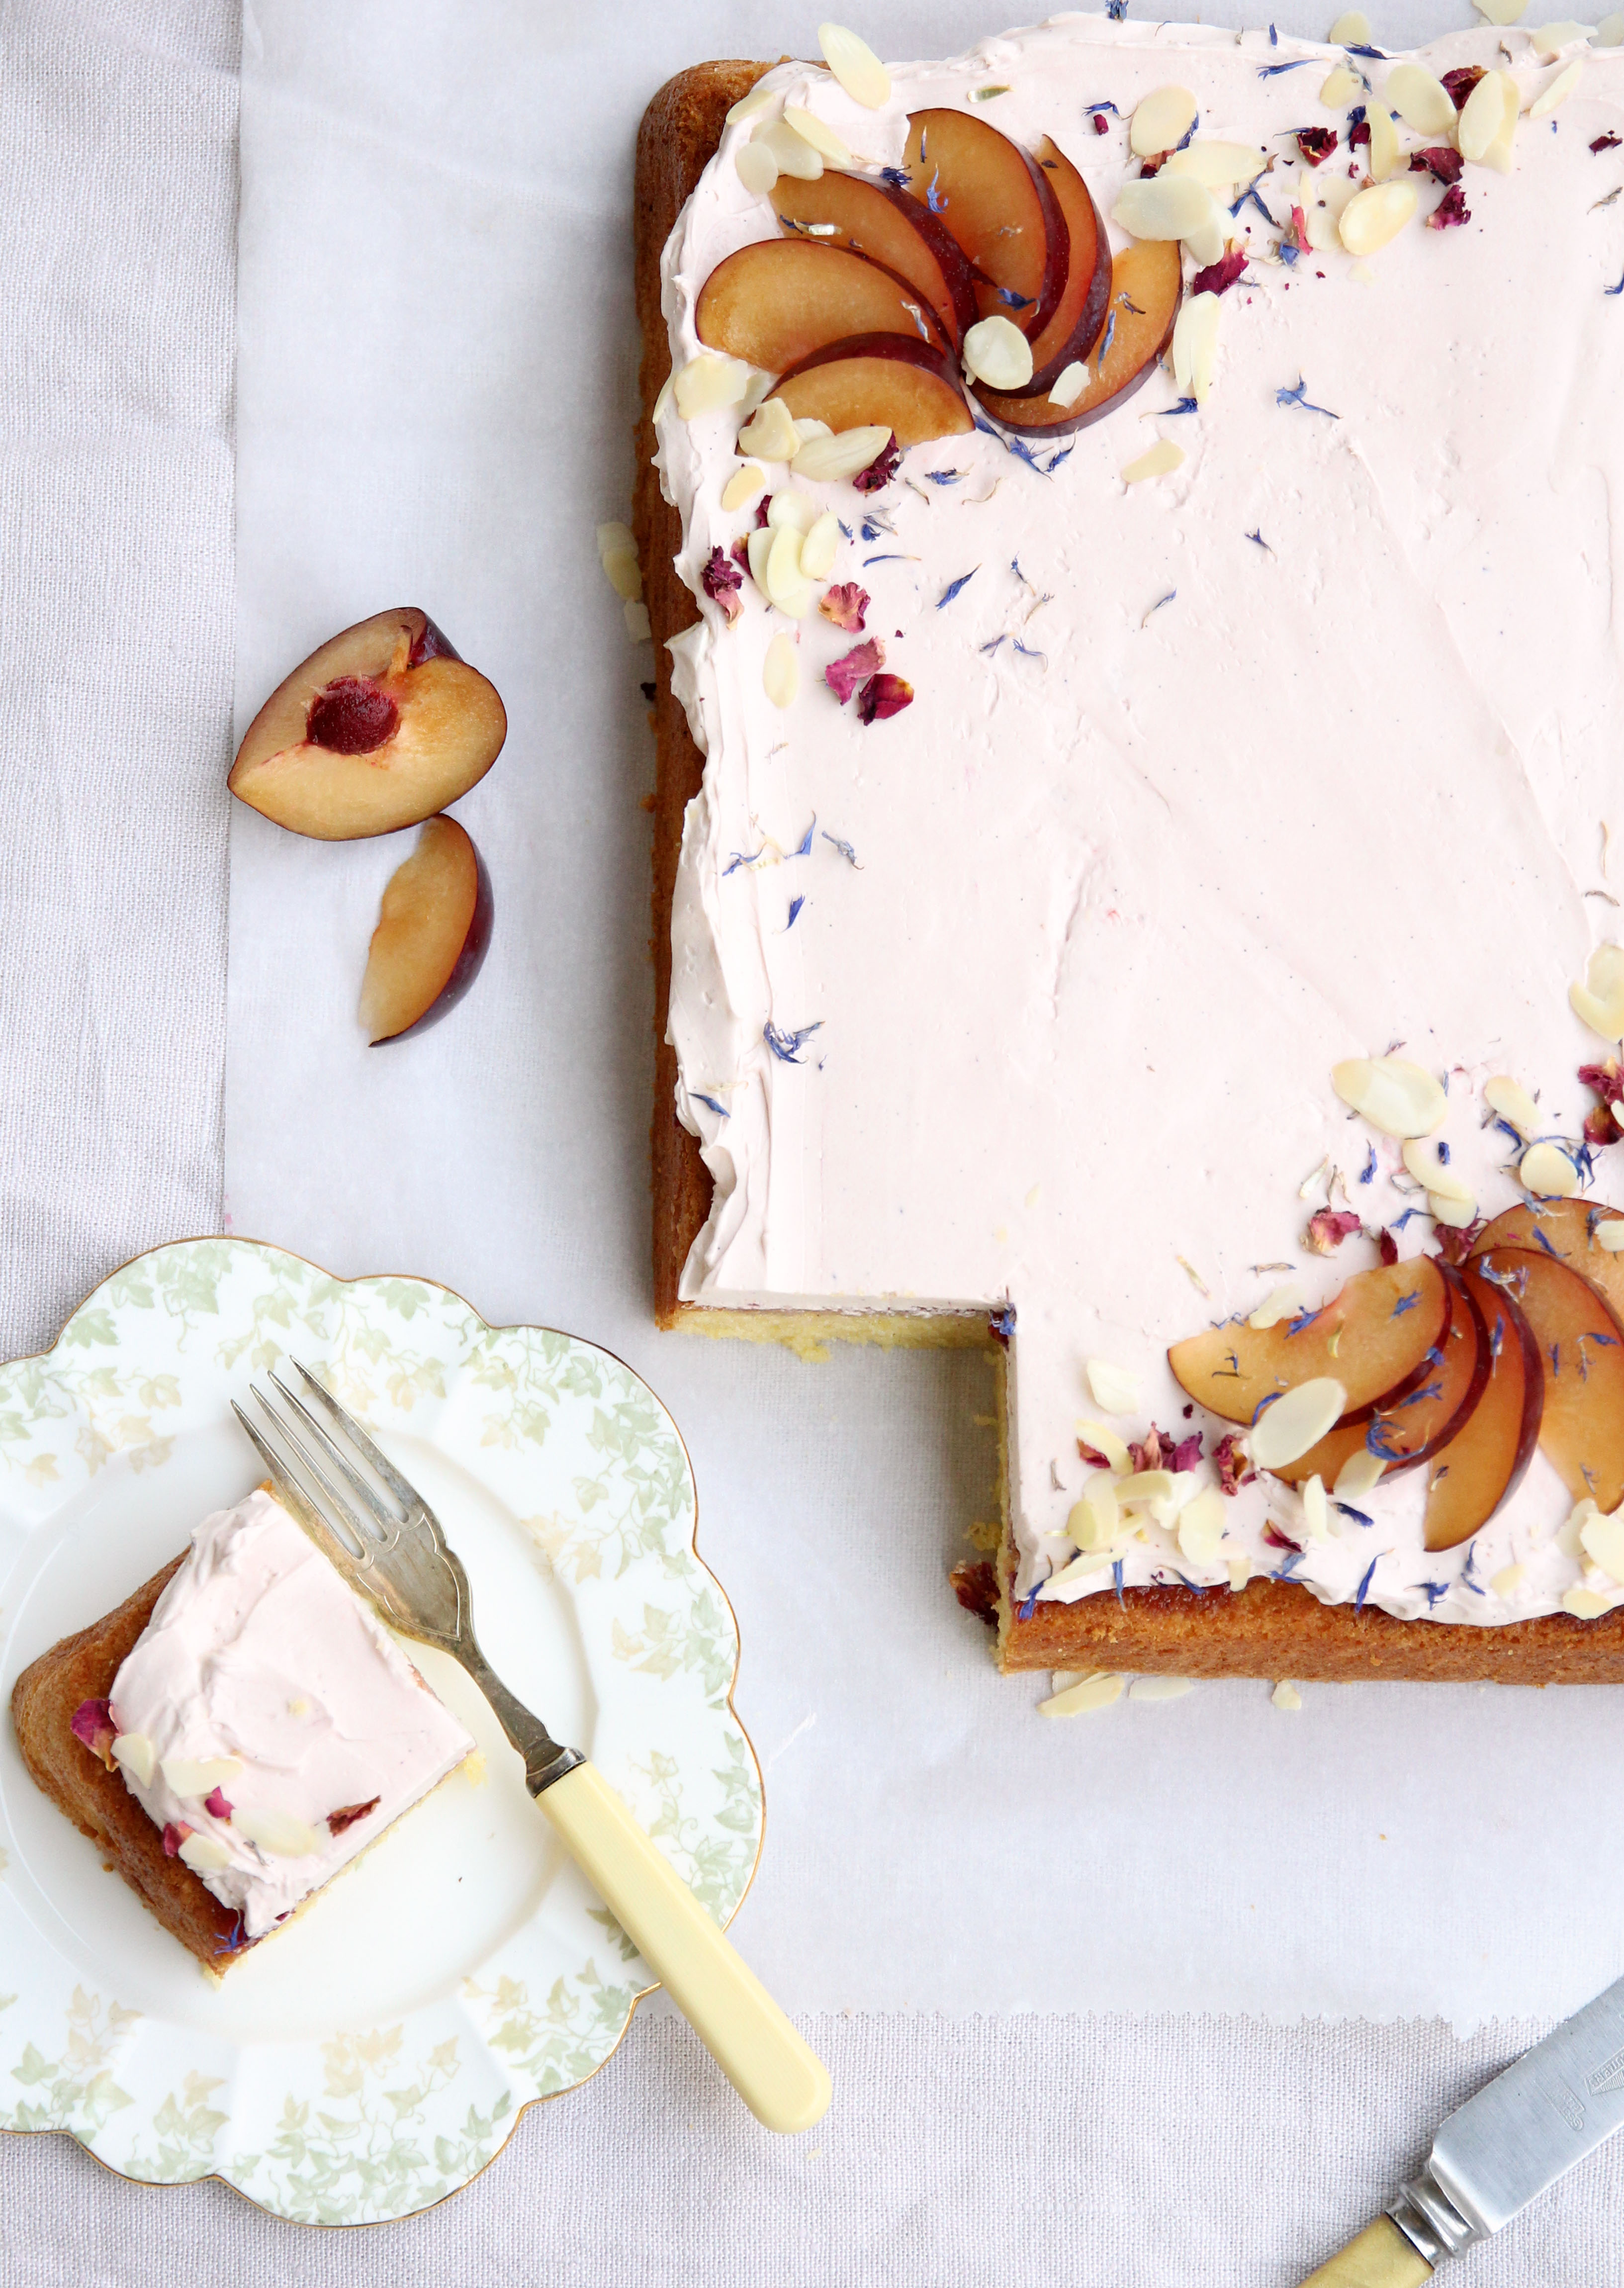
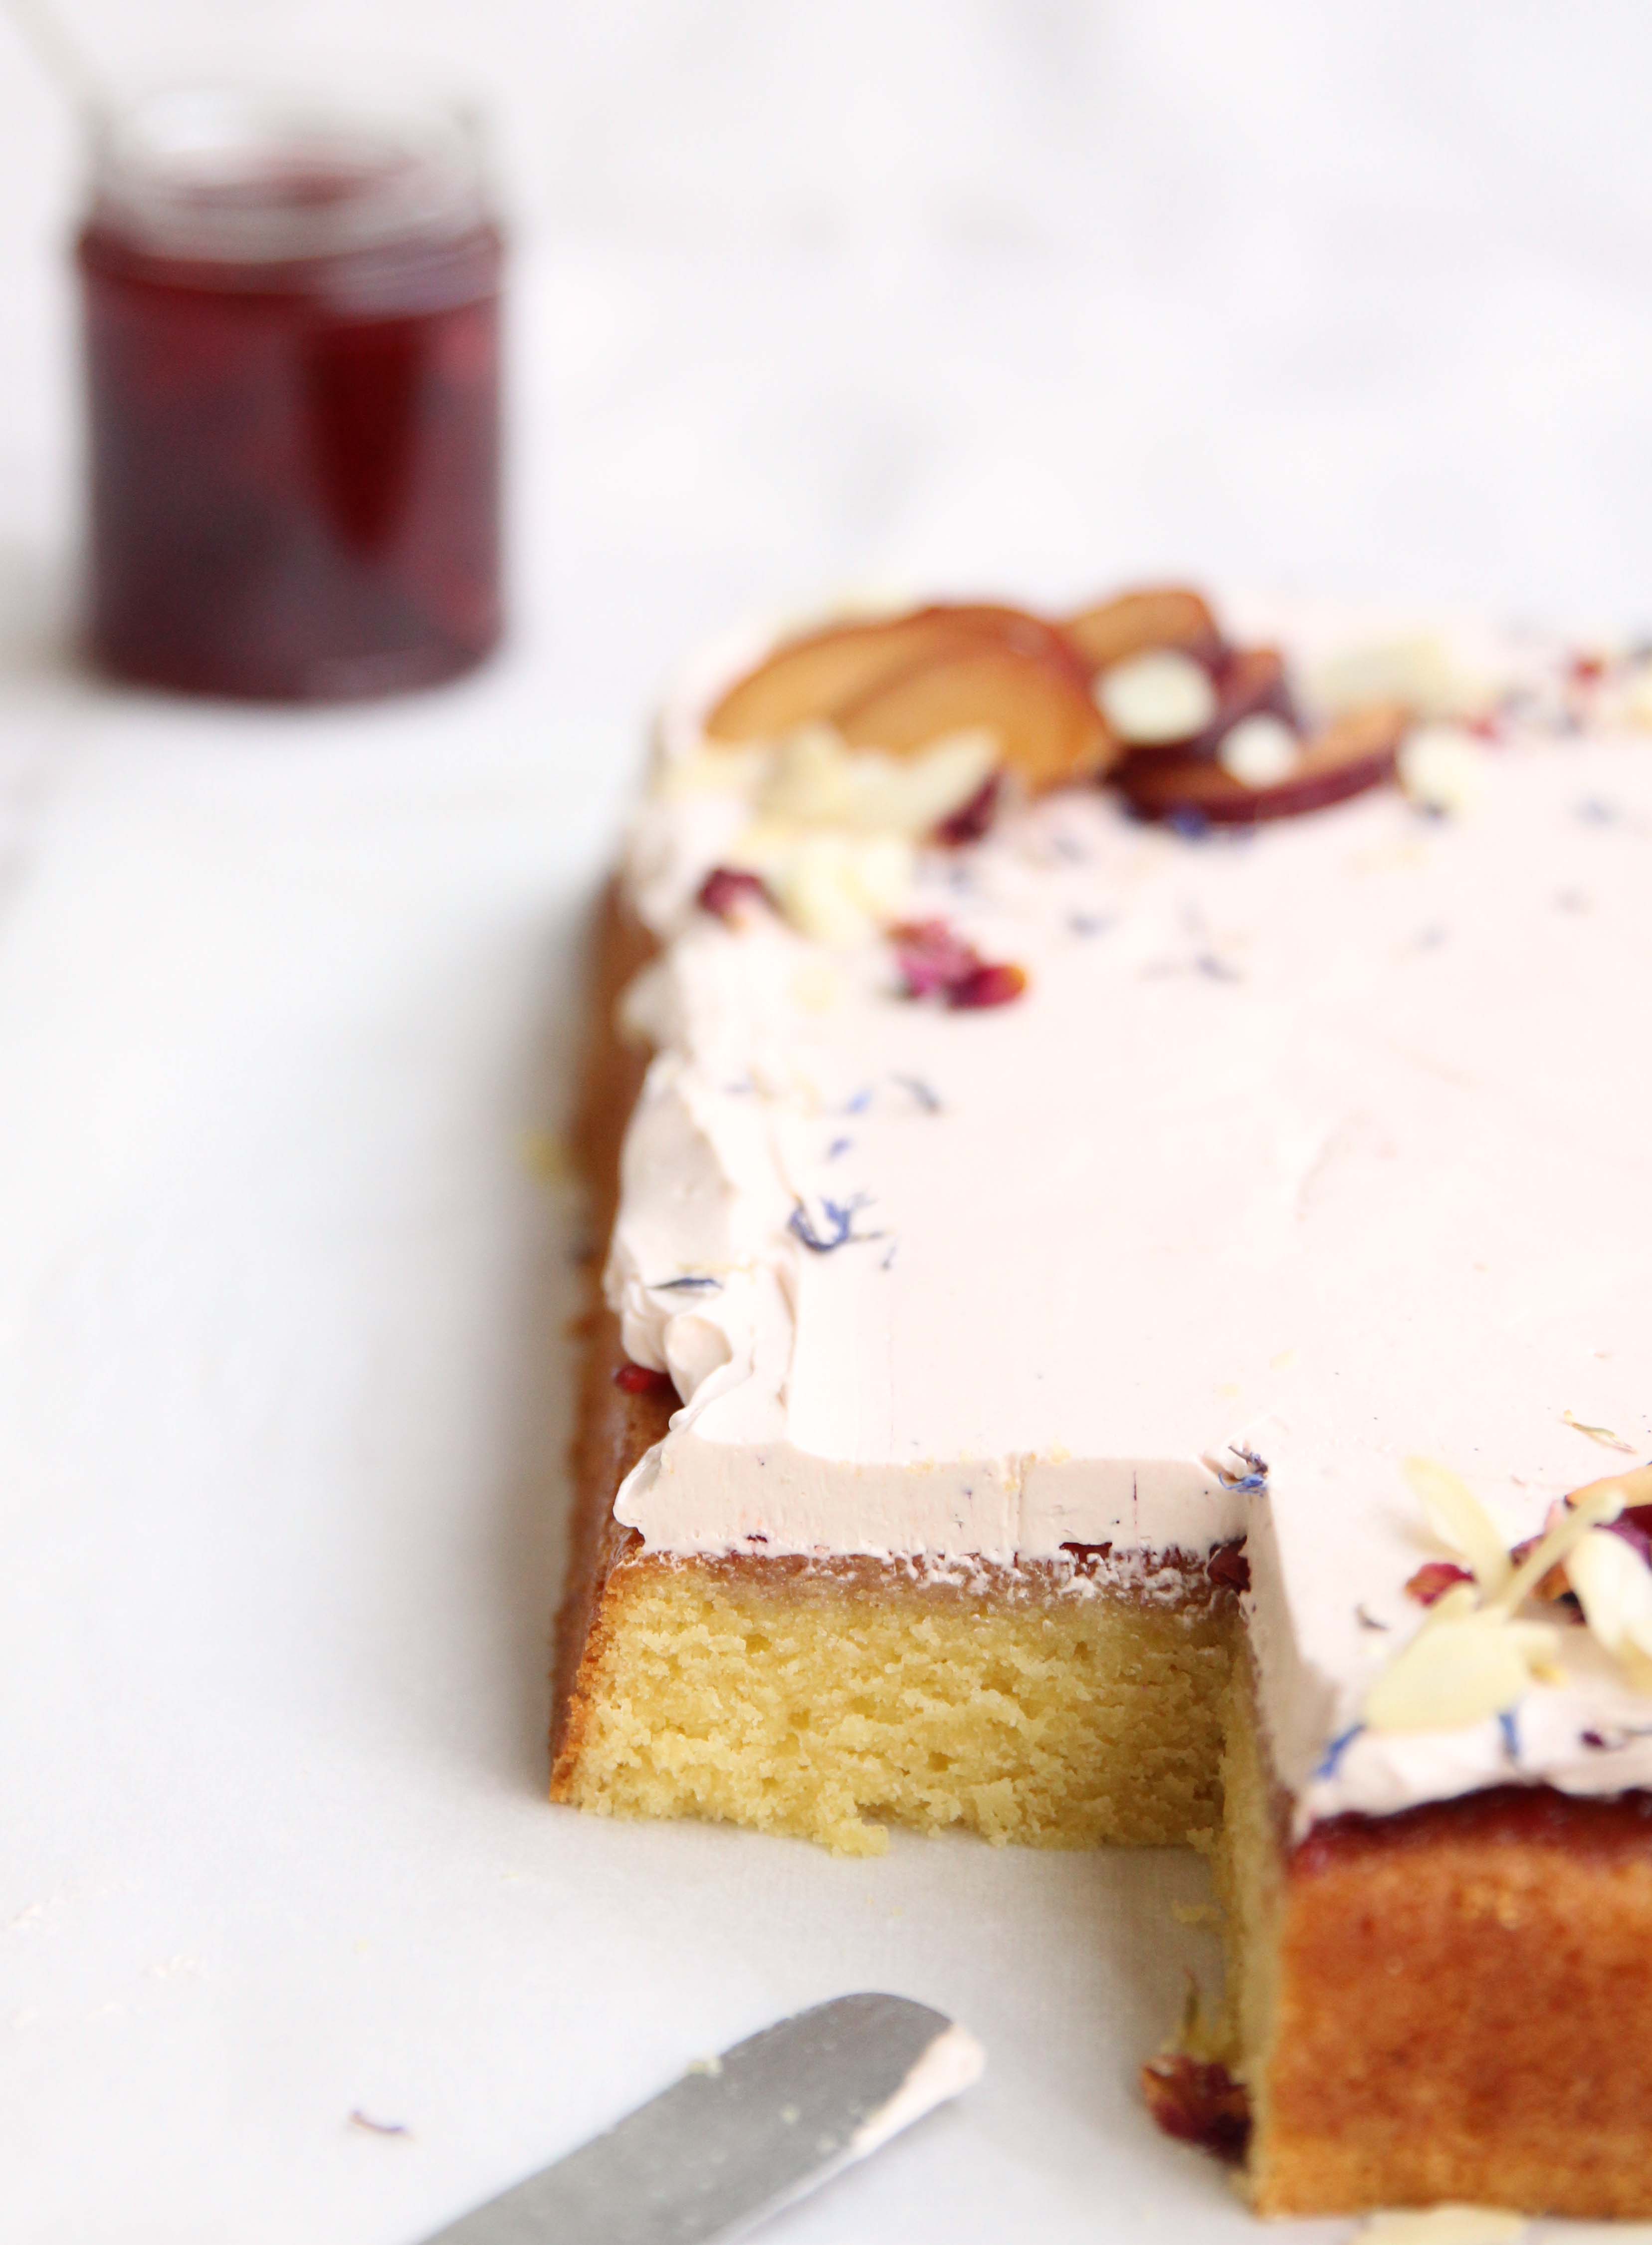
Almond Cake Recipe with Plum and Sweet Geranium Jam and Vanilla Bean Swiss Meringue Buttercream

Almond Plum Sweet Geranium Sheet Cake

The Flavours

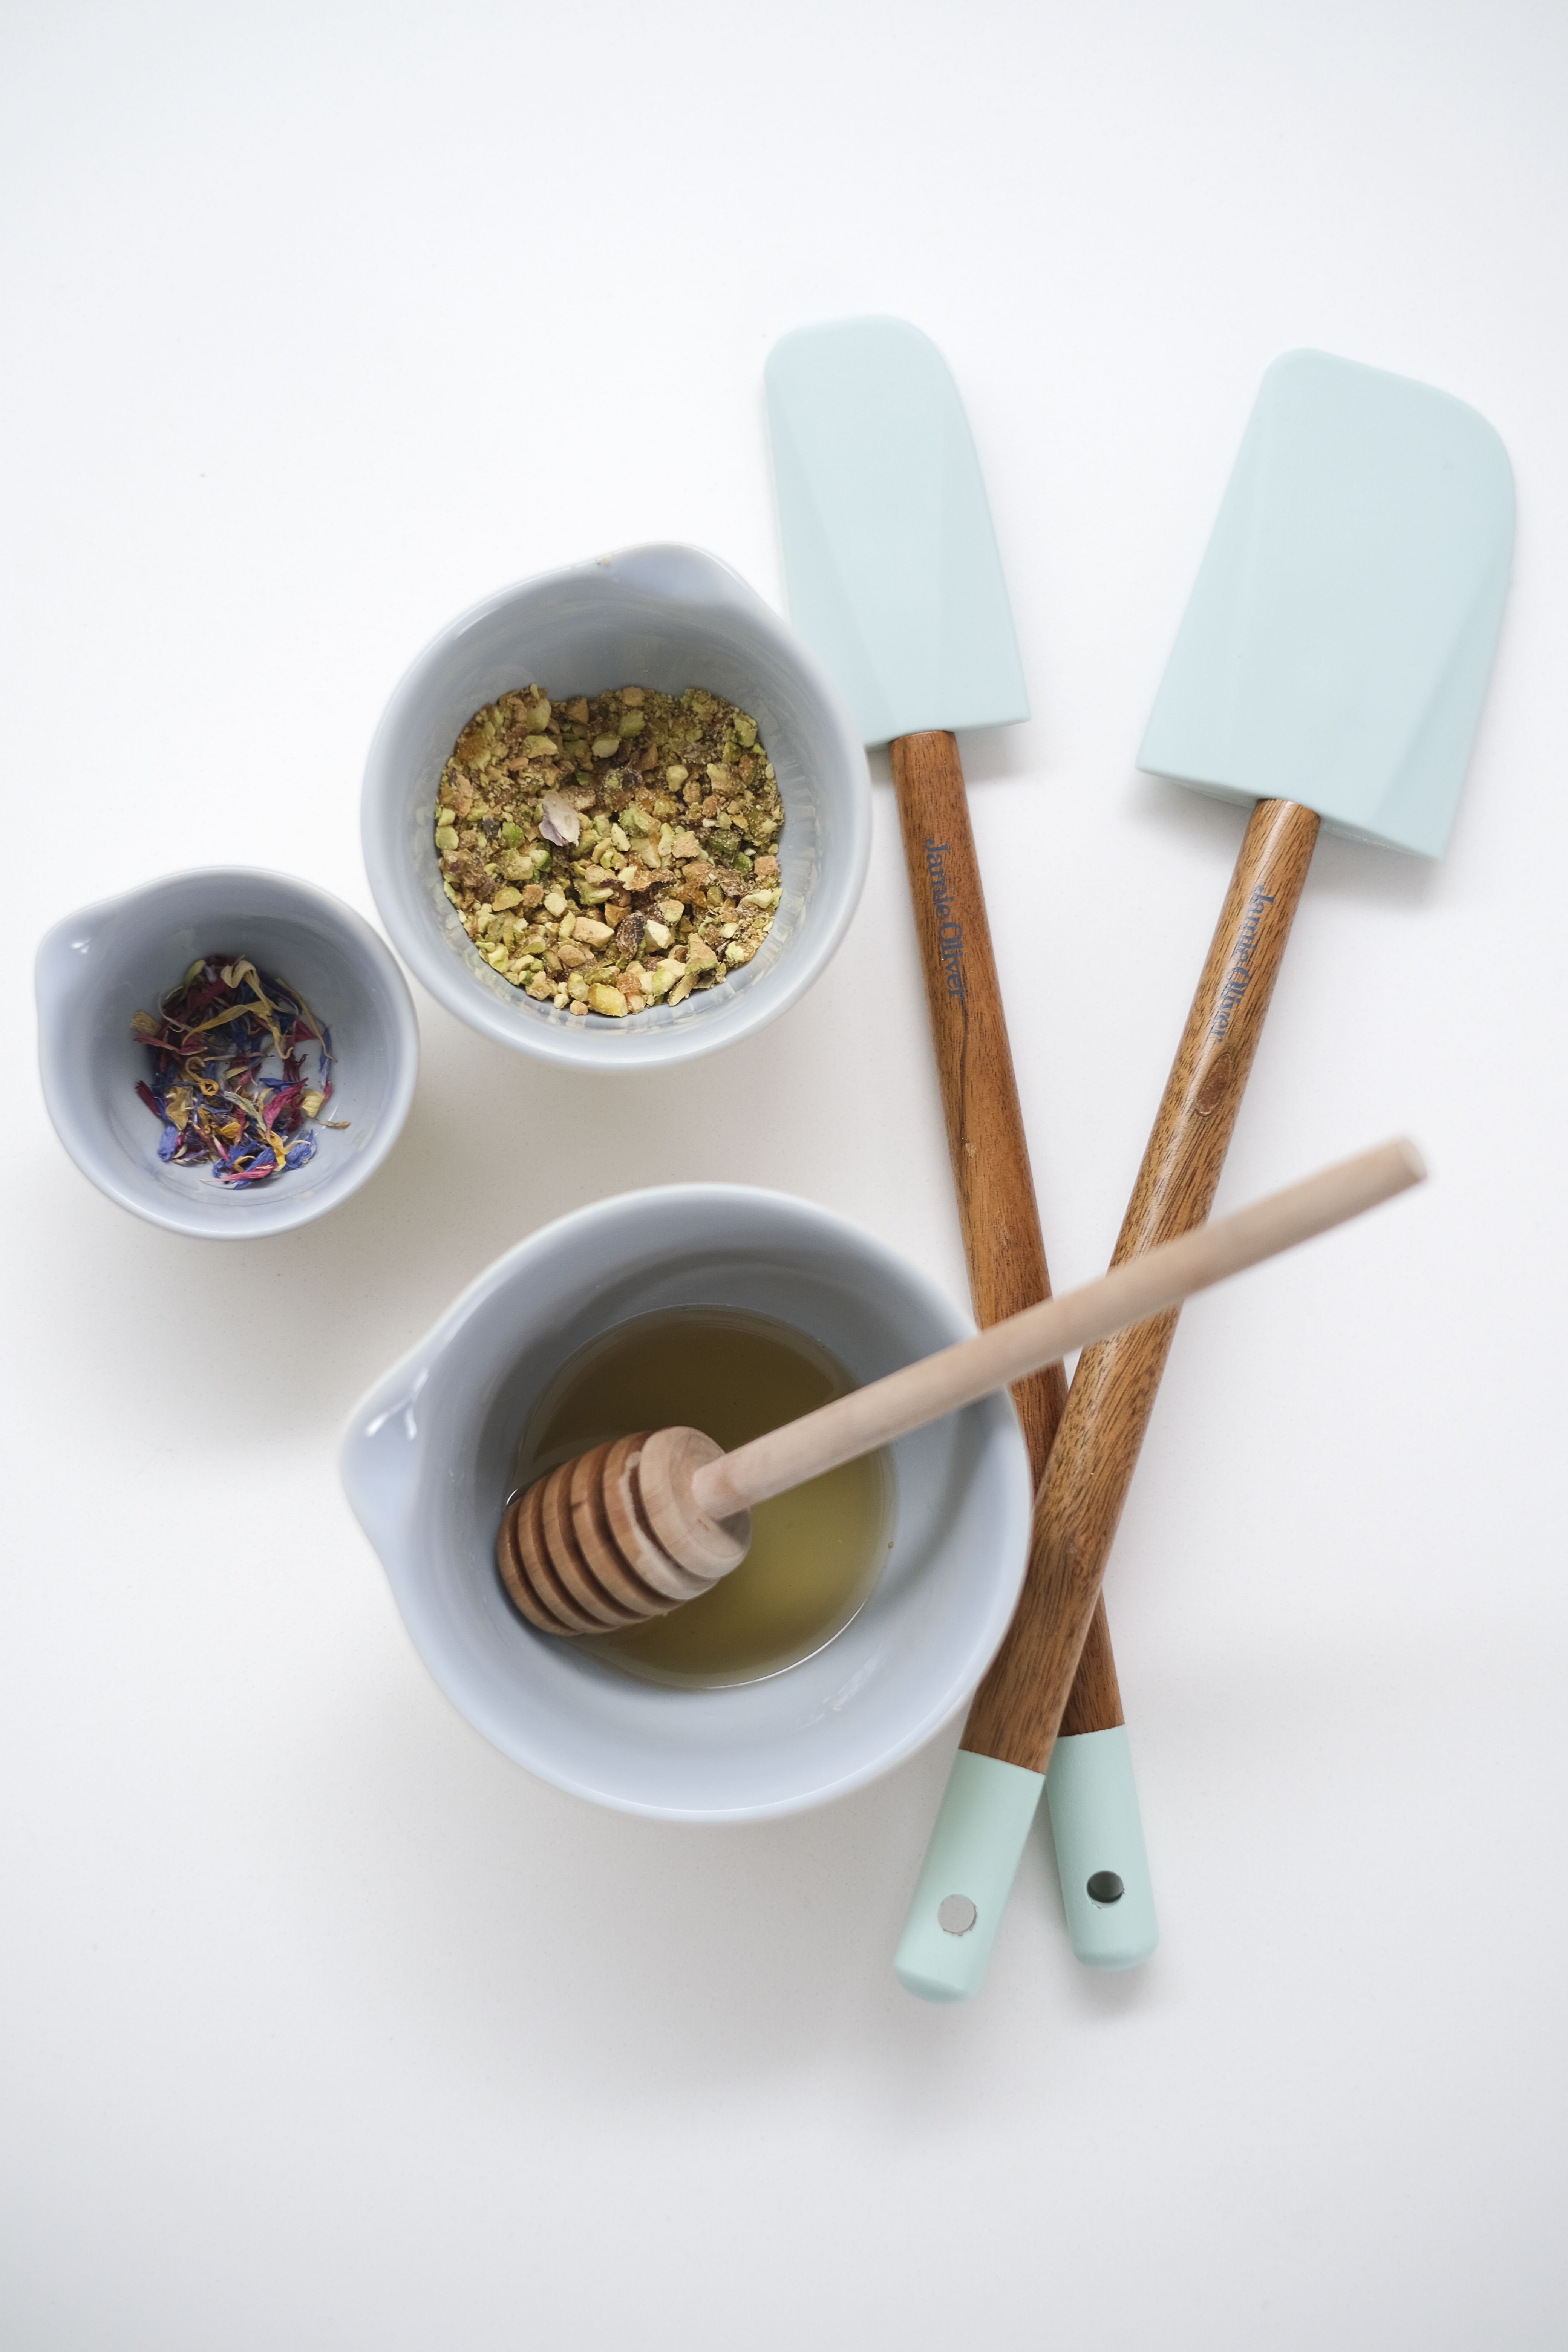
I only recently discovered scented rose geranium as a baking ingredient, having bought some at our local farmer’s market. While not the pretties of leaves, it releases a wonderfully delicate rose scented flavour simply by rubbing  to release the oils. It can be used in sweet dishes in a variety of ways, for example by infusing sugar to use in baking and desserts in place of normal sugar, or in scented syrups or jams. It pairs well with citrus flavours, fruits and spices.  I choose to use my geranium in a jam with plums, which happened to be in season at the time of late Autumn. It is quite possibly the best jam I have ever made! While we have been using it on toast and scones for several weeks, I finally satisfied my original intention of using it as a cake filling by creating this delicious recipe for Almond Cake with Plum and Geranium Jam and Vanilla Bean Swiss Meringue Buttercream.

The Almond Cake

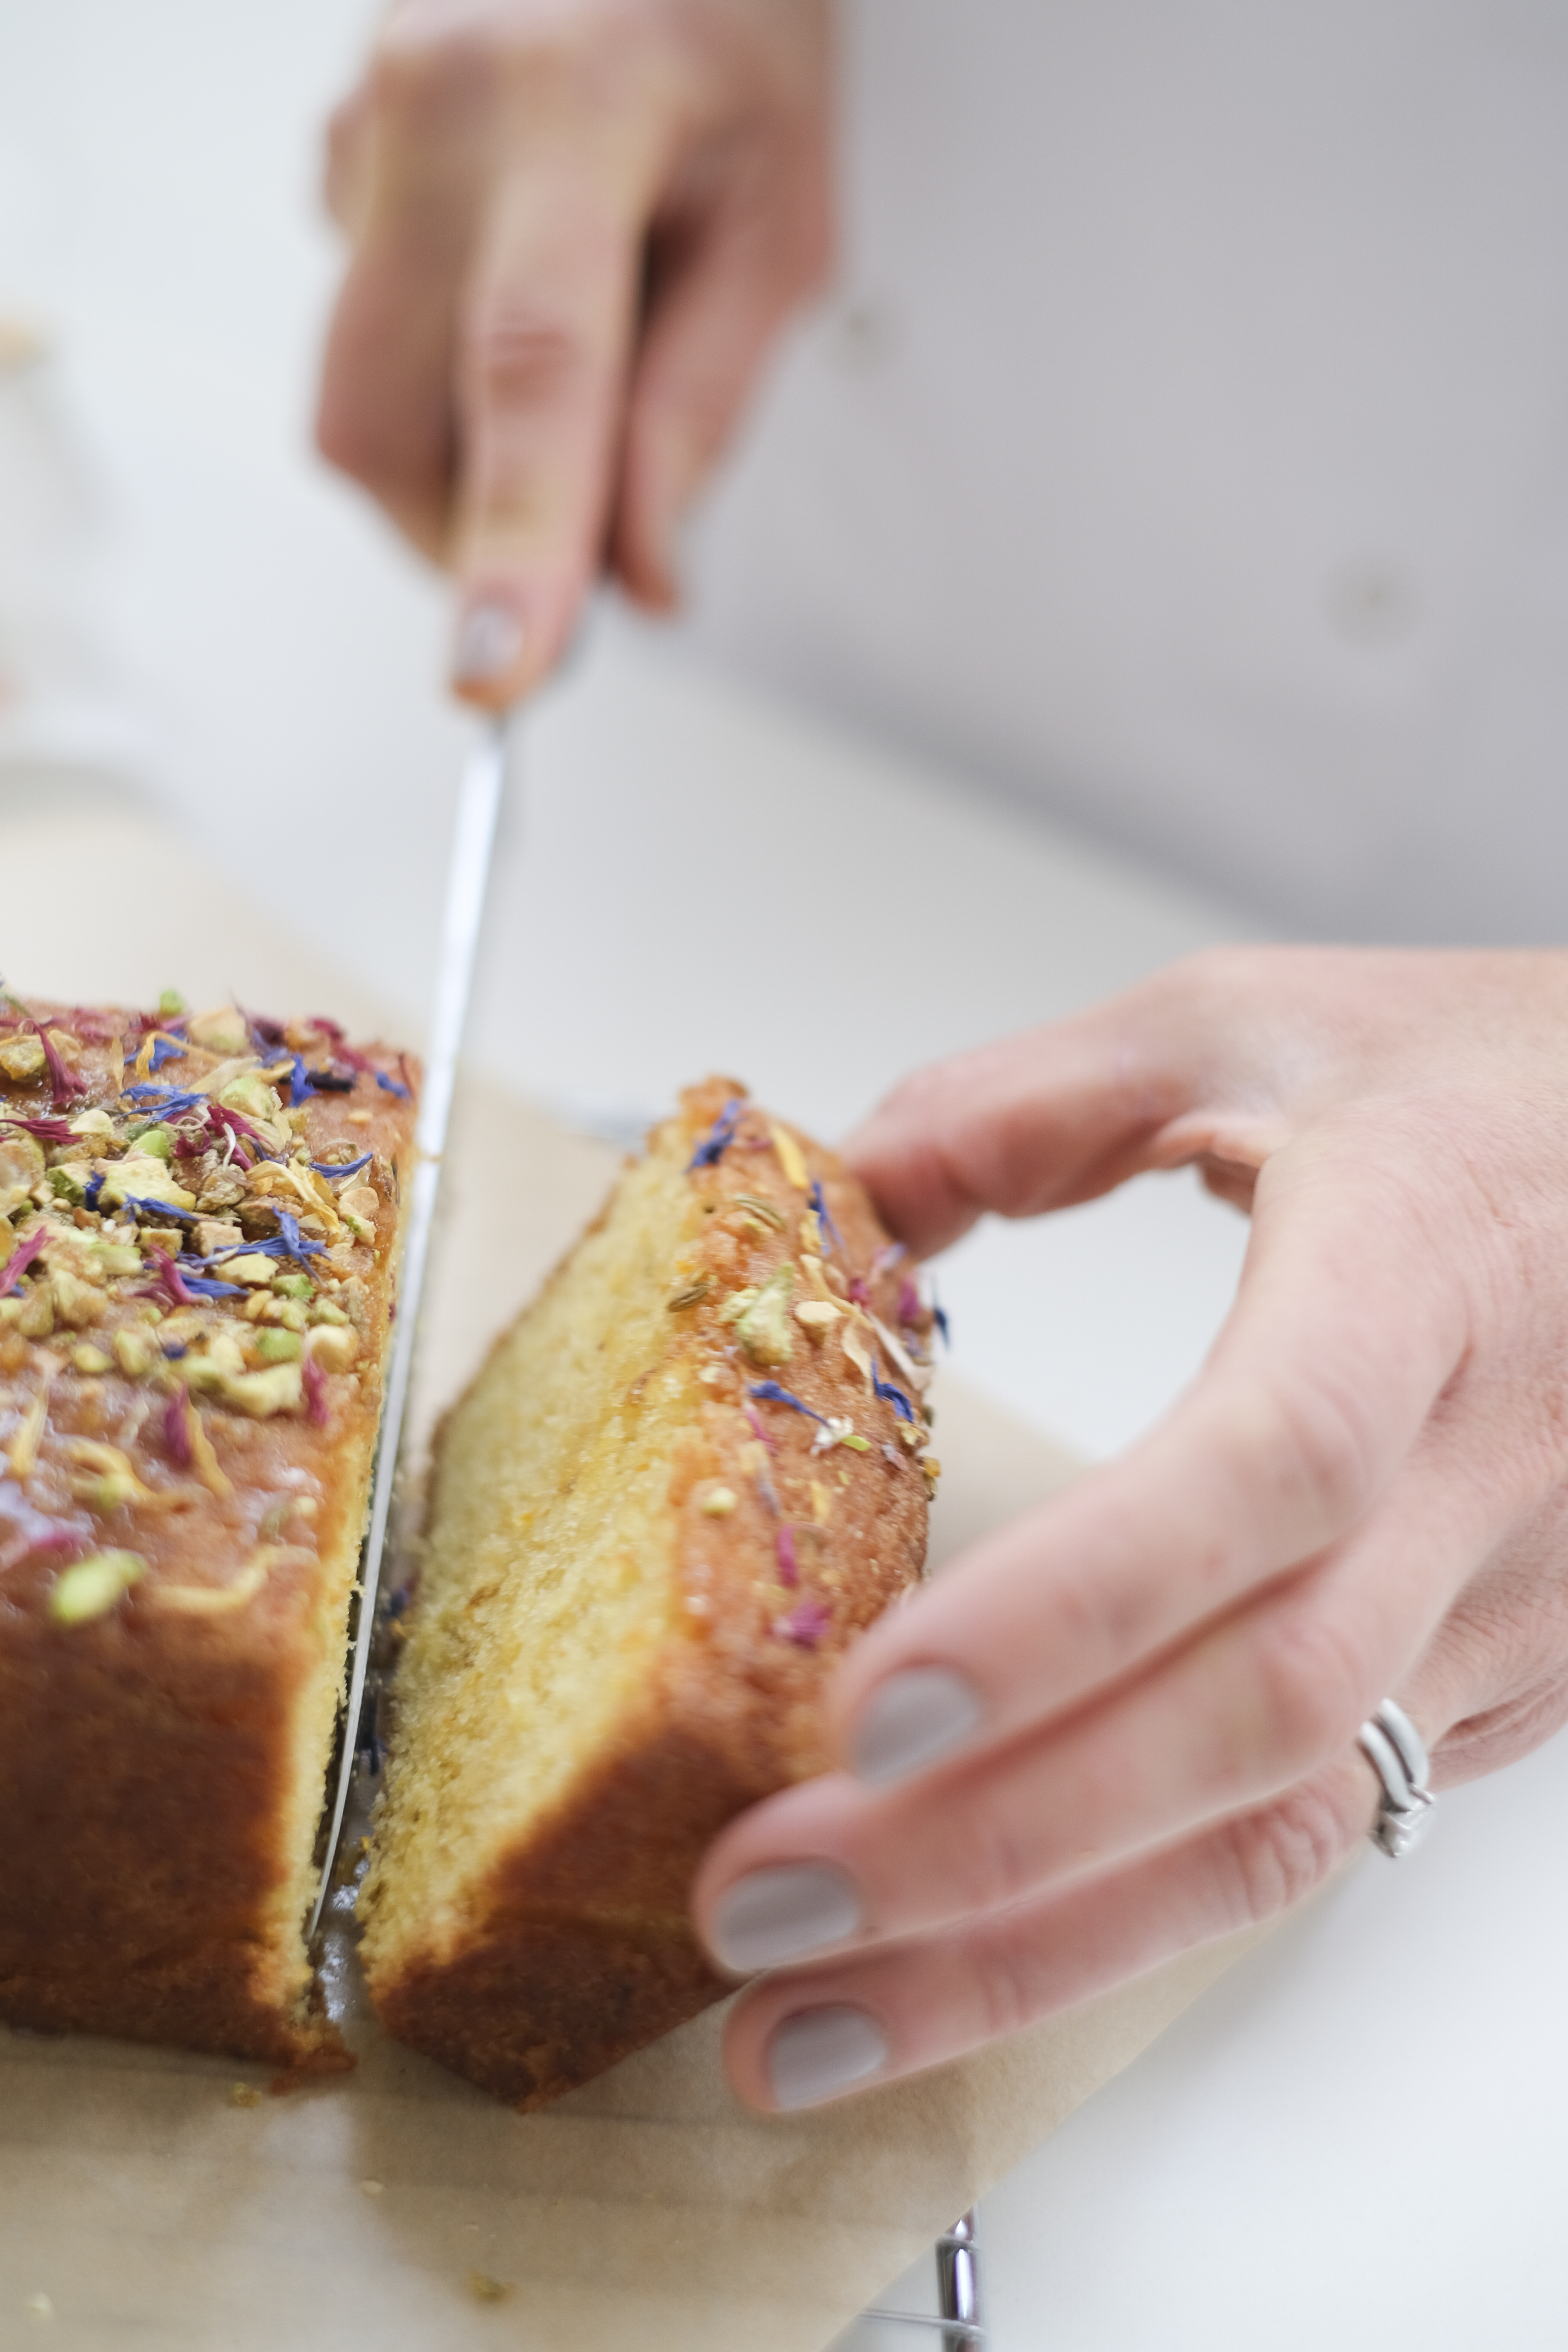
I chose to make this as a tray or sheet cake. I will tell no lies, I was in a bit of a rush and didn’t have the time to consider layering and icing in my usual way. And actually I quite like the informality of a tray cake; it is easy to cut and serve for a casual teatime treat! The large surface is a perfect canvas for decorative prettiness too!

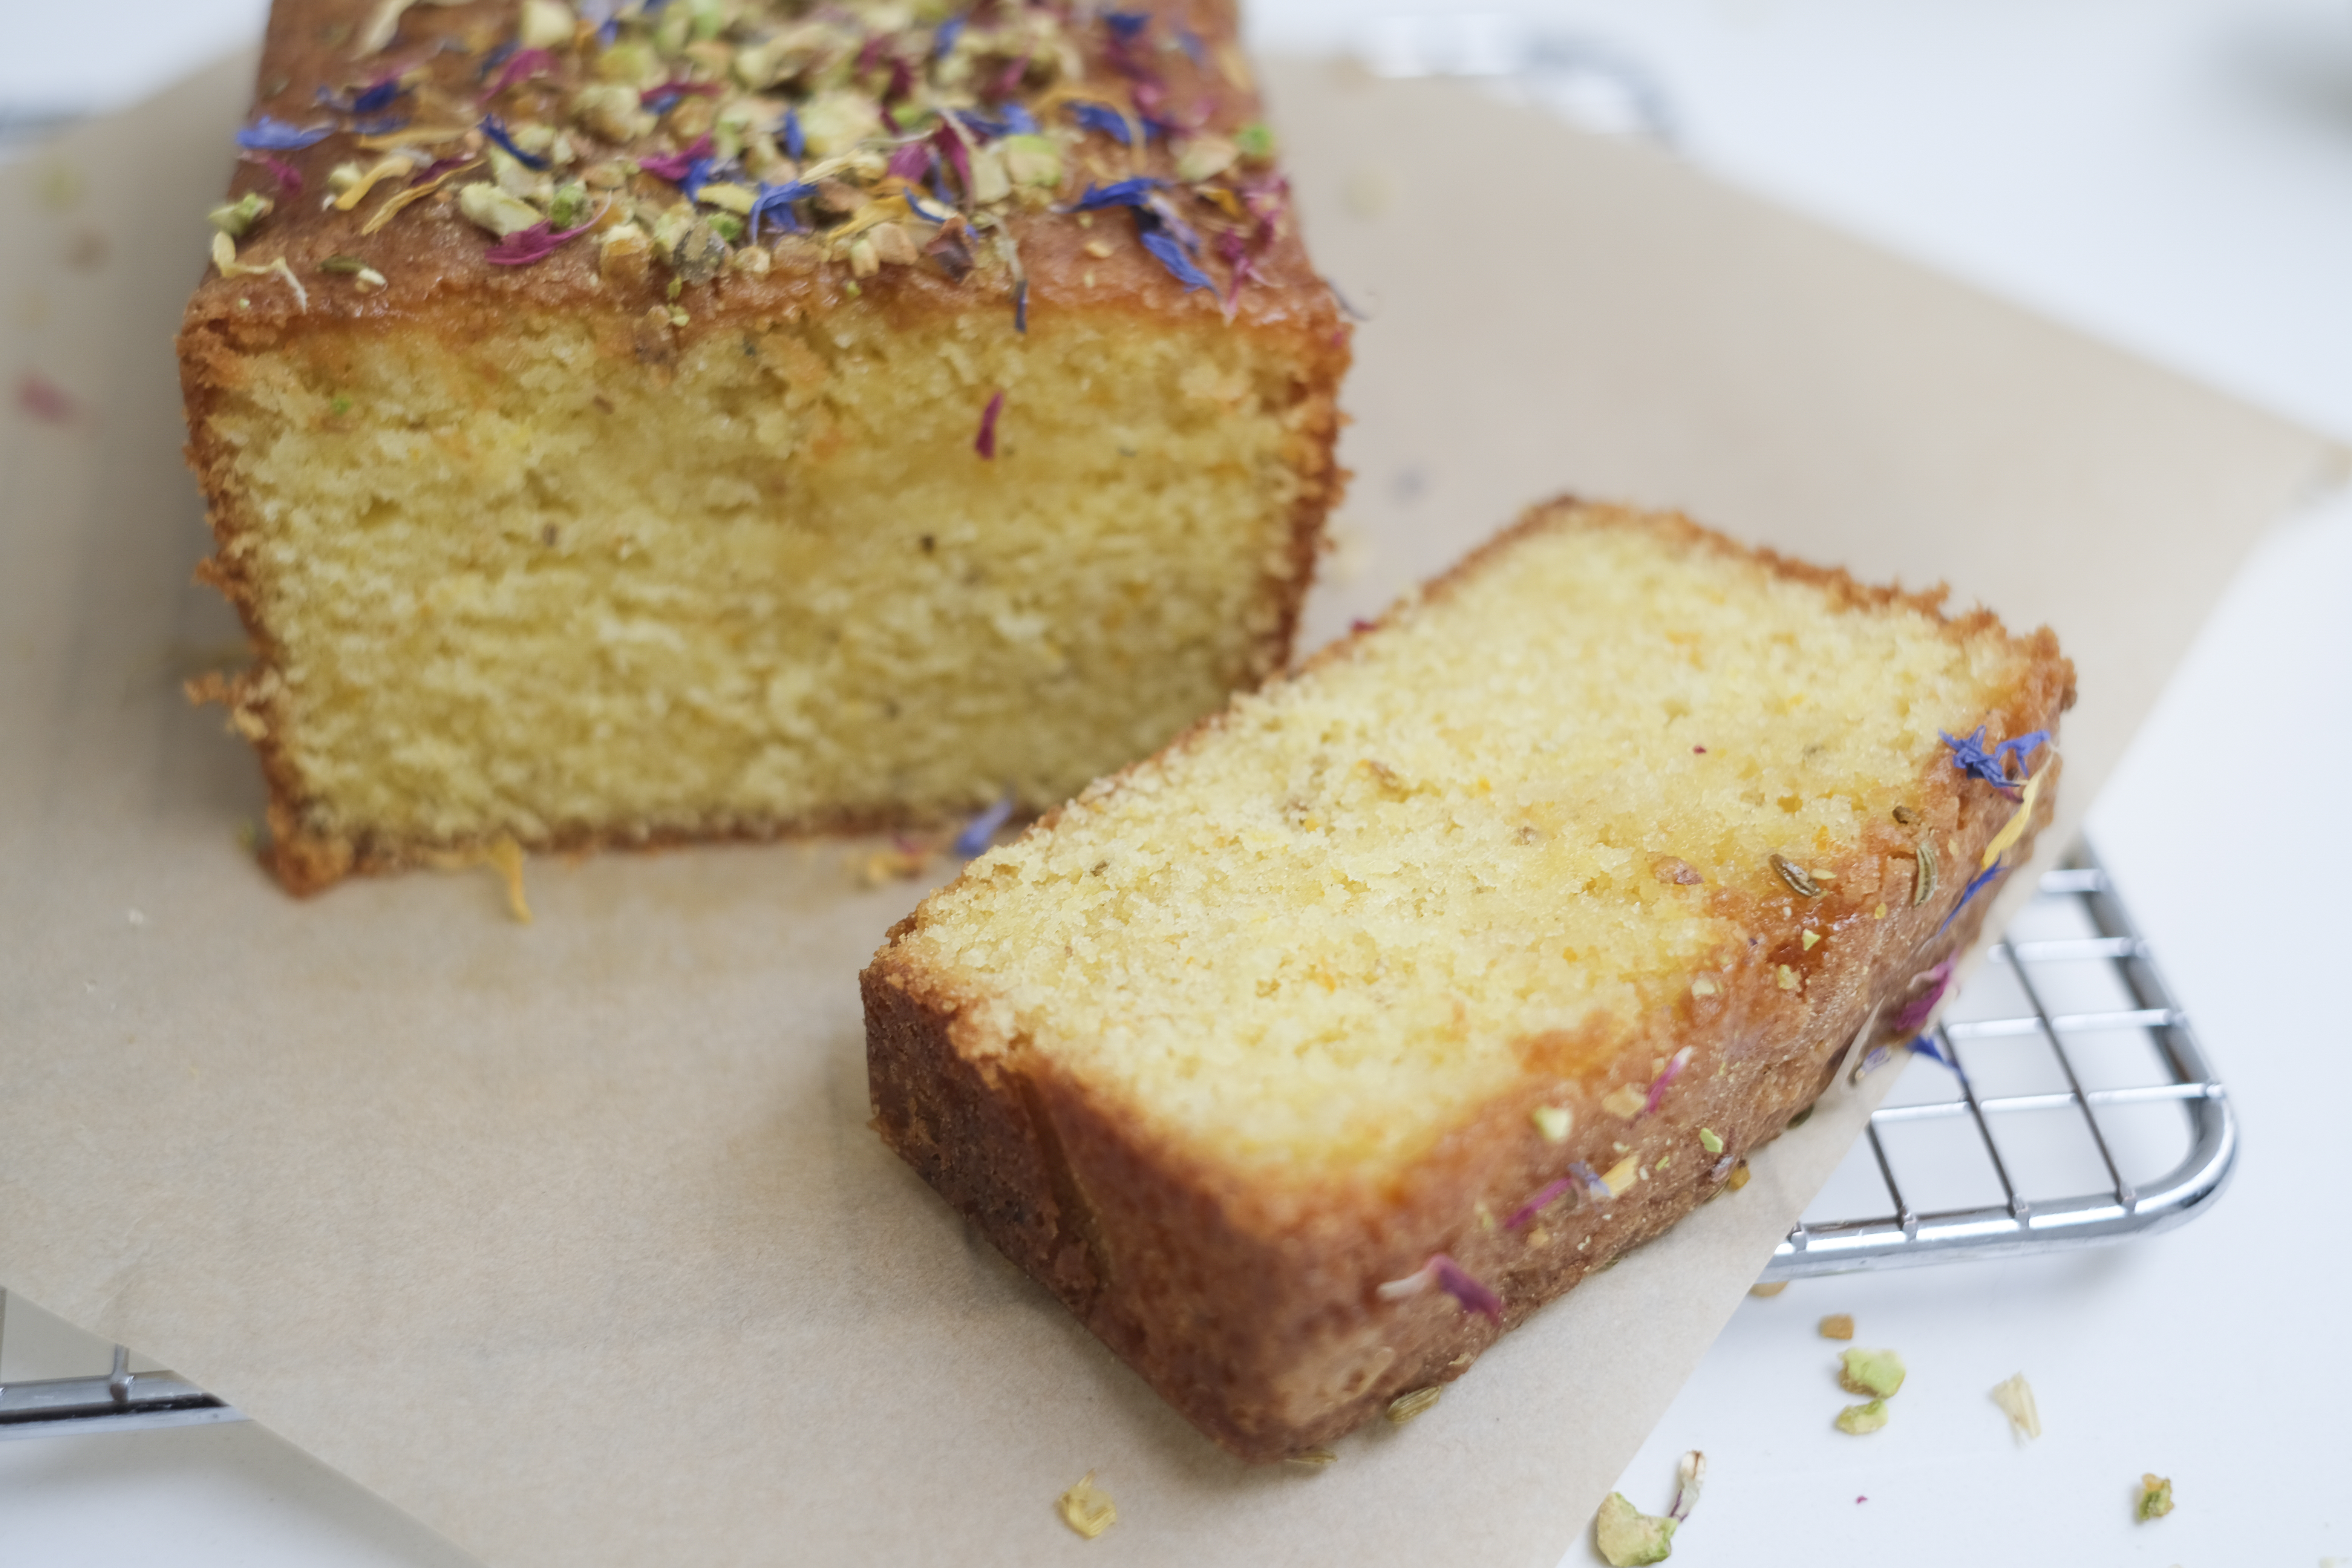
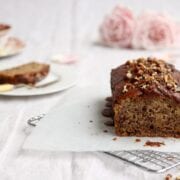
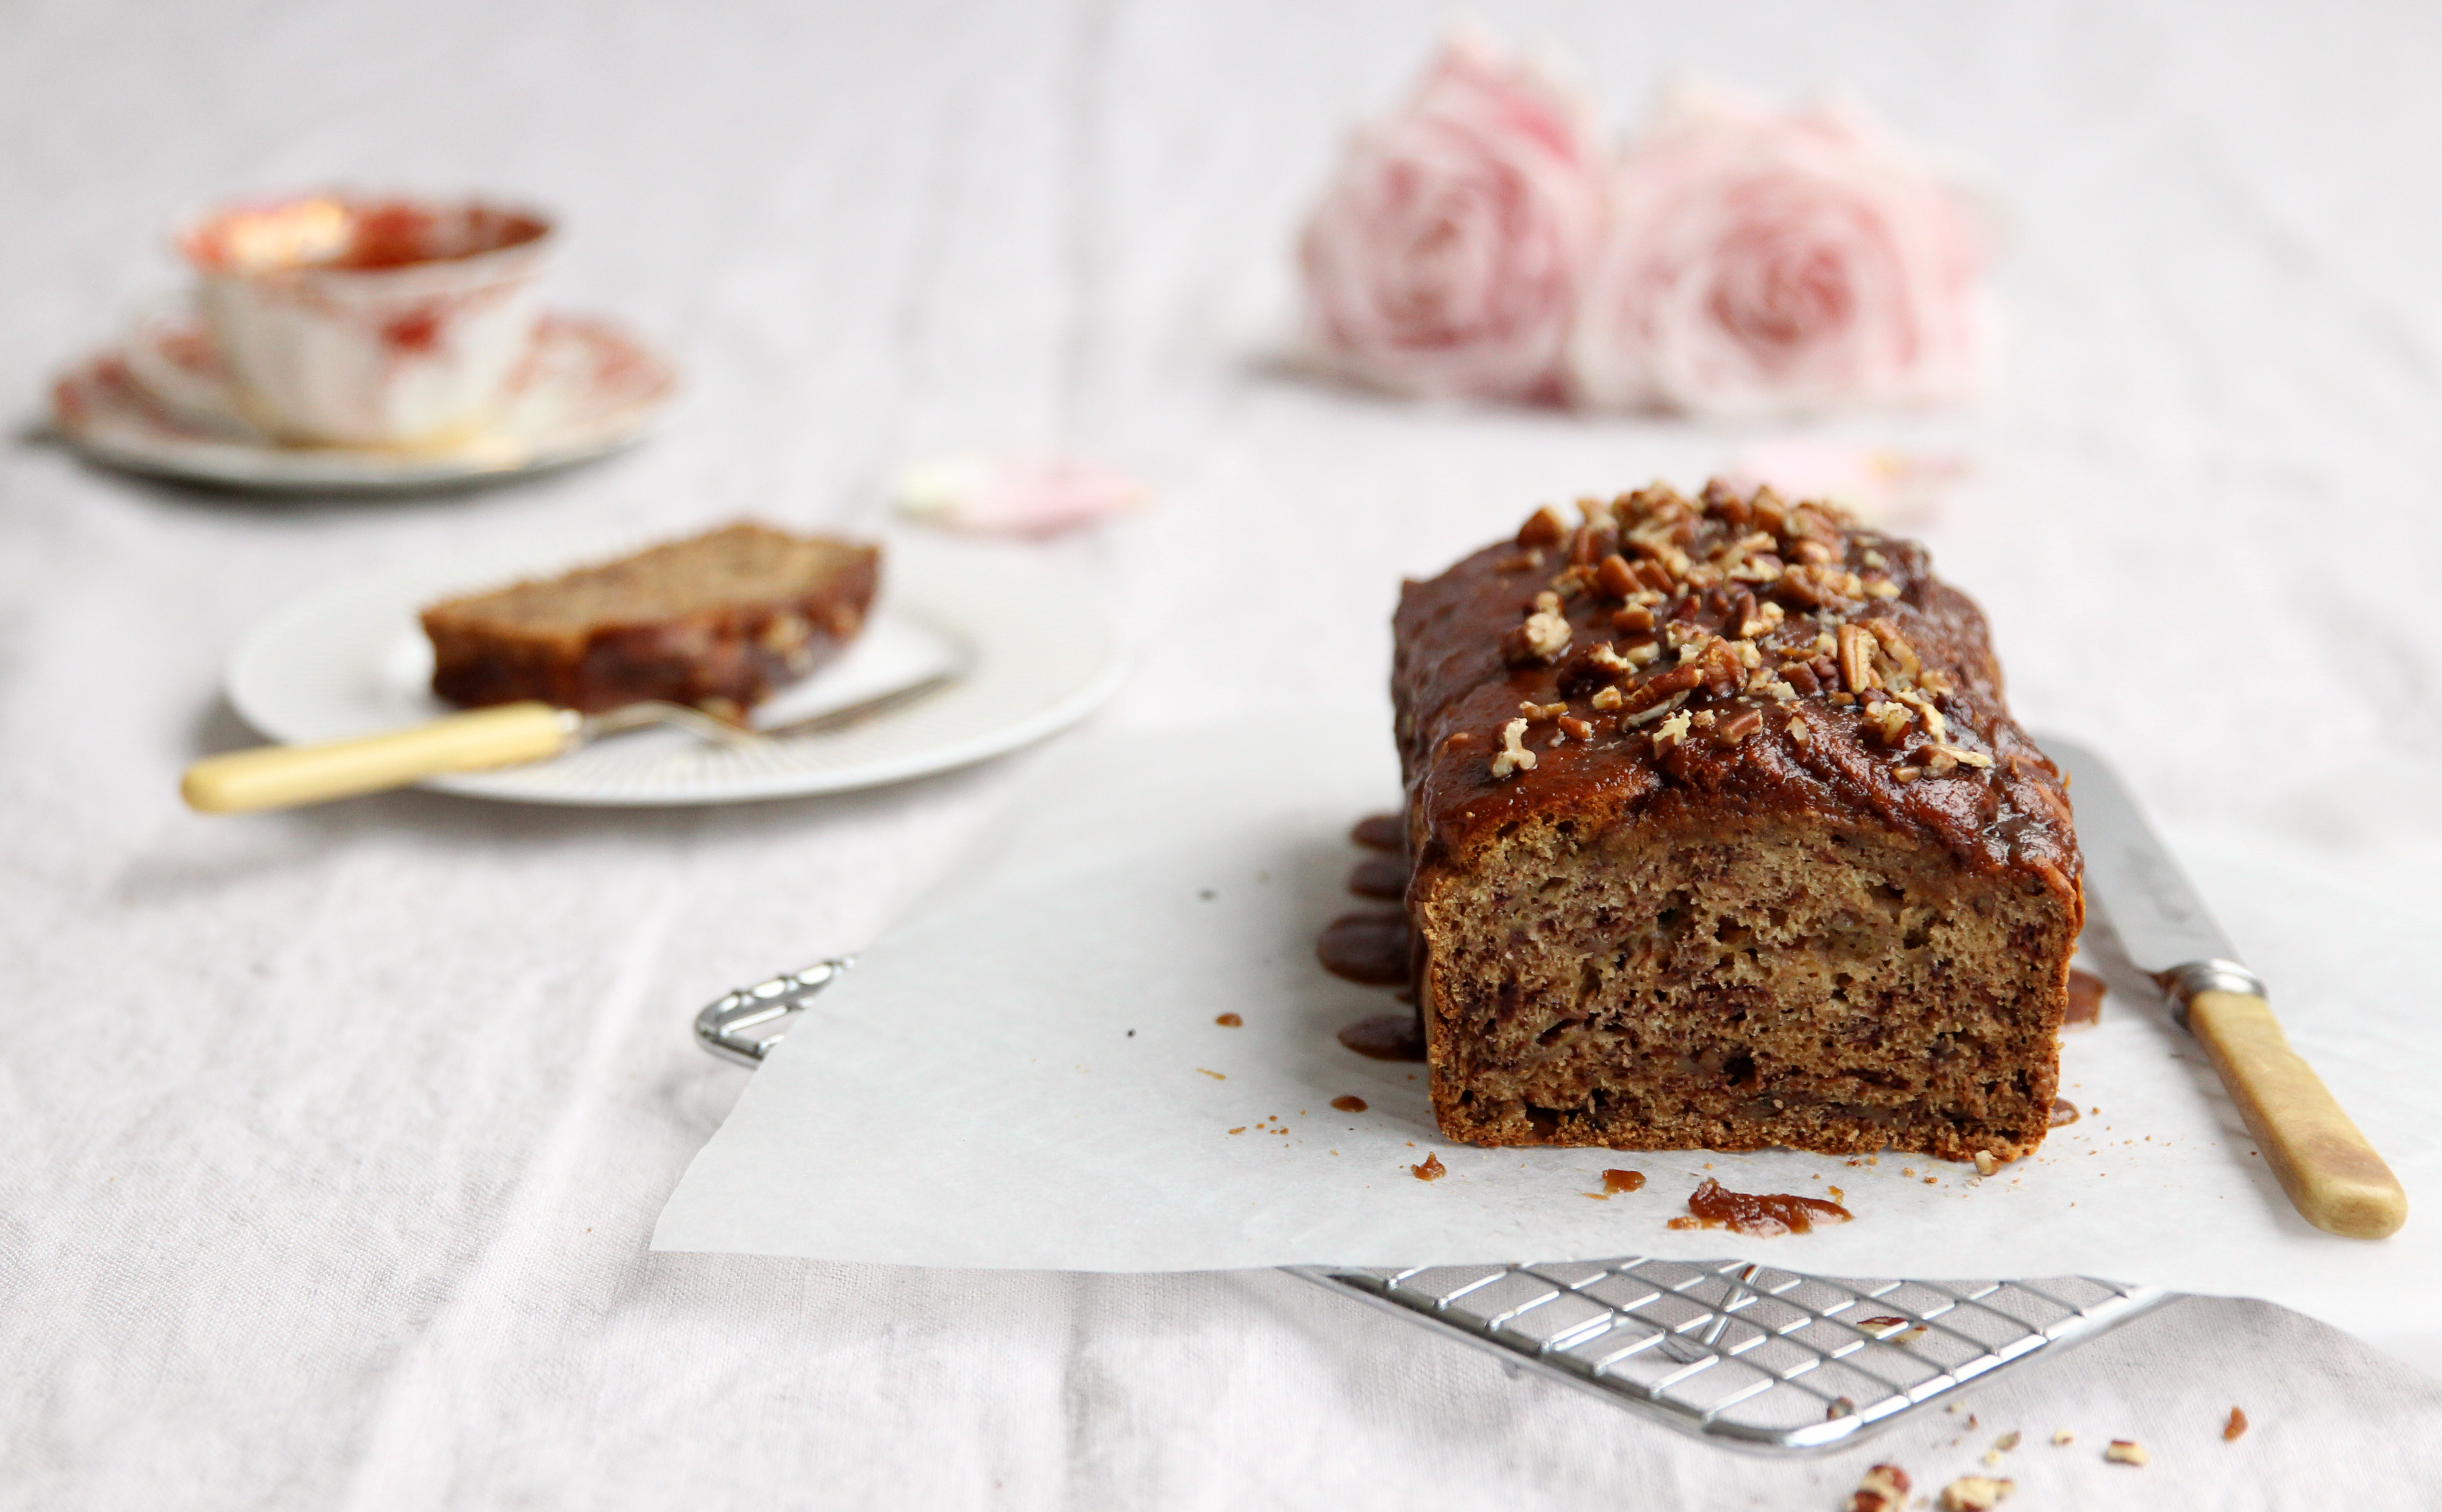
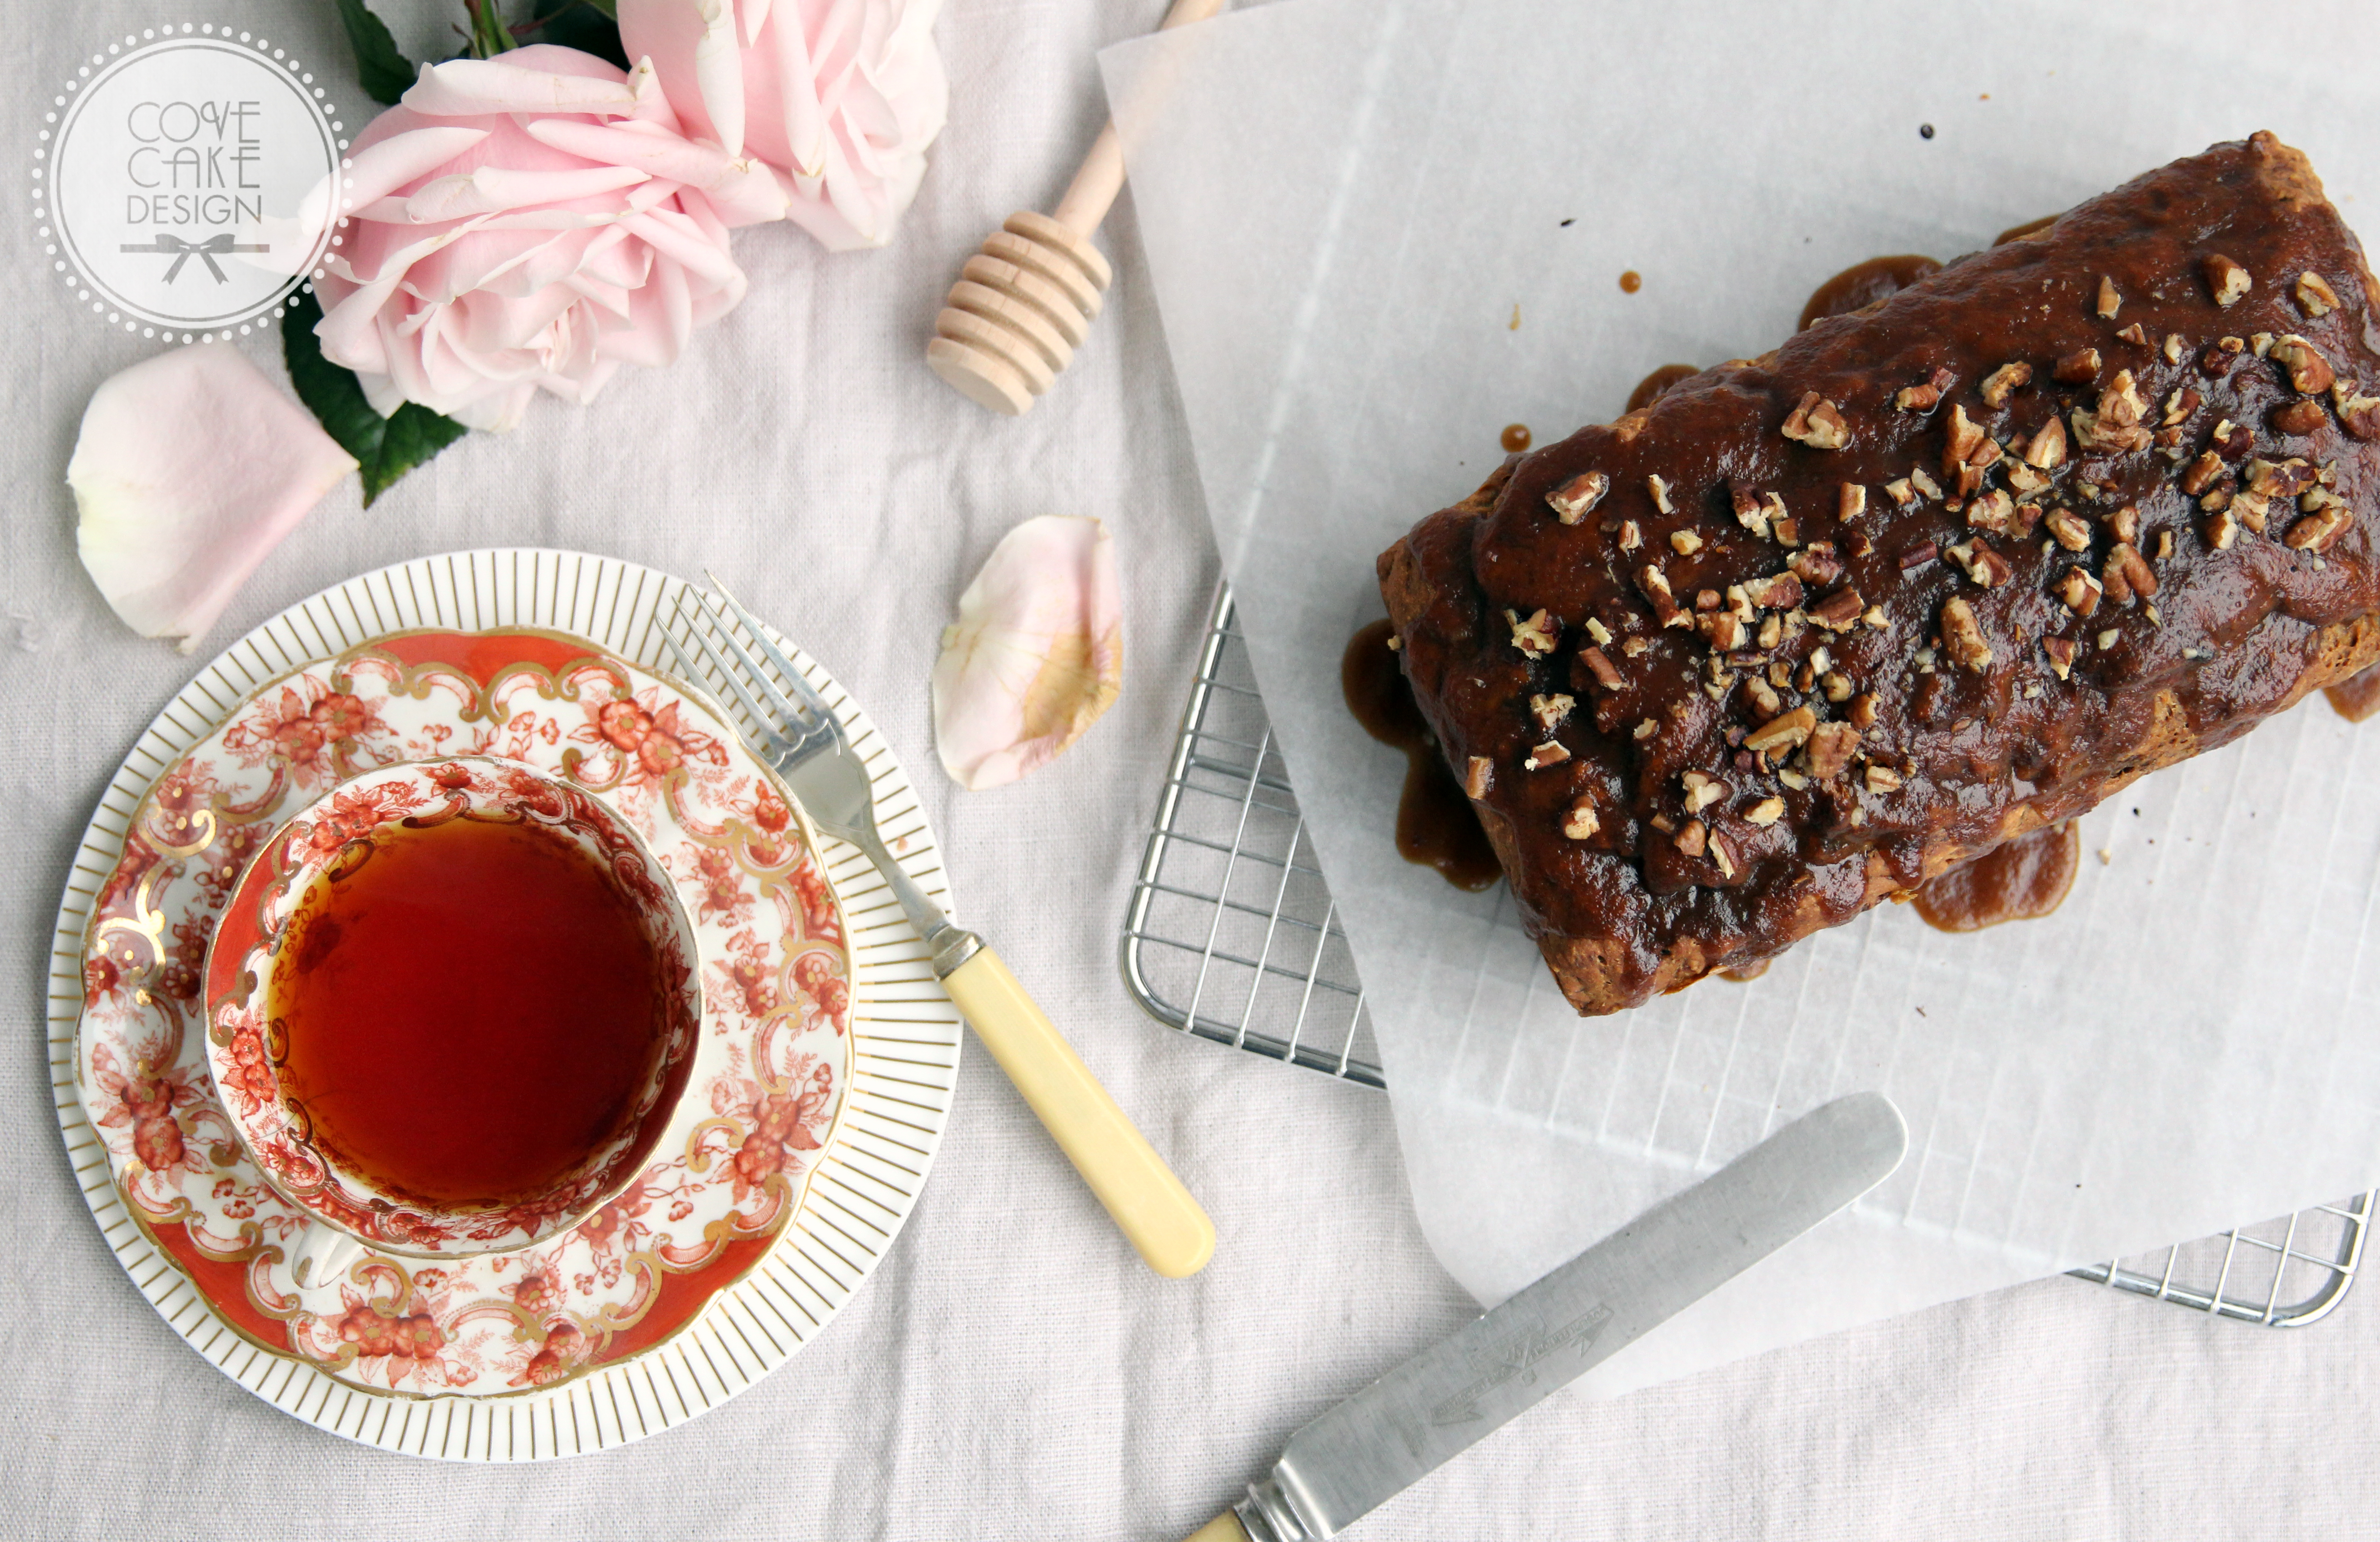
The almond cake is particularly dense and moist, and is a classic pairing with the plum jam. The sweet geranium in the jam adds just the right amount of floral fragrance.  I used quite a few geranium leaves but feel free to adjust this flavour to your preference.  You could also try making the jam with geranium-infused sugar, rather than the chopped leaves I have used here, although this would take a little more forward-planning. I chose a vanilla Swiss meringue buttercream for a simple, light and complimentary flavour.
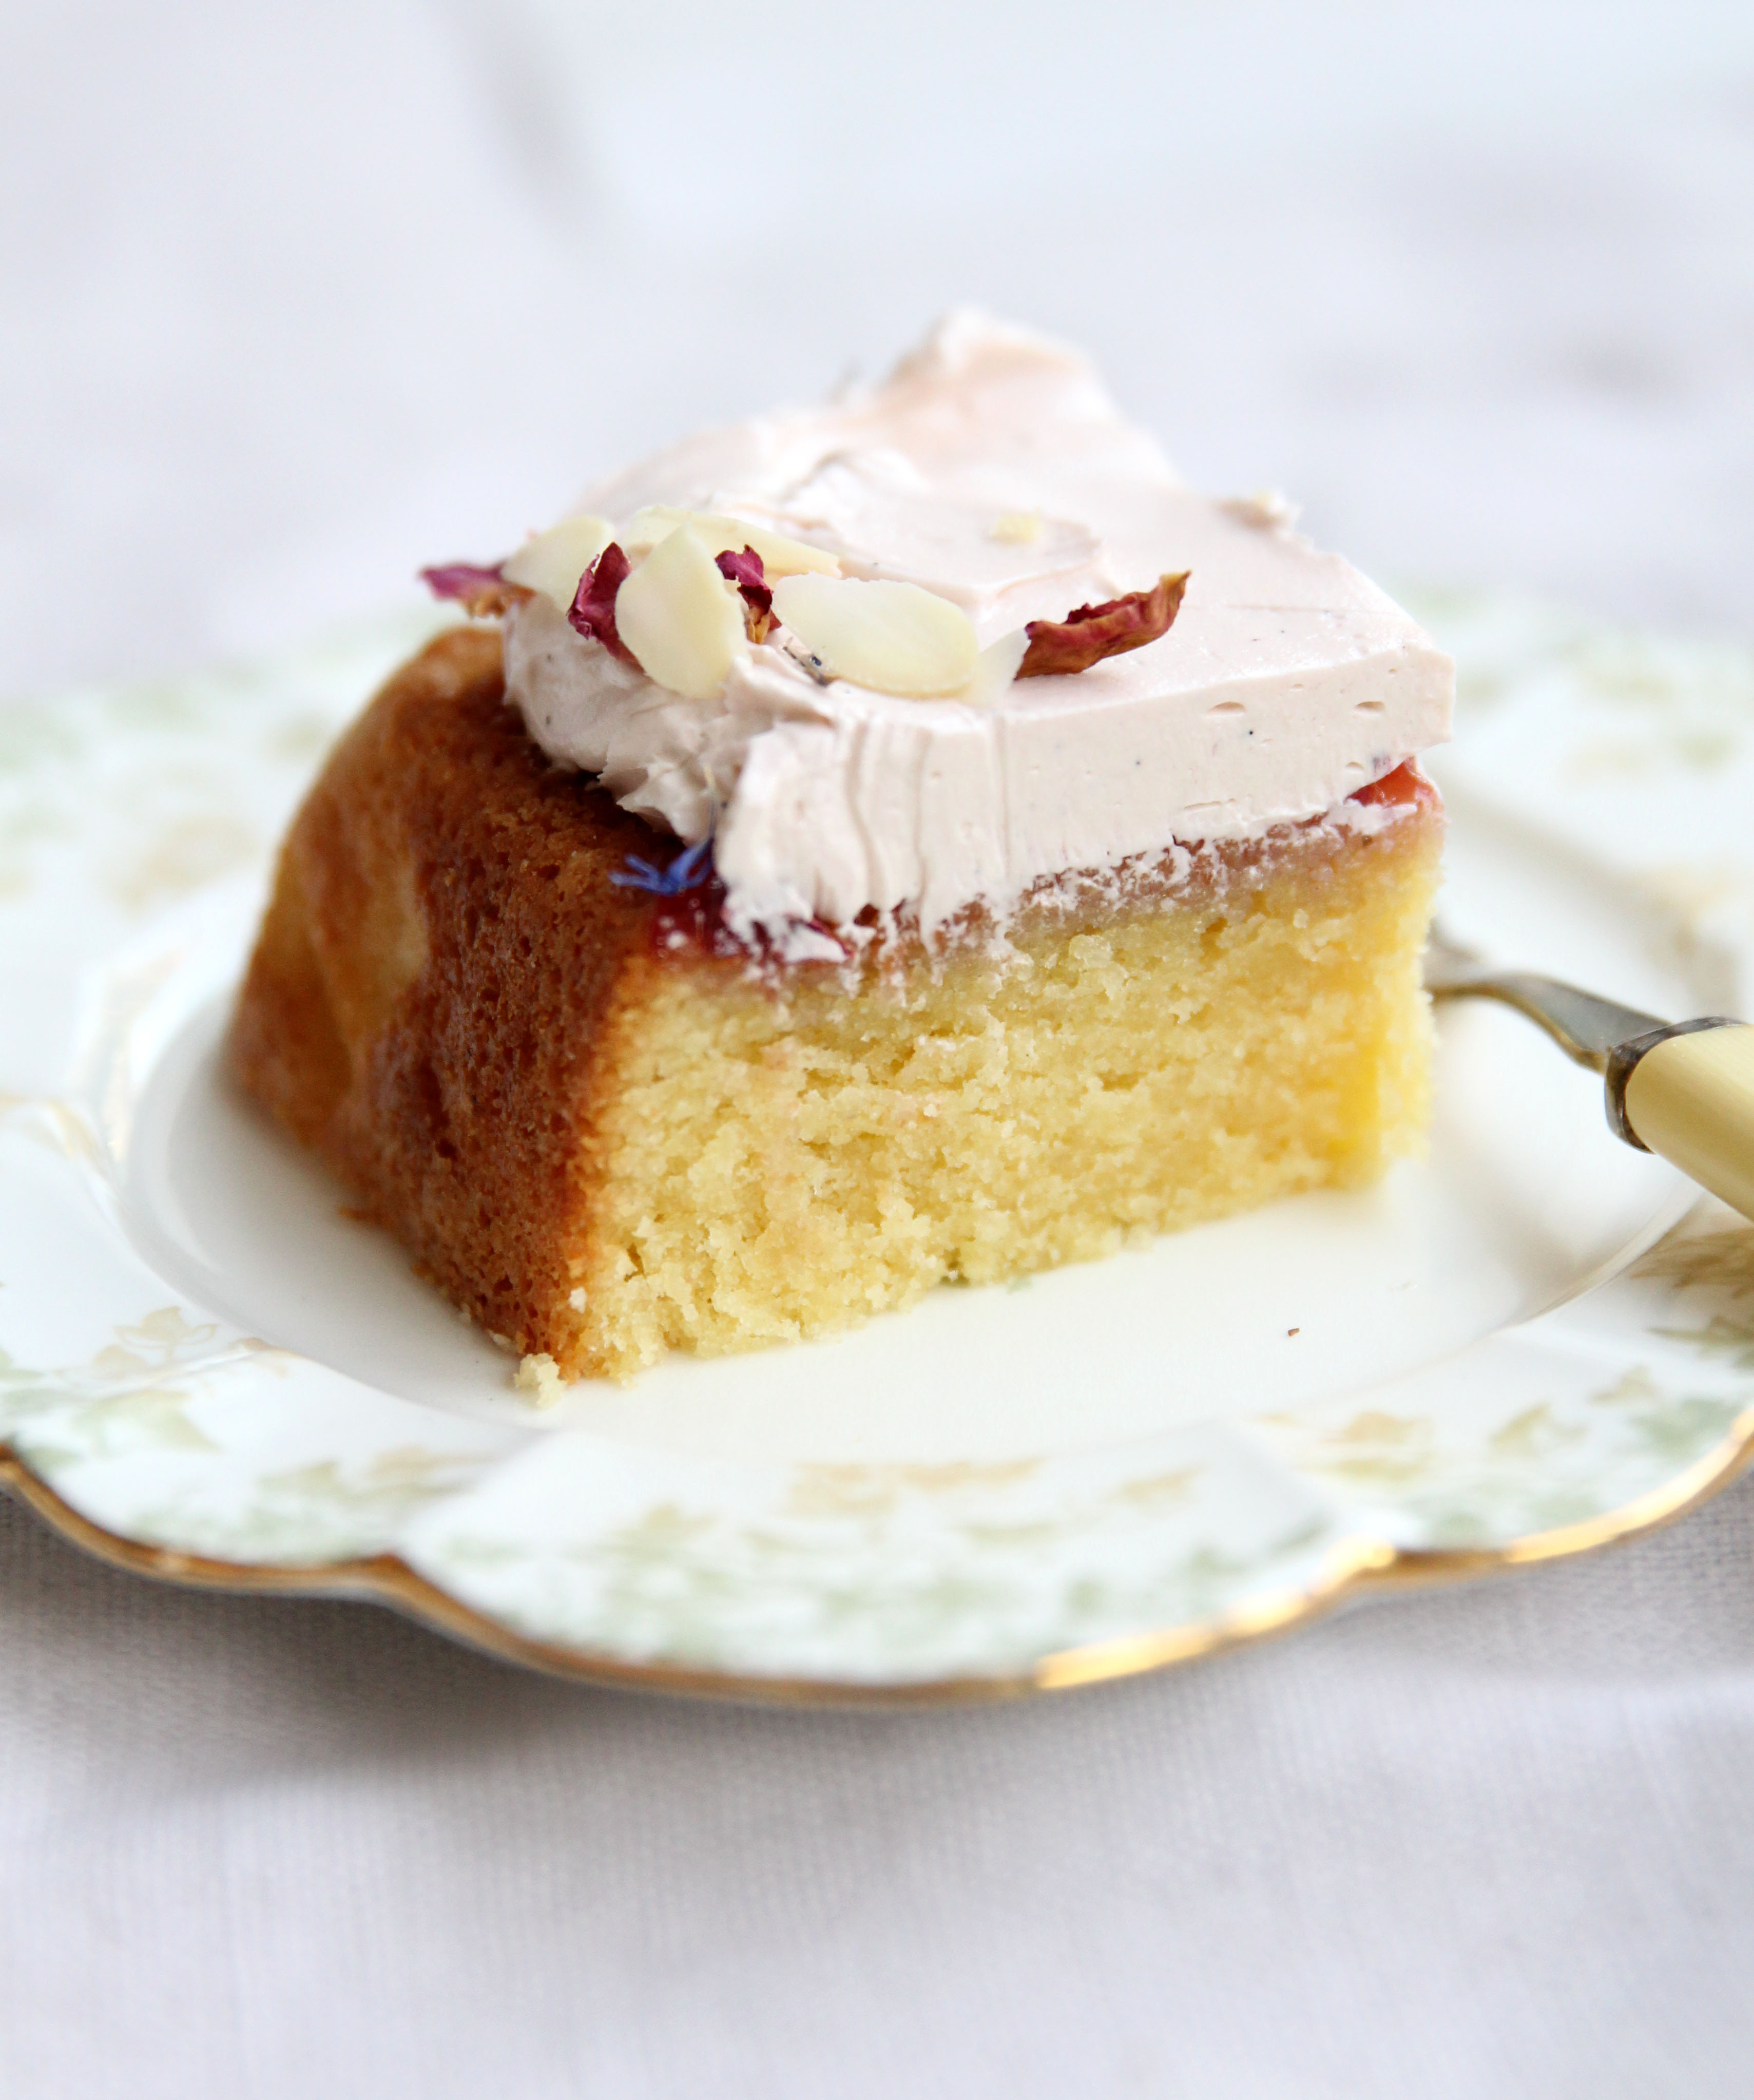
Plum Jam

The quantities for the jam makes much more than you need, but store in sealed sterilised jars and use it in other bakes, or simply enjoy on your favourite toast, croissant or scone! If you can’t find geranium or seasonal plums, this cake and buttercream recipe works well with other similar fruity floral combinations, try shop bought raspberry jam with a little rosewater added for an even quicker but equally delicious cake.

Swiss Meringue Buttercream

Similarly the Swiss meringue buttercream makes more than required. However as this is a more labour-intensive buttercream than the straightforward recipe of mixing icing sugar and butter, I always go for the larger quantity and freeze leftover icing for my next bake. You can of course halve the quantities if you don’t envisage using it again in the foreseeable future.

Enjoy!

I was delighted to donate this bake to my local community Crosscare cafe, which offers hot meals and a warm and friendly environment for those in need. Spread love with cake!

Happy baking!

Suzanne x

Almond Cake with Plum and Sweet Geranium Jam and Vanilla Bean Swiss Meringue Buttercream

Ingredients for the cake:

  • 400g unsalted butter
  • 400g caster sugar
  • 6 eggs
  • 100g plain flour
  • 250g ground almonds
  • Pinch salt
  • Few drops almond essence (optional)
  • 4-6tbsp milk

Ingredients for Plum Jam:

  • 900g plums (washed, dried, stoned and sliced)
  • 700g caster sugar
  • 5-6 large sweet geranium leaves, finely chopped
  • Juice one lemon

Ingredients for the Vanilla Swiss Meringue Buttercream:

  • 300g fresh egg whites (about 10 eggs)
  • 500g caster sugar
  • 680g unsalted butter, cool but not cold
  • seeds 1 vanilla pod
  • pinch salt
  • pink paste food colouring (optional)

For decoration (optional):
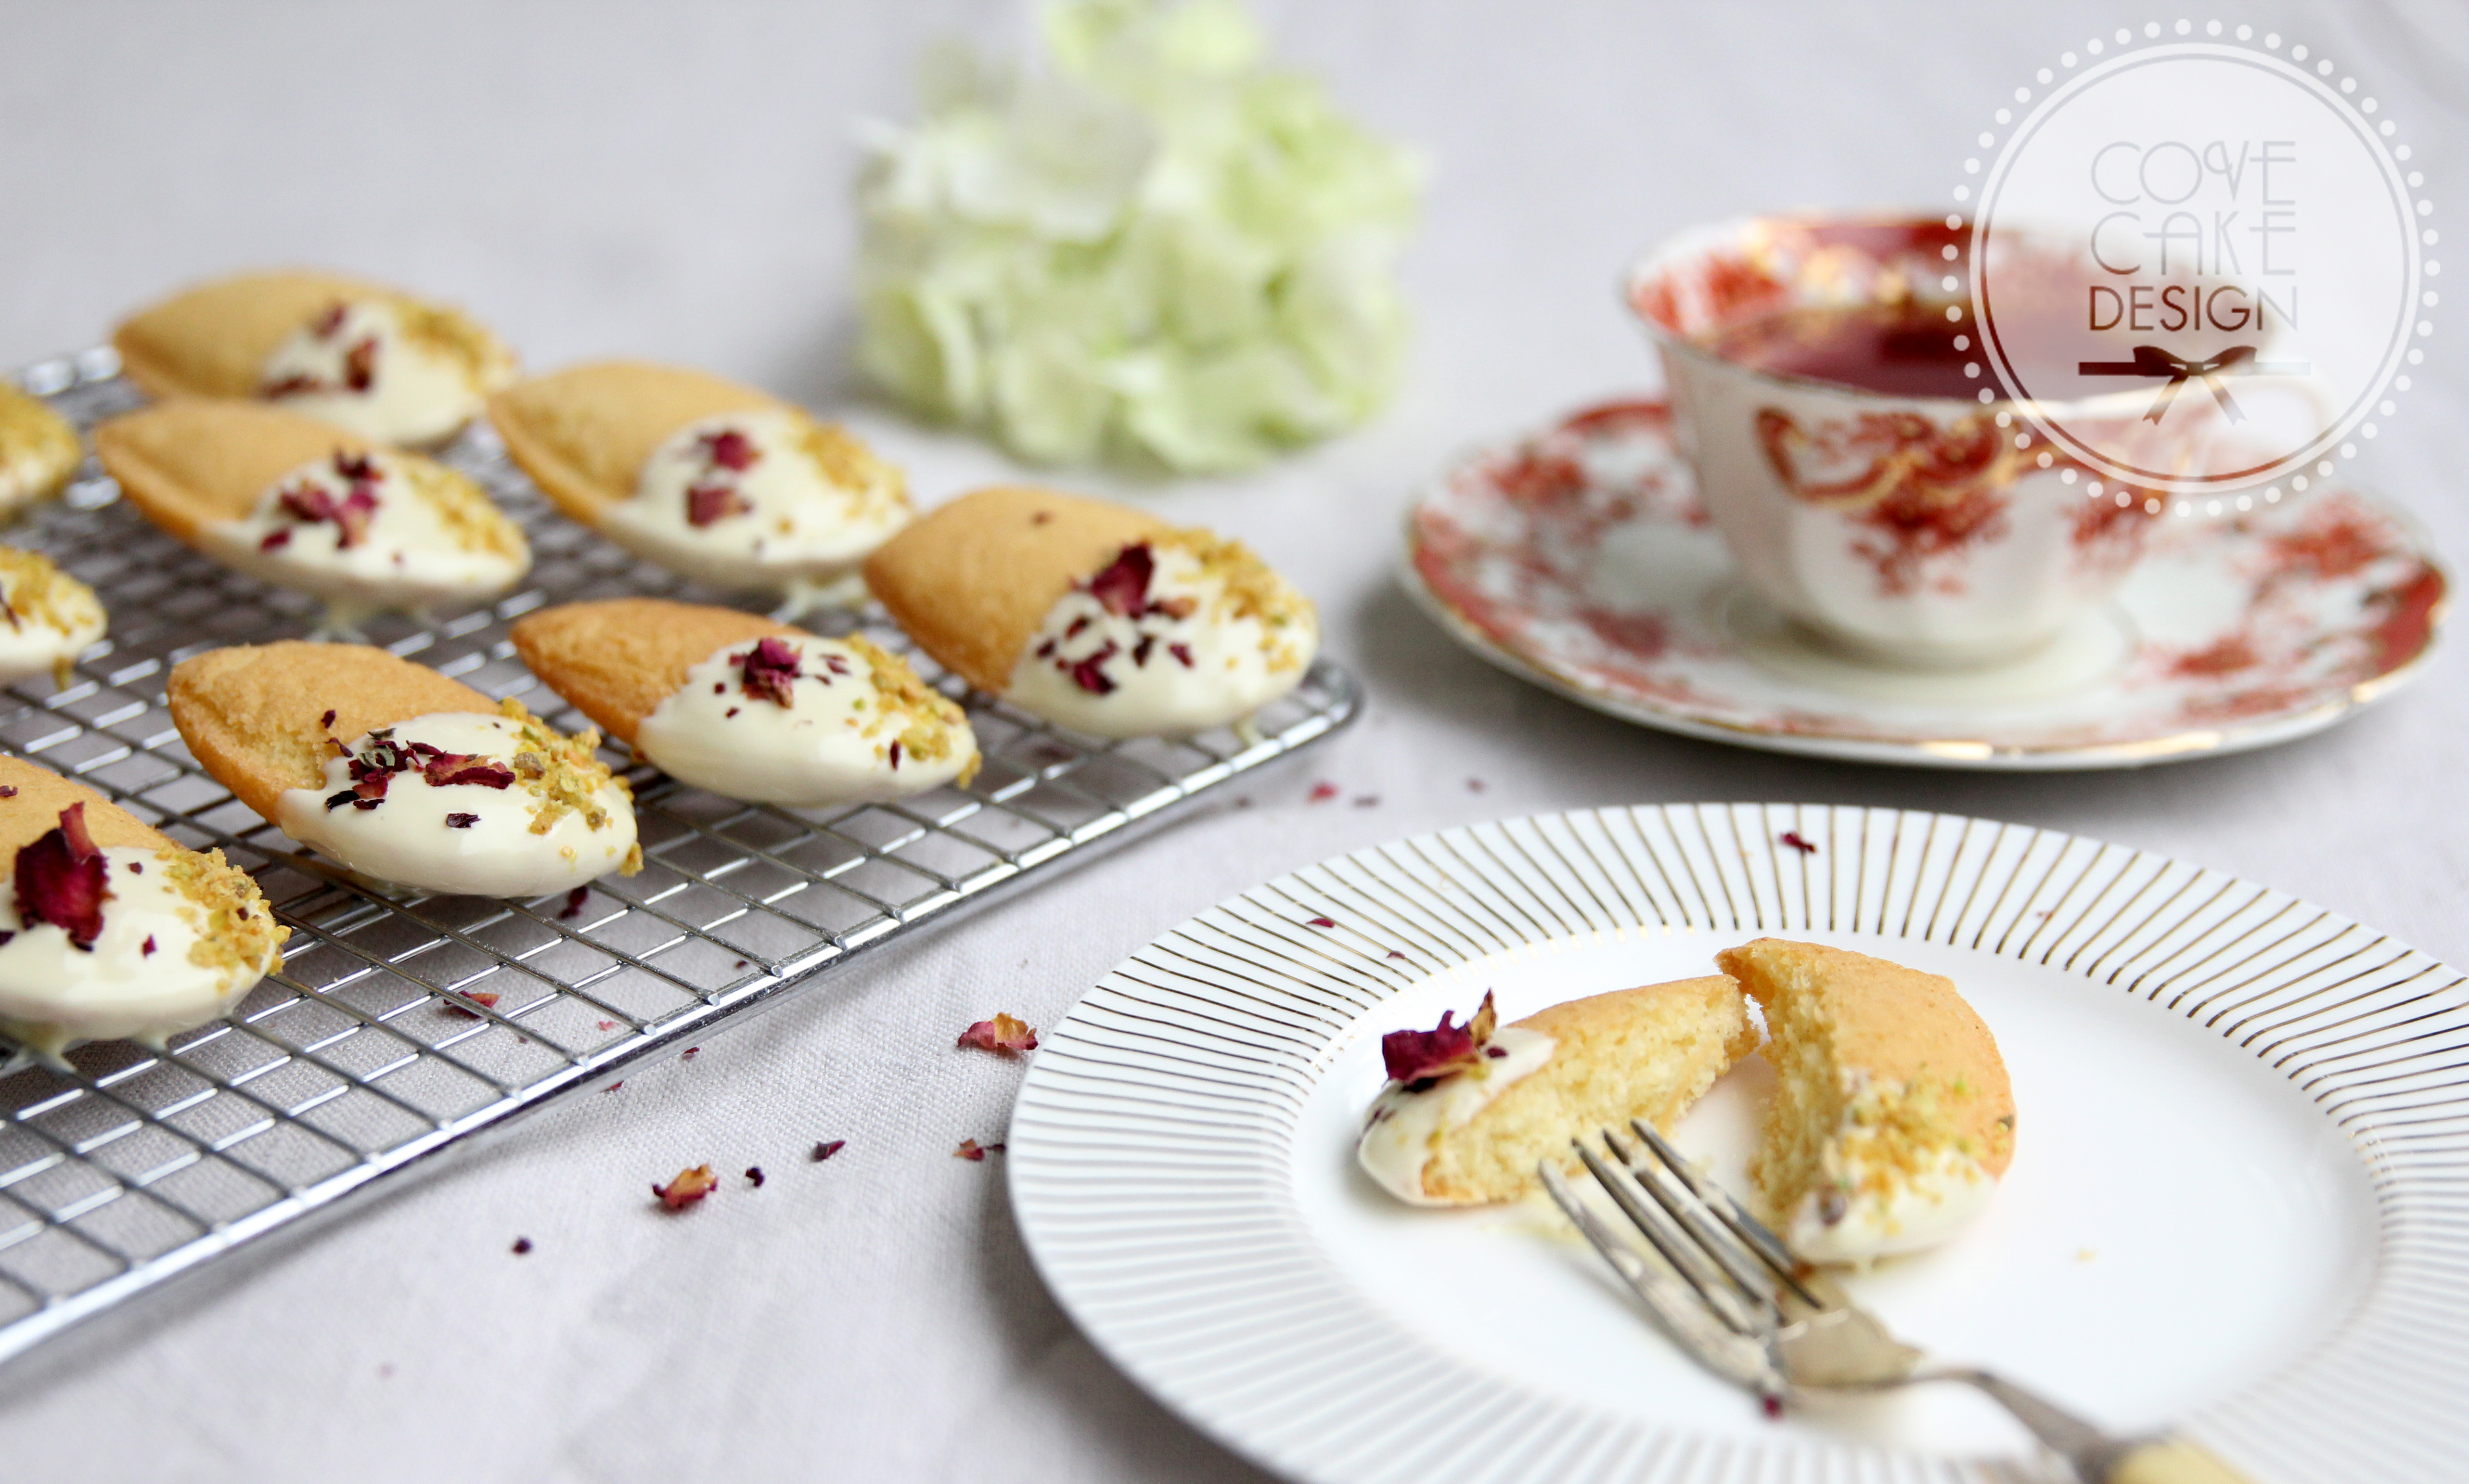
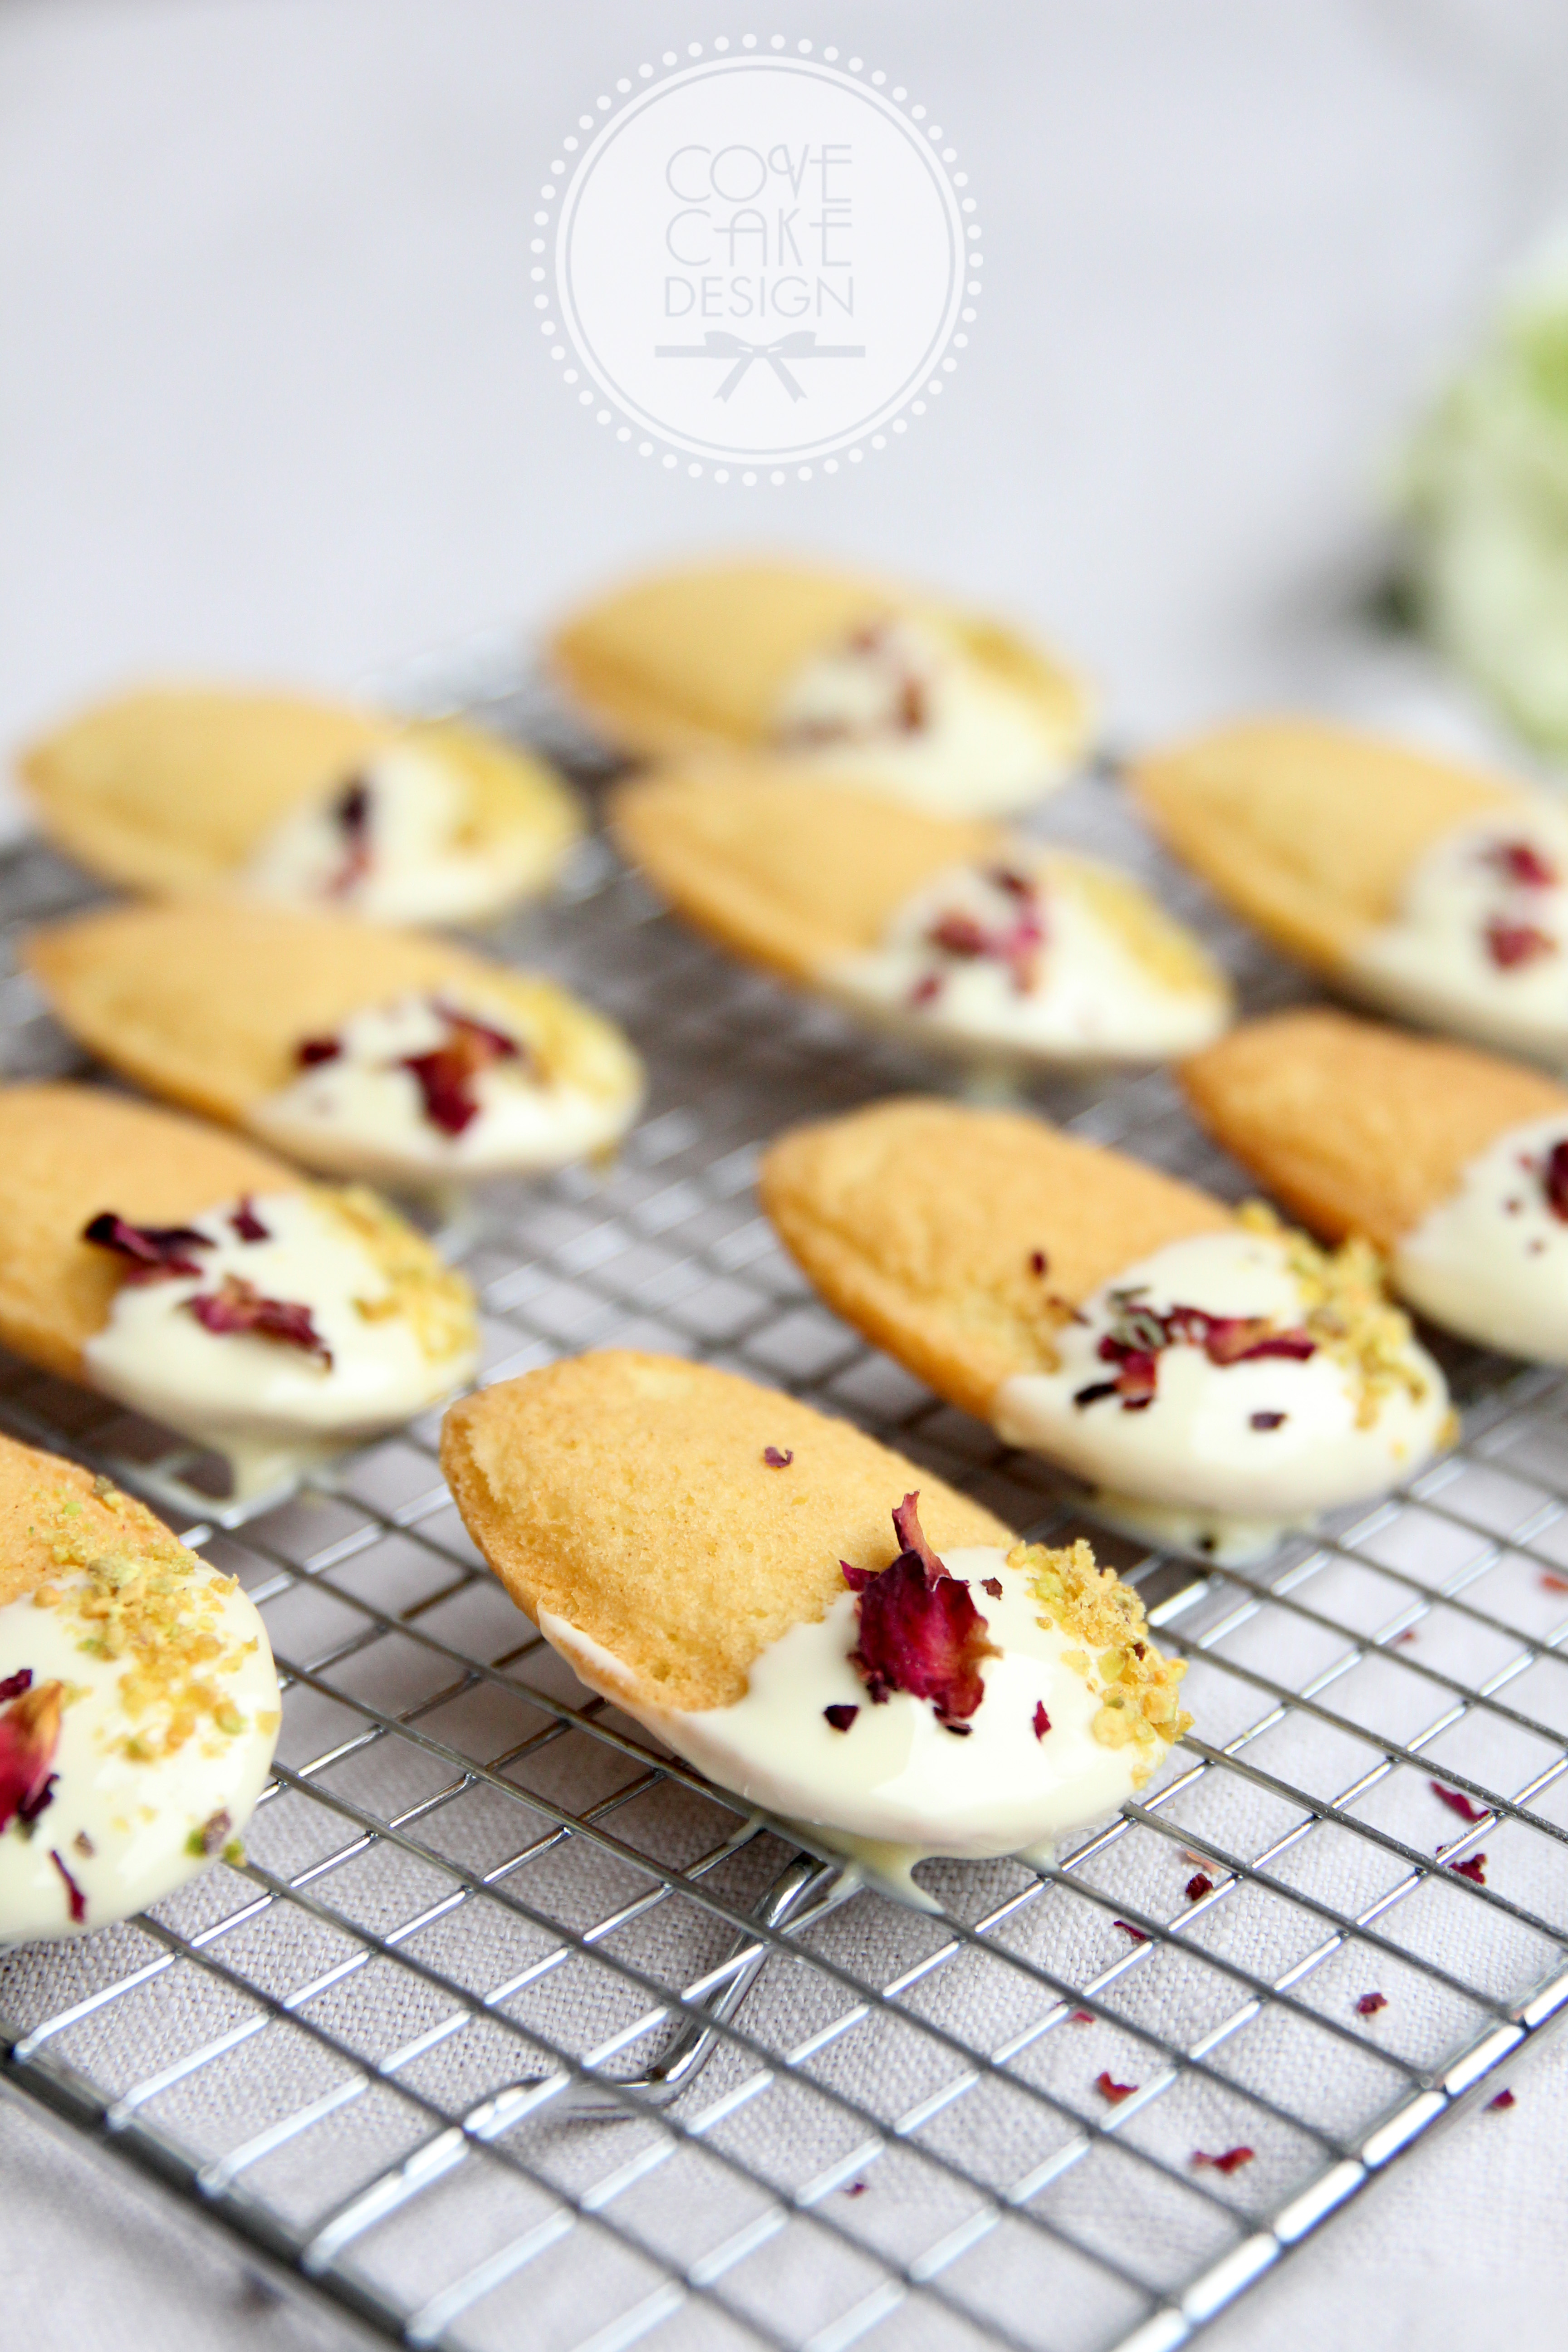
  • Sliced plums
  • Dried edible flower petals (rose and cornflower)
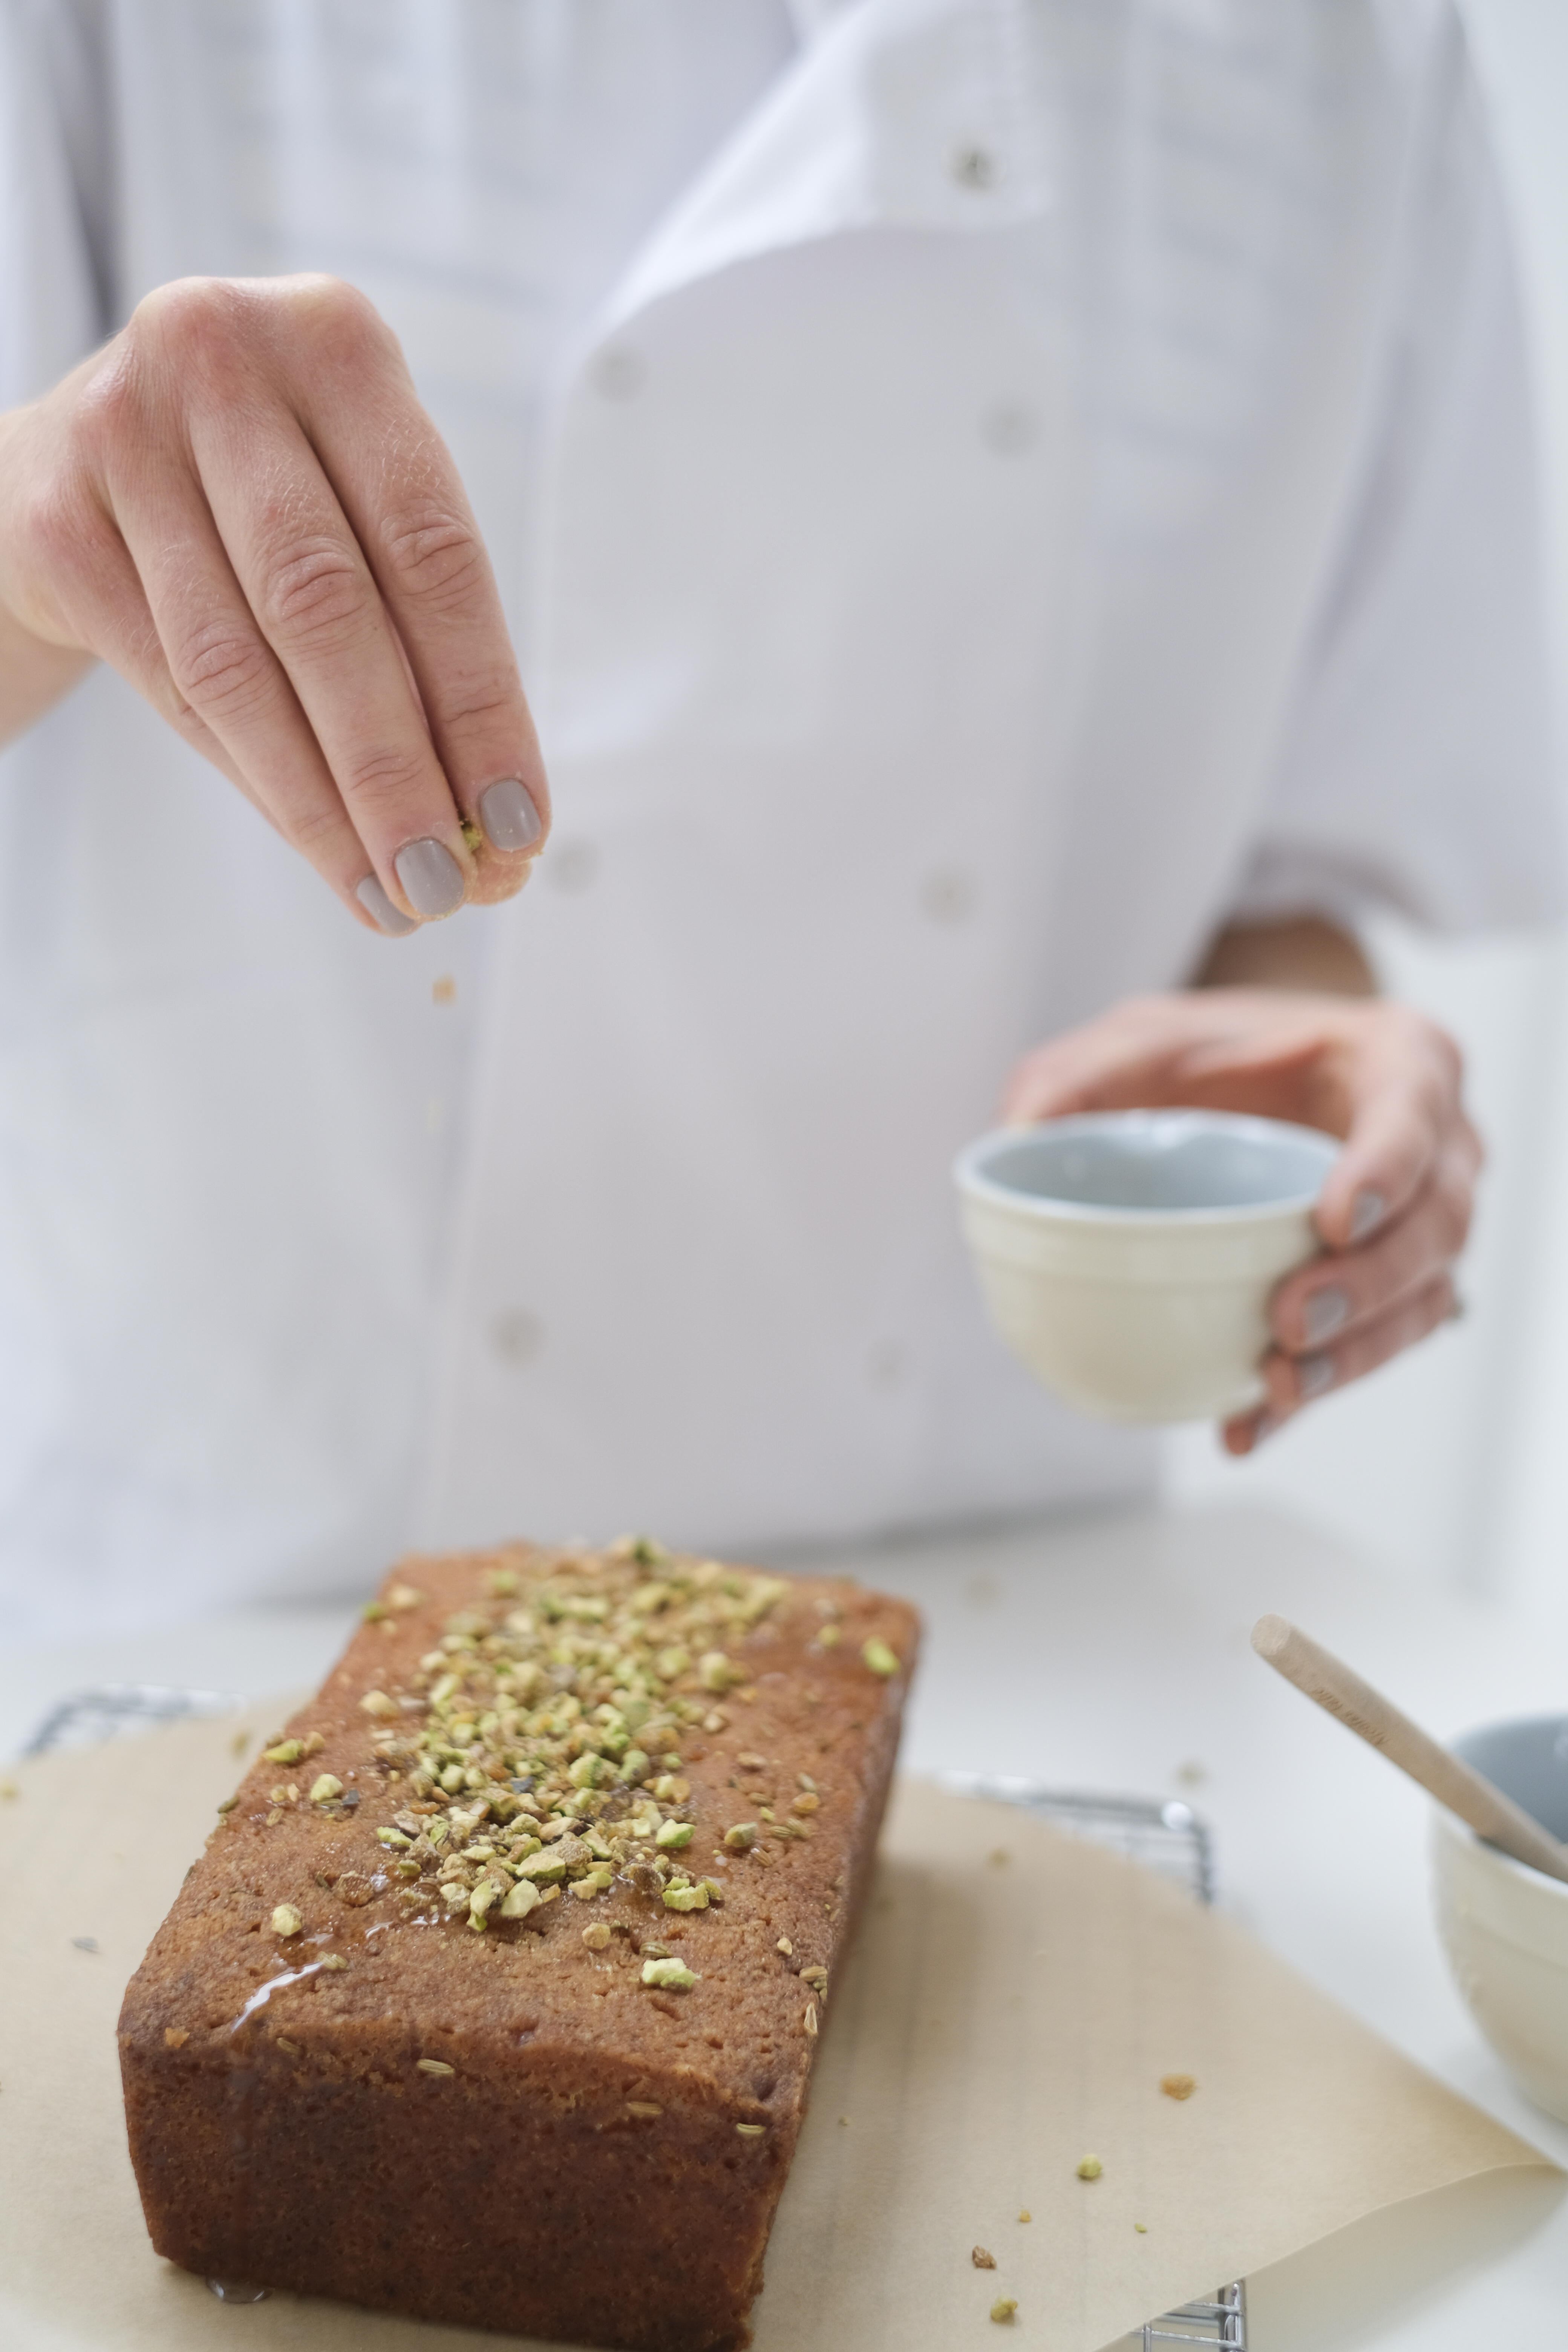
  • Toasted flaked almonds

Method:

  1. To make the jam, place the plums in a large pan with 250ml water. Cover, bring to the boil and then reduce the heat and simmer for about 20mins until the plums are soft.
  2. Remove the lid and add the sugar, sweet geranium and lemon juice. Simmer on a medium heat until the jam is reduced down and has reached setting point (you can test this by placing a spoonful on a cold plate in the fridge for a few minutes. It should form a skin when you push it with your finger).
  3. Remove from the heat and pour into clean sterilised jars and seal immediately. Leave to cool.
  4. To make the cake, preheat the oven to 160°C/320F.  Grease and line a 9″x 12″ baking tray that is approximately 1.5″ deep (or similar size) with baking parchment.
  5. Cream together the butter, sugar and almond essence in a mixer until pale.
  6. Sift together the flour and salt into another bowl.
  7. Add the eggs one at a time into the butter sugar mixture, beating well after each addition.
  8. Add in the flour mixture and mix on low speed until combined.
  9. Add the ground almonds and mix again.
  10. Finally add milk and mix to achieve a dropping consistency.
  11. Pour the mixture into the tin and bake for 35-45 mins until the top of the cake is firm to the touch and a skewer inserted into the centre comes out clean.
  12. Remove the cake from the tin after 10-15mins and leave to cool completely on a wire rack.
  13. To make the icing: Clean the bowl and whisk of an electric mixer with a squeeze of lemon juice and dry with paper towel to remove any traces of grease.
  14. Place the egg white and sugar into the bowl and place over a pot of simmering water, whisking constantly, until the temperature reaches 160°F on a candy thermometer. If you don’t have a thermometer, whisk until the sugar has completely dissolved and the egg whites are hot.
  15. Transfer the bowl to the mixer and using the whisk attachment whisk until the meringue is thick and glossy and the bottom of the bowl feels neutral to the touch.
  16. Switch to paddle attachment and with mixer on low speed add the butter a cube at a time, mixing until incorporated after each addition. If the mixture curdles continue to mix until it comes back together. Add the vanilla seeds and salt and food paste colouring as desired.
  17. If the buttercream is too runny, refrigerate until firmer and mix again before using.
  18. To assemble the cake, when cool cover the cake generously with plum jam followed by a thick layer of delicious buttercream. Scatter with plum slices, flaked almonds and dried flower petals. Serve with a cup of tea!

Almond sheet cake slice


Lemon Curd and Violet Loaf Cake Recipe Cove Cake Design

Lemon Curd and Violet Loaf Cake Recipe

Lemon curd loaf cake

Lemon Curd Loaf Cake

Loaf cakes are a weekend favourite, partly because they are so quick and easy to make. Without the need for layering and filling, a quick glaze or icing and some edible decorations results in something delicious and pretty with minimal effort.

This lemon curd loaf cake recipe evolved from a half jar of homemade lemon curd lurking in my fridge that I had left over from a wedding cake order. I am always loathe to throw away food and try to use everything up, so decided to add the curd itself to this loaf cake to add an extra tang and moistness.

Lemon and Violet

Lemon and violet are a perfect summery combination. I had crystallised violet petals from Sous Chef UK in my cupboard so used them to add a subtle violet flavour to the cake as well as flavour and decoration on the icing. You could also use other violet products such as a violet sugar (try substituting some of the regular sugar for violet sugar) or violet food essence. Another nice addition would be some seasonal blueberries.  Feel free to experiment!

Happy Baking!

Suzanne

Lemon curd cake

Lemon Curd and Violet Cake Recipe

Ingredients for the cake:

  • 190g unsalted Irish butter
  • 190g plain flour
  • 190g caster sugar
  • 3 medium free range Irish eggs
  • 1 tsp baking powder
  • Pinch salt
  • 4 tbsp lemon curd (homemade or shop bought)
  • Finely grated zest of 1 lemon
  • 4tsp crystallised violets, ground

Ingredients for the icing and decoration:

  • 100g icing sugar
  • Juice 1 lemon
  • Crystalised violets, coarsely ground
  • Edible flowers

Method:

  1. Preheat the oven to 160°C/320F.  Grease and line a 1lb loaf tin with baking parchment.
  2. Cream together the butter, caster sugar, lemon zest and ground crystallised violets in an electric mixer or by hand until light.
  3. Sift together the flour, baking powder and salt.
  4. Add the eggs one at a time into the butter sugar mixture, beating well after each addition.
  5. Add in the flour mixture and mix on low speed until combined.
  6. Finally add the lemon curd and mix again.
  7. Pour the mixture into the loaf tin and bake for 45-55 mins until the top of the loaf is firm to the touch and a skewer inserted into the centre comes out clean.
  8. Remove the cake from the tin after 10-15mins and leave to cool completely on a wire rack.
  9. To make the icing, sift the icing sugar into a bowl and add the lemon juice to make an icing with a thick pouring consistency. Add more lemon juice/icing sugar as required to achieve this.
  10. Pour the icing over the cooled cake, using a spatula to spread over the top and allowing a little to drizzle down the sides. Decorate with crushed crystallised violet petals and edible flowers if desired.
  11. The cake keeps well in an airtight container for 2-3 days.

lemon curd cake slice


Orange Fennel Honey Loaf Cake Recipe Cove Cake Design

Orange Fennel and Honey Loaf Cake Recipe

Orange Fennel Honey Loaf Cake Recipe Cove Cake Design

Loaf Cake Recipe for Irish Country Magazine

I do love a loaf cake…easy to make and requiring little decoration, they are a perfect weekend teatime treat. I devised this Orange Fennel Honey Loaf Cake recipe for a feature in the November 2018 edition of Irish Country Magazine and hence had the pleasure of having talented photographer Ramona Farrelly follow me in its making in my kitchen…thank you for these lovely photos Ramon!Loaf cake ingredients

Loaf Cake Details

This is a classic loaf cake recipe, kept moist by the addition of yogurt and given a refreshing zing with orange zest and syrup. Fennel seeds add a subtle liquorice flavour and heighten the sweetness of the orange. Decorated here with dried edible flowers and chopped pistachios feel free to experiment with presentation…an orange icing would also work well, as would candied orange slices or other nuts.

Happy Baking!

Suzanne x

Orange Fennel and Honey Loaf Cake Recipe

Ingredients for the cake:

  • 190g unsalted Irish butter
  • 190g plain flour
  • 190g caster sugar
  • 3 medium free range Irish eggs
  • 1 tsp baking powder
  • Pinch salt
  • 25g natural greek yogurt
  • Finely grated zest of 1 large orange
  • 3tsp fennel seed

Ingredients for the syrup and decoration:

  • Juice of 1 orange
  • 1tbsp Irish honey
  • 50g caster sugar
  • Handful chopped pistachios (optional)
  • Handful dried flower petals (optional)

Method:

  1. Preheat the oven to 160°C/320F.  Grease and line a 1lb loaf tin with baking parchment.
  2. Lightly toast the fennel seed in a hot pan until fragrant. Pour into a pestle and mortar and grind to a fine powder.
  3. Cream together the butter, caster sugar and orange zest in an electric mixer or by hand until light.
  4. Sift together the flour, baking powder, ground fennel and salt.
  5. Add the eggs one at a time into the butter sugar mixture, beating well after each addition.
  6. Add in the flour mixture and mix on low speed until combined.
  7. Finally add the yogurt and mix again.
  8. Pour the mixture into the loaf tin and bake for 45-55 mins until the top of the loaf is firm to the touch and a skewer inserted into the centre comes out clean.
  9. Meanwhile make the syrup. Add the orange juice, honey and sugar to a pan and bring to the boil. Allow to simmer until reduced slightly. Pour over the loaf cake when it comes out of the oven.
  10. Remove the cake from the tin after 10-15mins and leave to cool completely on a wire rack. Decorate with chopped pistachios and dried flower petals if desired.

Orange Loaf Cake Recipe Cove Cake Design

Moist orange fennel loaf cake

Rose Butter Madeleines with White Chocolate and Pistachio Praline


I recently received the most amazingly fragrant organic roses from Bumblebee Flower Farm in West Cork. The scent was something that you would never get from a standard shop-bought rose…these roses were those that you just wish to close your eyes and breathe for. My purpose was to try out some of the beautiful summer blooms from Bumblebee Farm for use as decoration in some of my cake designs, but I couldn’t pass the smell of these roses without thinking that I had to incorporate that scent into a cake too!

Madeleines are small French butter cakes baked in pretty scalloped-shaped madeleine moulds. I had only made them once before but thought that making a delicate rose-scented version would be perfect for these dainty teatime treats. To capture the scent of the rose petals, I infused the butter in the recipe first which resulted in a deliciously subtle sweet and fragrant flavour. If you can’t get your hands on rose petals feel free of course to add a little rosewater for a similar taste. This base recipe would also work with other flowers such as lavender.

Normally my recipes are self-explanatory but much like other French baked goods (macarons spring immediately to mind!), I have found that making madeleines is not quite as straightforward as it seems and a few little tricks are essential! In my first attempt at this recipe I only buttered the tin, resulting in cakes that stuck tight. A dust of flour is essential. Recipes vary greatly and I initially didn’t chill my batter but they subsequently rose and spread hugely outside the moulds, tasting delicious but losing their pretty shape. I found chilling the batter in the tin for about 30 mins solved this. I have also found that the light sponge doesn’t stay fresh for long, so feel no guilt in devouring these tiny treats on the day they are made!

Rose Butter Madeleines with White Chocolate and Pistachio Praline

Ingredients for the Rose Butter Madeleines:

  • 60g unsalted butter
  • Handful fragrant edible rose petals (or use 1/4 tsp of rosewater or other flavouring)
  • 50g caster sugar
  • 1 egg
  • 50g plain flour, plus extra for dusting
  • 1/4 tsp baking powder

For the Pistachio Praline:

  • 50g caster sugar
  • 50g shelled pistachios

To decorate (optional):

  • 100g white chocolate
  • Pistachio Praline
  • Dried rose petals

Step 1: To make the rose butter madeleines, preheat the oven to 170°C/315F.

Step 2: Melt the butter in a small saucepan over a low heat. Add the rose petals and leave to infuse, swirling now and then. The butter should become fragrant with the rose petals. Have a small taste to check and if not leave for a little longer or add more petals.

Step 3: Use a little of the butter to brush over the moulds of a madeleine tin. Then dust the moulds with a little flour, tapping out any excess.

Step 4: Whisk together the egg and caster sugar using a handheld or stand whisk until the mixture is pale and mousse like and has increased in volume.

Step 5: Sift the flour and baking powder into the egg and sugar mixture and fold in gently until just combined

Step 6: Strain the butter into the mixture, discarding the rose petals, and fold in gently until combined.

Step 7: Place a heaped teaspoon of the mixture into each of the moulds of the madeleine tray and place in the fridge for 30 mins.

Step 8: To make the pistachio praline, roughly chop the pistachios and place a square of baking paper on a tray.

Step 9: Heat the sugar in a small saucepan over a medium heat, swirling regularly until dissolved.

Step 10: Continue to heat the sugar until it caramelises, taking care not to burn.

Step 11: Remove from the heat, add the chopped pistachios and quickly stir to coat in the caramel. Pour out onto the baking parchment and leave to cool.

Step 12: Place the praline in a chopper or pestle and mortar and grind to a rough consistency.

Step 13: To finish the madeleines, remove the madeleine tray from the fridge and bake for approximately 12-15 mins until risen and springy to the touch. Remove from the oven and leave to cool for a few minutes before gently removing each madeleine from its mould using a palette knife. Leave to cool on a wire wrack.

Step 14; Melt the white chocolate in a cup or small bowl in the microwave. Dip the tip of each madeleine in the white chocolate and place on a sheet of baking paper. Sprinkle some pistachio praline and rose petals over the top. Enjoy immediately!

Lemon Raspberry Hibiscus Loaf Cake Recipe


I recently came across dried Hibiscus flowers on one of my many compulsive deli wanderings. Ruby red in colour, it is consumed as a tea, with a tart berry-like flavour, often requiring the addition of sugar to counteract this. I love using teas to flavour cakes and decided to try Hibiscus in a loaf cake, paired with the classic combination of lemon and raspberry. This cake recipe is deliciously moist due to the addition of natural yogurt, and the hibiscus flavour is introduced as a drizzle syrup, and in a tangy cream cheese icing. I decorated with candied hibiscus flowers, pistachio praline crumb (I do like to add pistcachio to all things possible!) and thyme flowers, but would be equally as good just with a smattering of fresh raspberries. Enjoy with a cup of your favourite brew!

(Note: If hibiscus flowers are hard to find this recipe is delicious as a simple lemon raspberry loaf cake. Simply substitute lemon juice for the hibiscus water in the syrup and omit the hibiscus syrup in the icing. Or ice with a simple mix of icing sugar and lemon juice!).

Lemon Raspberry Hibiscus Loaf Cake

Ingredients for the Lemon Rasberry Cake:

  • 190g unsalted butter
  • 190g caster sugar
  • 3 large eggs
  • 190g plain flour
  • 1tsp baking powder
  • Finely grated zest 2 lemons
  • 25g natural yogurt
  • Handful of frozen raspberries

Ingredients for the Hibiscus Syrup:

  • 75g caster sugar
  • 75g boiling water
  • Handful dried hibiscus flowers

Ingredients for the Hibiscus Lemon Cream Cheese Icing :

  • 100g cream cheese
  • 2tbsp natural yogurt
  • 1tbsp icing sugar
  • 2tbsp hibiscus syrup
  • Finely grated zest 1 lemon

To decorate (optional):

  • Candied Hibiscus flowers (you can buy these in a syrup in some good delis)
  • Thyme flowers
  • Pistachio crumb
  • Other options include fresh raspberries, candied lemon peel and edible flowers!

Step 1: To make the lemon raspberry cake, preheat the oven to 170°C/315F.  Grease and line a loaf tin.

Step 2: Cream together the butter, sugar and lemon zest with an electric mixer (or hand mixer) until pale. Scrape down sides regularly.

Step 3: Beat in the eggs one at a time.

Step 4: Sift together the flour and baking powder into a large bowl.

Step 5: Add the flour to the butter and sugar mixture and mix on slow speed until just combined.

Step 6: Add the natural yogurt and mix again until combined.

Step 7: Pour the batter into the lined tin. Push the raspberries about half way down into the cake so they are dispersed throughout the loaf. Smooth over the top and bake in the preheated oven for approximately 50 mins or until the top is springy to the touch and a skewer inserted into the centre comes out clean.

Step 8: To make the hibiscus syrup, add the hibiscus flowers to the boiling water and leave to steep for 10-15 mins.

Step 9: Drain the hibiscus water into a small saucepan and add the sugar. Heat until the sugar is dissolved and a syrup formed.

Step 10: To make the hibiscus cream cheese icing, mix together the cream cheese, yogurt and lemon zest until combined. Add the hibiscus syrup a little at a time until the desired consistency and taste is achieved (you don’t want it to be too runny).

Step 11: To assemble the cake. When the cake is cooked remove from the oven and leave to cool in the tin for 10mins before turning out onto a wire wrack to cool further.

Step 12: While the cake is still warm, poke holes in the top with a skewer and pour the warm hibiscus syrup over the top.

Step 13: When the cake has cooled completely, cover with the icing and decorate as you see fit! I used candied hibiscus flowers, pistachio praline crumb and thyme flowers. Some fresh raspberries would work equally well!

Storage: Due to the cream cheese icing this cake needs to be stored in the fridge. Bring to room temperature before serving and consume within 1-2 days.

Hazelnut Chocolate Orange Macarons

I made these macarons as my edible Christmas gifts last year. The combination of chocolate and hazelnut is a well renowned match made famous of course by Nutella! The addition of orange zest adds a fresh twist and the decoration of dipped chocolate coated in crunchy hazelnut praline adds an additional layer of flavour and luxury….the perfect gift and indeed luxurious teatime treat! Enjoy!

Hazelnut Macarons with Chocolate Orange Ganache and Hazelnut Praline

Ingredients for the Hazelnut Macarons:

  • 50g hazelnuts
  • 50g ground almonds
  • 100g icing sugar
  • 100g caster sugar
  • 2 x 40g egg white

Ingredients for the Chocolate Orange Ganache:

  • 110g 70% dark chocolate
  • 100ml pouring cream
  • 10g caster sugar
  • 25g unsalted butter
  • finely grated zest 1 orange

Ingredients for the Hazelnut Praline Decoration:

  • 100g 70% dark chocolate, melted
  • 75g caster sugar
  • 75g skinned toasted hazelnuts, chopped

Step 1: To make the hazelnut macarons, preheat the oven to 170°C/315F.  .

Step 2: Place the hazelnuts on a baking tray and place in the oven for approx 10-15mins, shaking every few minutes to turn. Take care  not to burn. Remove from the oven and leave to cool slightly before placing in a clean tea towel and rubbing to remove the skin.

Step 3: Place the skinned hazelnuts, ground almonds and icing sugar into a blender and grind to a fine powder. Sieve into a clean metal bowl, discarding any large particles. Add 1 x 40g egg white and mix to form a paste (called the tant pour tant). Set aside.

Step 4: Clean the inside of the metal bowl of a food mixer and the whisk attachment with lemon juice or boiling water to remove all traces of grease. Wipe with paper towel. Place the second 40g egg white into the bowl.

Step 5: Place the caster sugar and water into a small saucepan and bring to the boil, swirling now and then to ensure even heating.

Step 6: Meanwhile whisk the egg white to soft peaks. When the temperature of the sugar syrup reaches 105°C, increase the speed and whisk to stiff peaks. When the syrup reaches 115°C, remove from the heat and pour the syrup in a thin stream into the egg whites. Whisk for approximately 10mins until thick and glossy.

Step 7: Add about a third of the meringue mixture to the hazelnut/almond mixture and fold in to loosen. Then add the rest of the meringue mixture, folding in until it has a ‘flow’ similar to consistency of lava.

Step 8:  Fit a piping bag with an 8mm round nozzle and pour in the batter. Pipe small well-spaced rounds of batter approximately the size of  a walnut onto a silicone baking mat on a baking sheet (if you don’t have a silicone mat use baking parchment and attach the corners to the tray with a small blob of the batter). Tap the trays on the counter 3-4 times to remove air bubbles. If any fail to pop use a cocktail stick to do so. Leave to form a ‘skin’ for approx 25-45mins depending on ambient temperature and humidity (test by touching gently with the tip of your finger, if skin has formed your finger should come away clean).

Step 9: Bake in the oven for 12-15mins, turning the tray half-way through. Leave to cool completely on the tray before removing.

Step 10: To make the chocolate orange ganache, place the orange zest and cream in a saucepan and heat gently until warm. Remove from the heat and allow the orange to infuse for 1hr. Pass through a fine sieve to remove the orange zest.

Step 11: Add the sugar to the cream and reheat.

Step 12: Meanwhile place the chocolate into a mixing bowl.

Step 13: Pour the cream over the chocolate and stir until chocolate is melted.

Step 14: Finally add the butter and stir to combine. Allow to cool and refrigerate for approximately one hour before filling the macarons

Step 15: To make the hazelnut praline, heat the caster sugar in a small saucepan until dissolved. Swirl gently to ensure even heating. When the syrup is a golden brown colour, remove from the heat and add the chopped hazelnuts. Stir with a spatula before transferring to a piece of baking parchment to cool. When cool, break into a food processor and pulse gently to form a medium coarse powder.

Step 16: To finish the macarons, dip half the macaron shells in the melted chocolate and place on a piece of baking parchment. Sprinkle with the hazelnut praline and leave to set.

Step 17: Using a piping bag fitted with an 8mm nozzle, fill the other half of the macaron shells with the chocolate orange ganache and place the chocolate praline coated shells on top. Place the macarons in the refrigerator. They are best eaten after 24 hours and within 72 hours of filling.

Vegan Banana Bread with Miso Caramel

Banana bread is a firm favourite in our house, delicious for a lunchbox or teatime treat and also a great way to use up those overripe bananas! For everyday family baking I prefer to opt for this healthier version over traditional banana bread recipes, which are often laden with sugar.  Made with spelt flour, vegan and free from refined sugar, it is not too sweet and comes with a little less guilt….just what is needed in January!

This bread can be enjoyed on it’s own but I discovered a recipe for vegan caramel on Gather and Feast  and thought that it would be a lovely addition. The vegan caramel was delicious, with the coconut sugar adding a toffee-like flavour. Obviously in an experimental mood, I decided to try adding miso to the caramel as an alternative to sea salt to counteract sweetness. I first came across using miso in sweet dishes after seeing Nigella Lawson‘s miso ice-cream recipe in her book Simply Nigella. Having fallen in love with Japan and its cuisine on a family trip there last year, I jumped at the chance to extend my use of Japanese ingredients to  my baking.  If you don’t regularly use miso however, feel free to add a pinch of sea salt to the recipe for the same effect! For a final flourish I topped with toasted pecans….enjoy!

Vegan Banana Bread with Miso Caramel

Ingredients for the Banana Bread:

  • 250g wholemeal or plain spelt flour (or you can use regular flour)
  • 1tsp baking soda
  • 3/4 tsp baking powder
  • 1tsp cinnamon
  • 80ml milk of choice (I used almond milk)
  • 2tsp vanilla bean paste
  • 120ml maple syrup
  • 1tbsp lemon juice
  • 3 large ripe bananas

Ingredients for the Miso Caramel:

  • 35g coconut sugar
  • 15g coconut oil
  • 80g coconut cream
  • 1tsp white miso paste
  • handful of toasted pecans, chopped

Step 1: To make the banana bread, preheat the oven to 180°C/350F.  Grease and line a 1lb loaf tin with baking parchment.

Step 2: Place the bananas in an oven proof dish and roast in the oven for 10-15 mins while you are preparing the other ingredients. The roasting increases the sweetness and flavour of the bananas but if you don’t have time for this simply mash the bananas as they are.

Step 3: Sift the flour, baking soda, baking powder and cinnamon into a bowl

Step 4: In a separate bowl, mix the milk, vanilla bean paste, maple syrup and lemon juice.

Step 5: Add the wet ingredients to the dry and mix until just combined. Add the roasted/mashed banana and mix again.

Step 6: Pour into the prepared tin and bake for 30-40 mins.

Step 7: To make the miso caramel, place the coconut sugar, coconut oil and coconut cream into a small saucepan. Heat gently until ingredients are combined. Continue to heat for approximately 5 mins until the caramel has thickened enough such that it begins to coat the back of a spoon.

Step 8: When cooked, remove the banana bread from the oven and place on a wire rack. Using a skewer, pierce several holes along the top of the banana bread. While the bread is still warm, pour over the caramel sauce. (If sauce has cooled and thickened too much, either add a little boiling water or heat again gently). Top with chopped toasted pecans.